Dining Table Mk2
28/02/2026
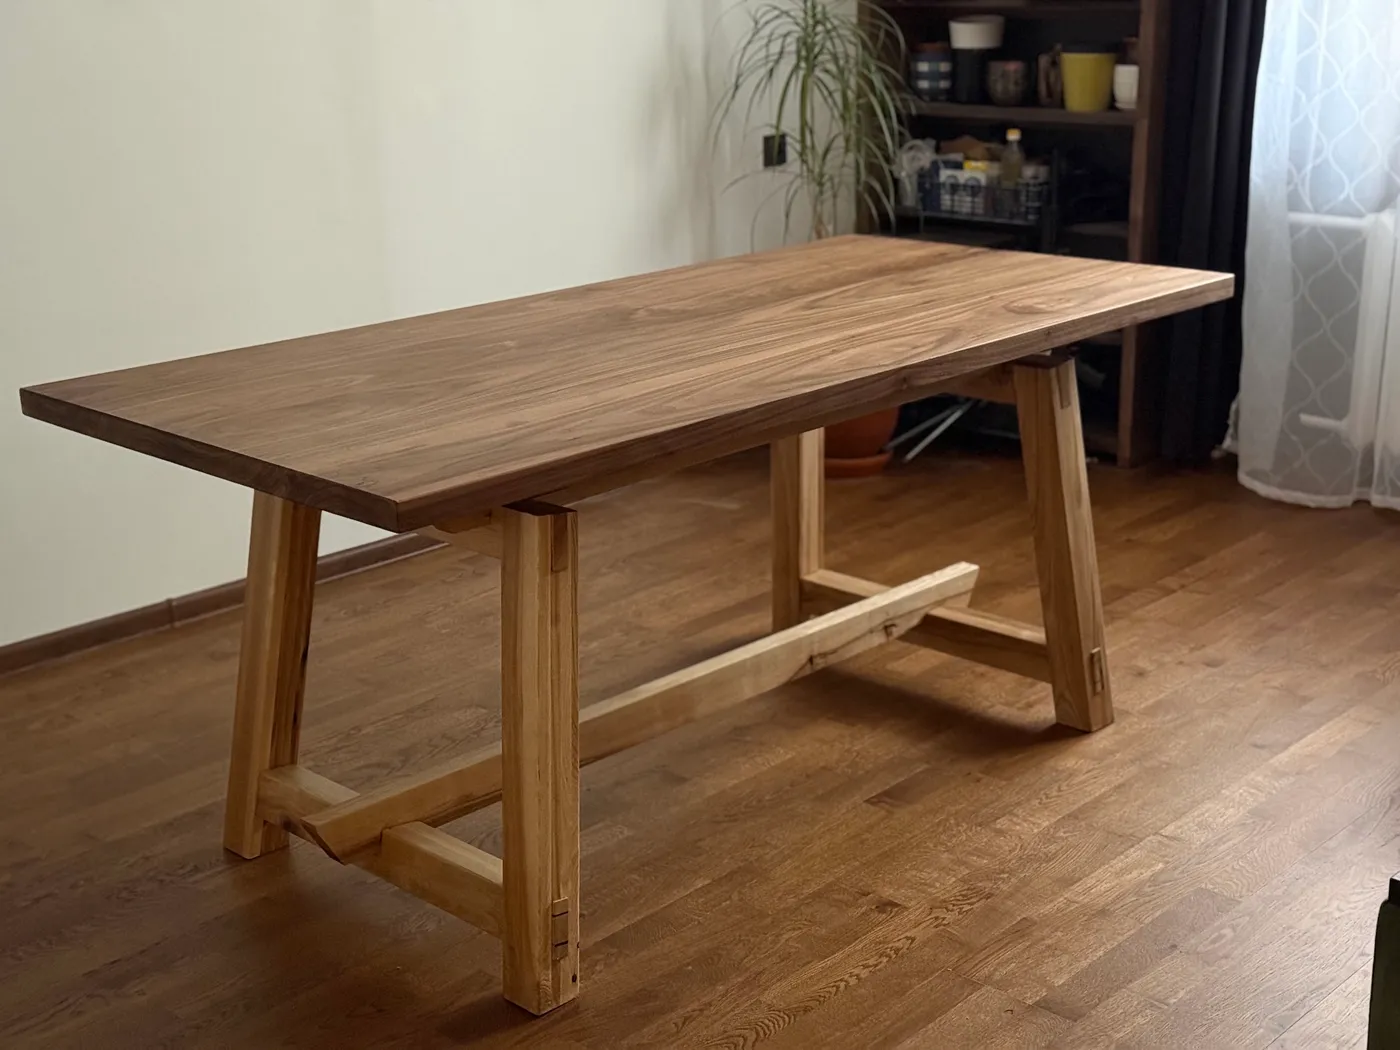
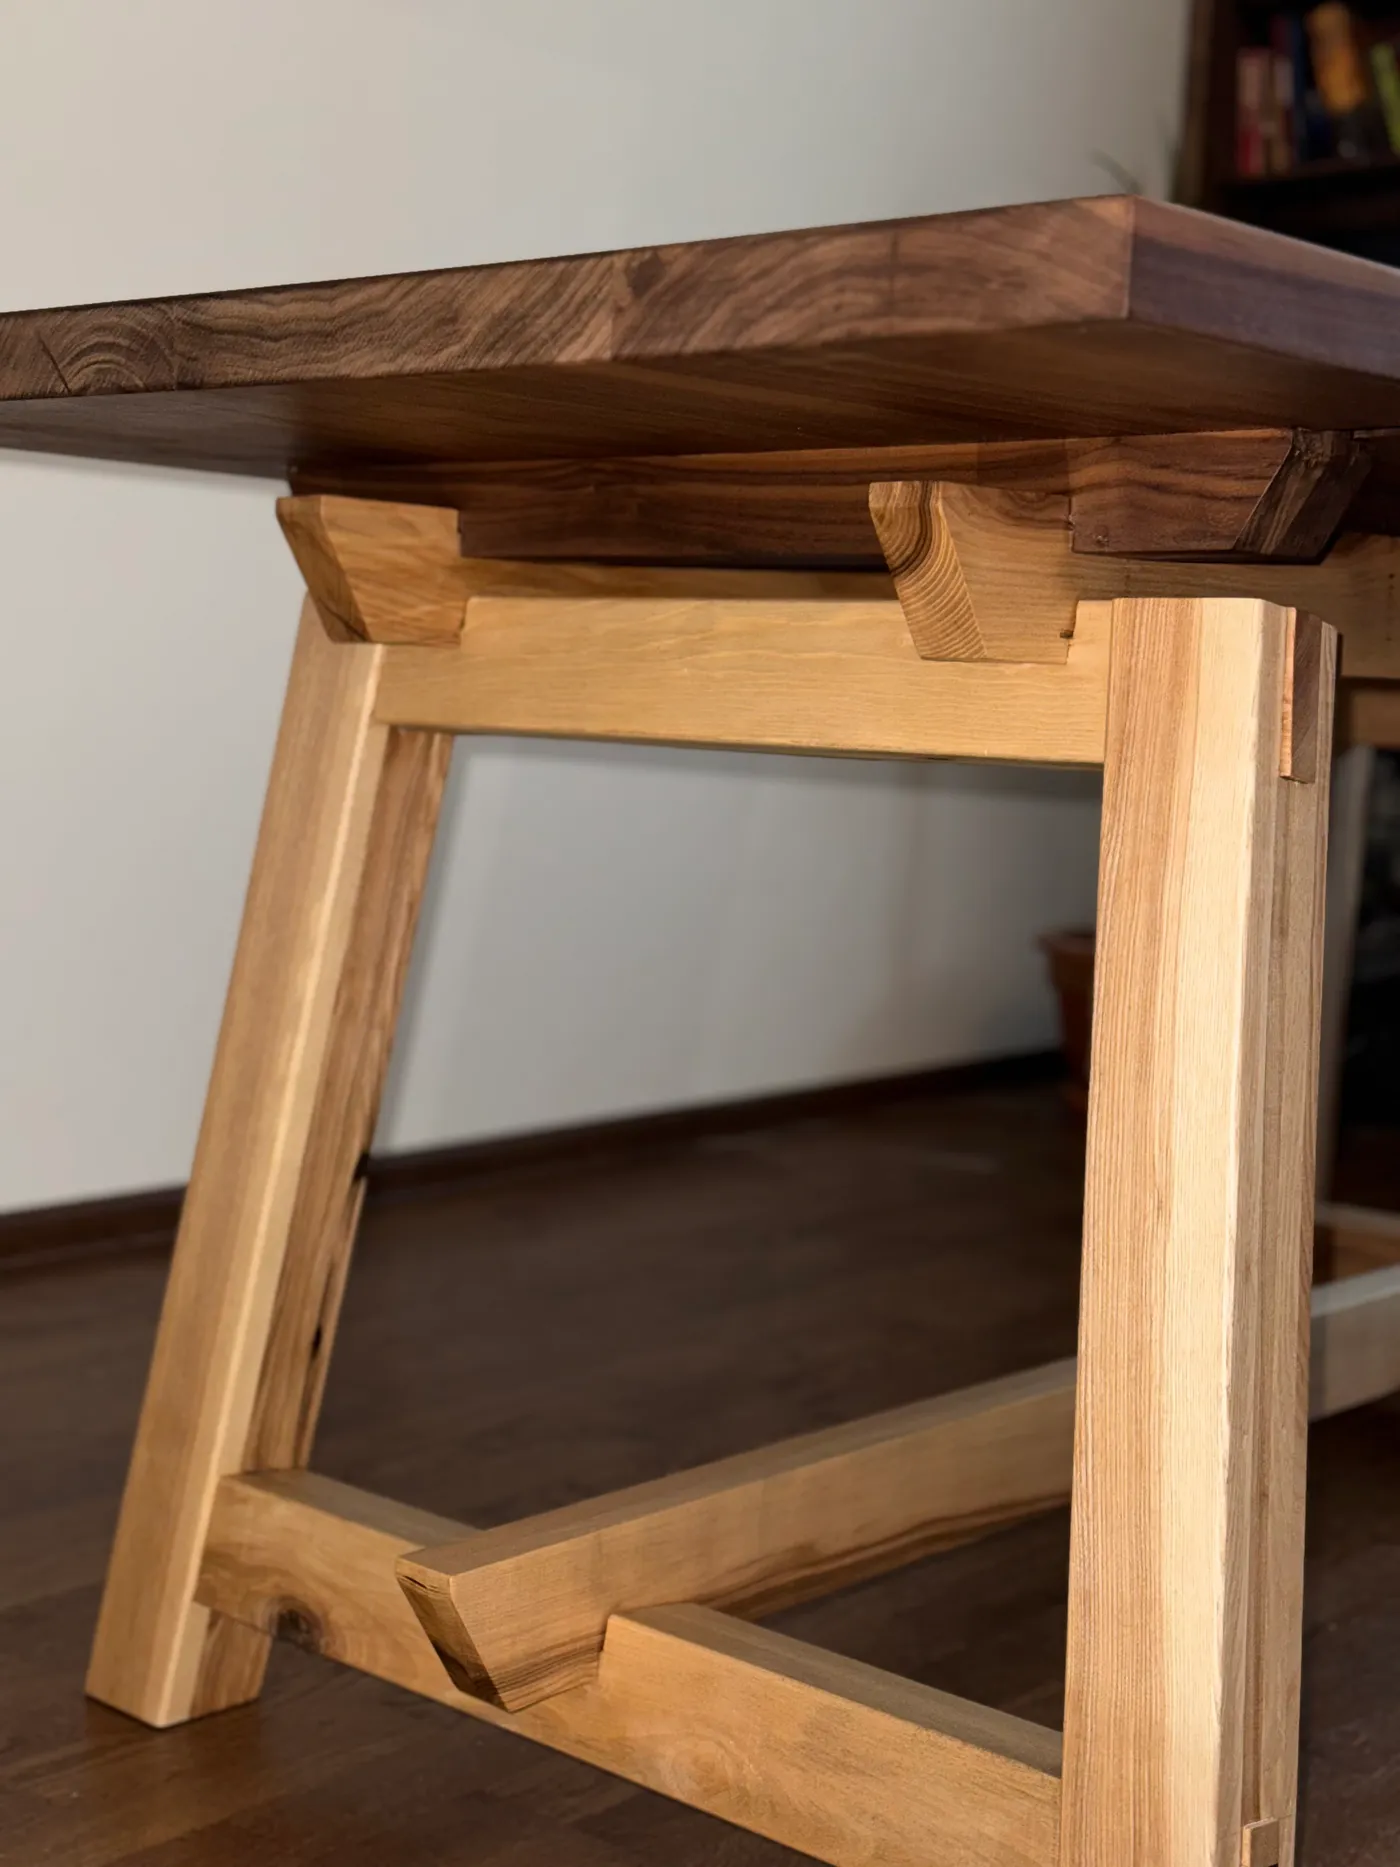
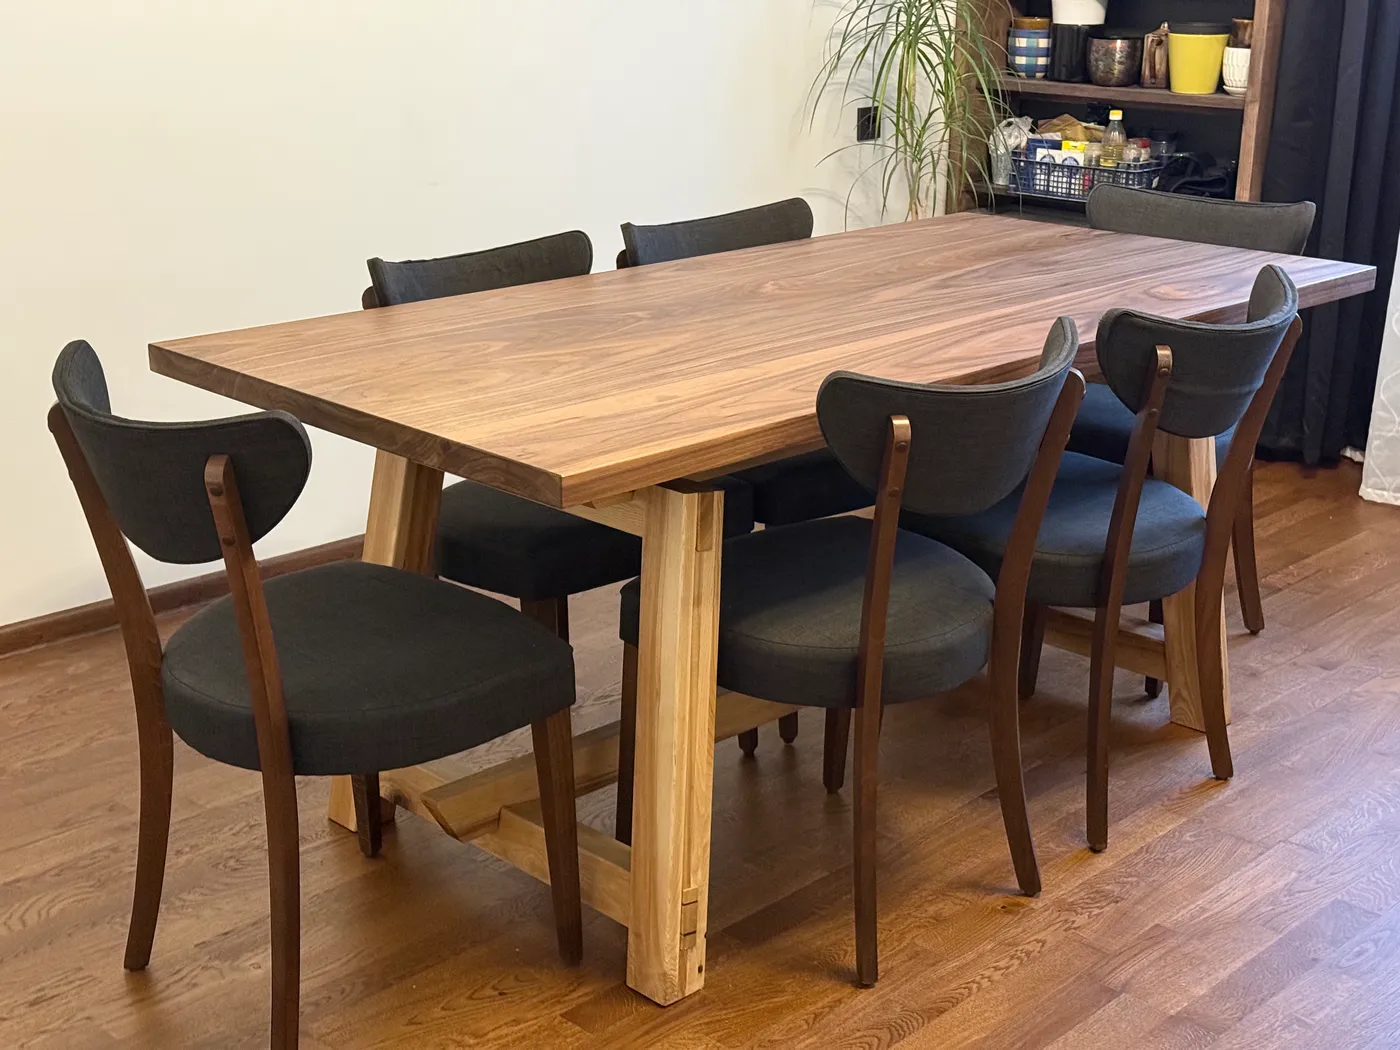
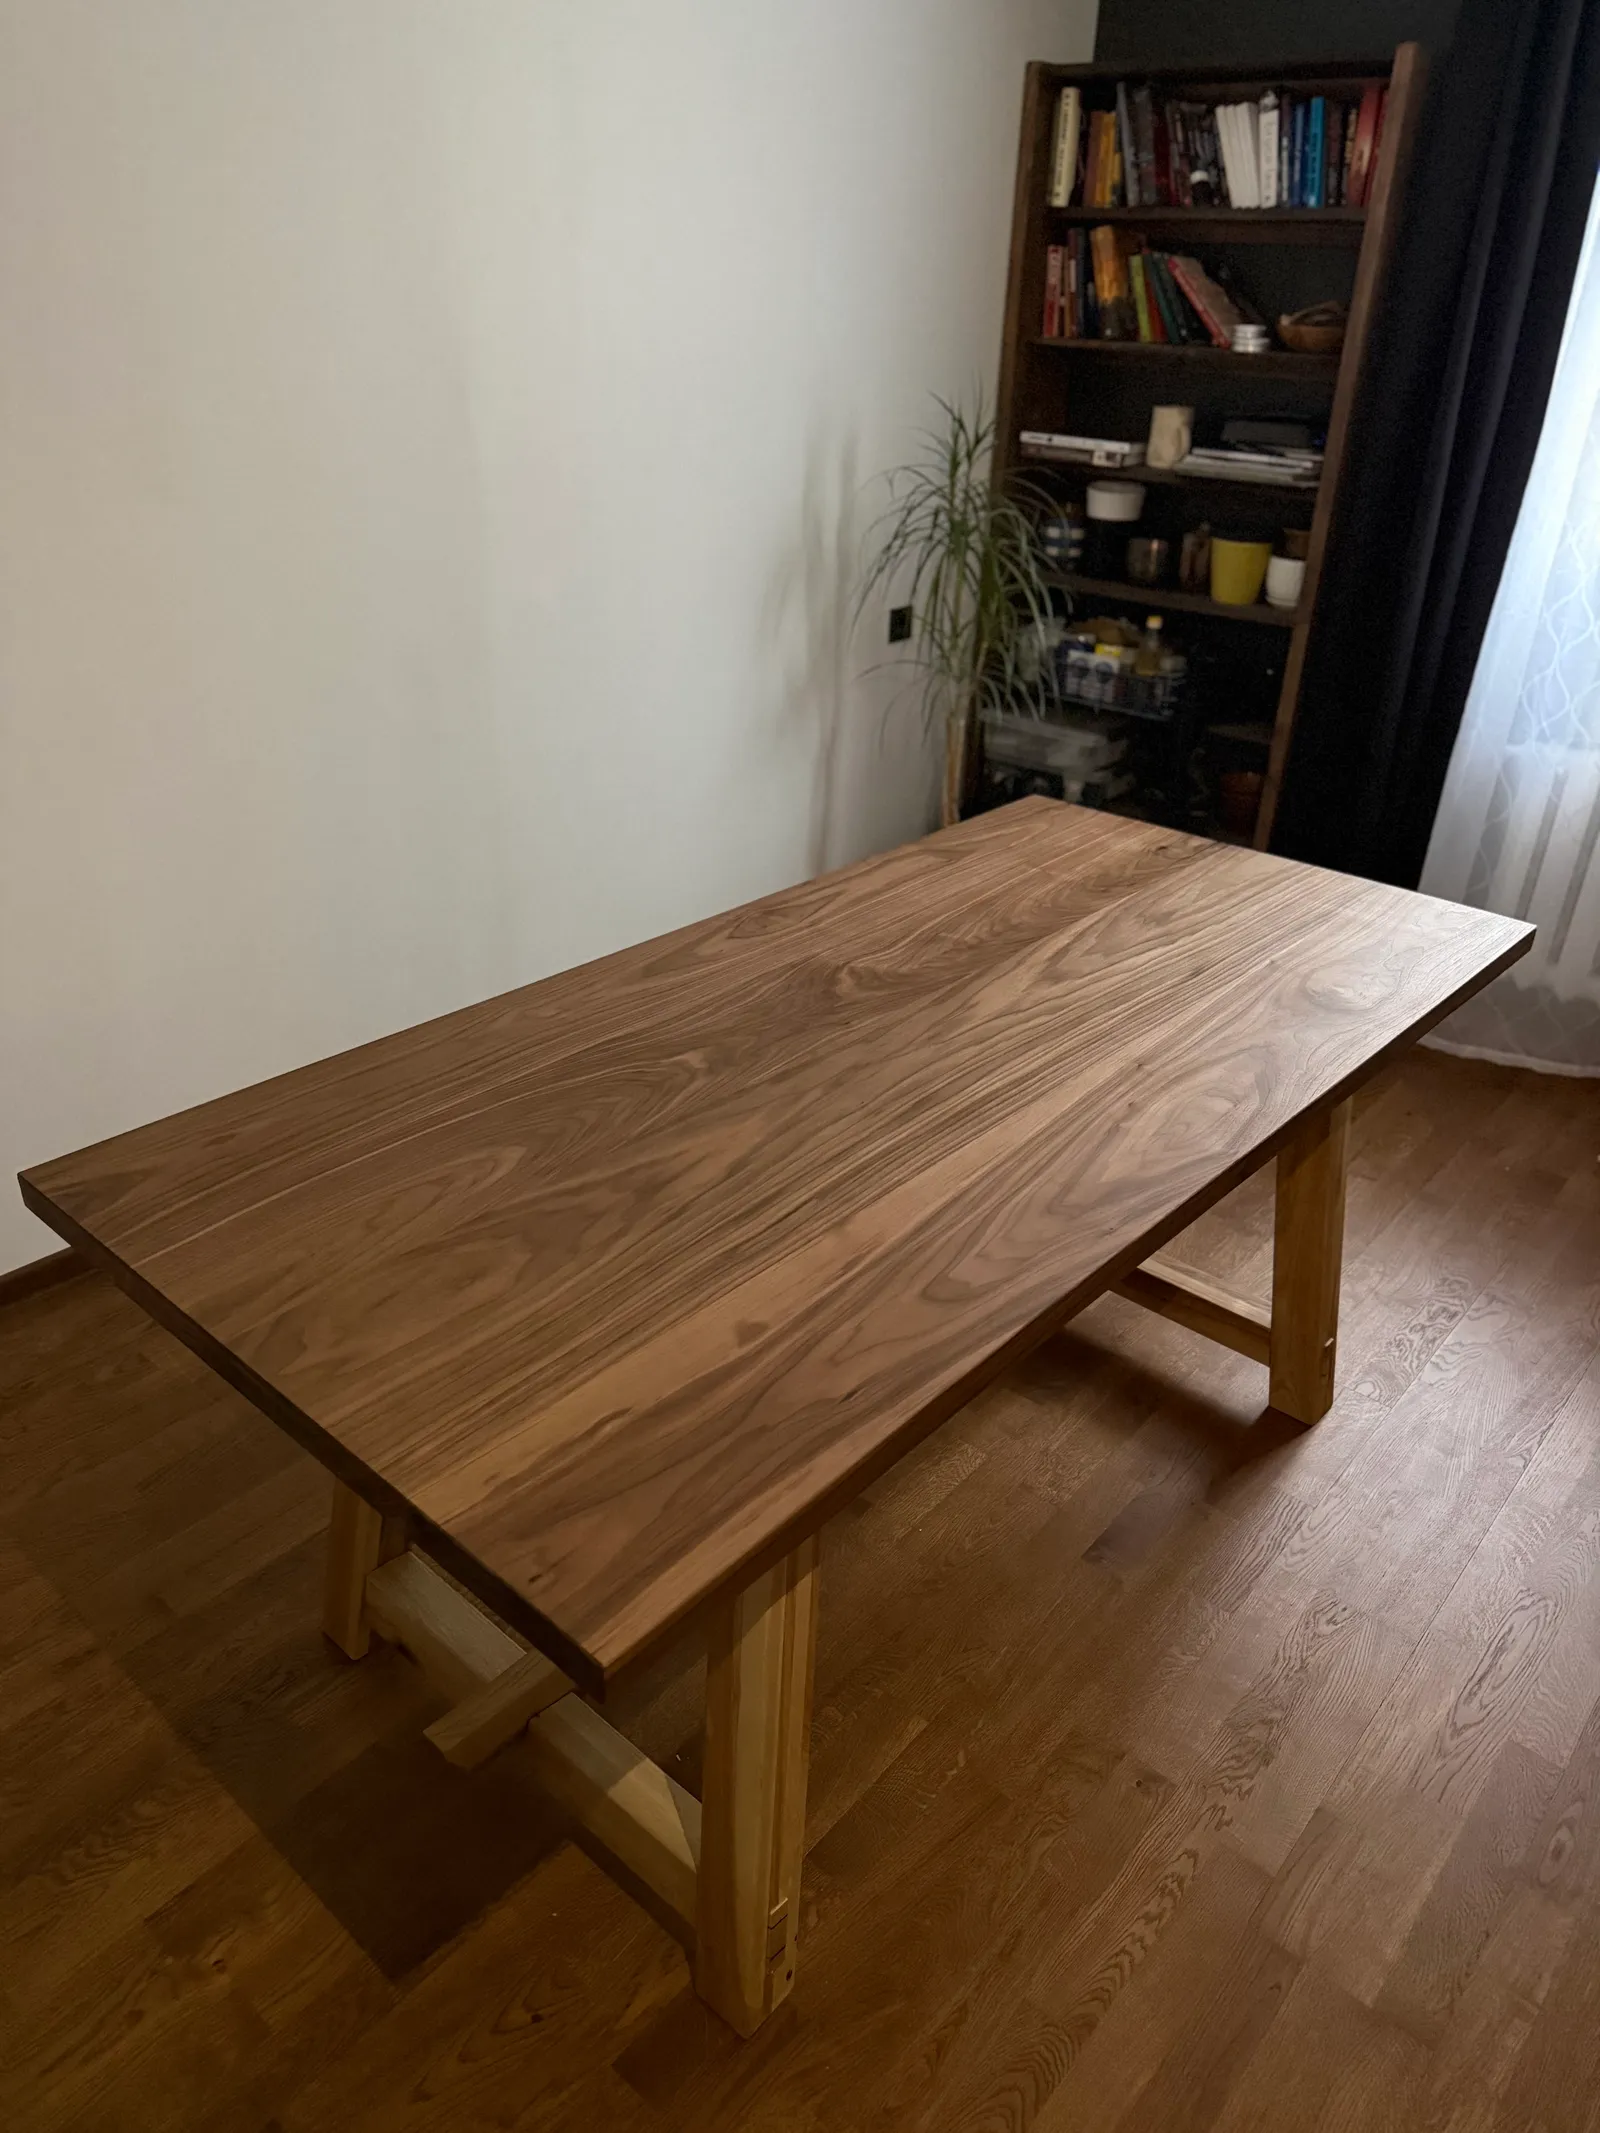
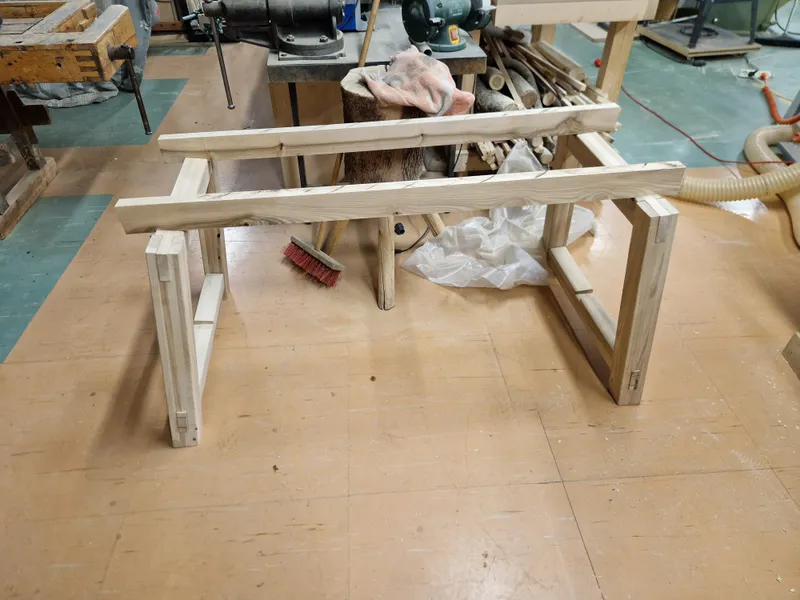
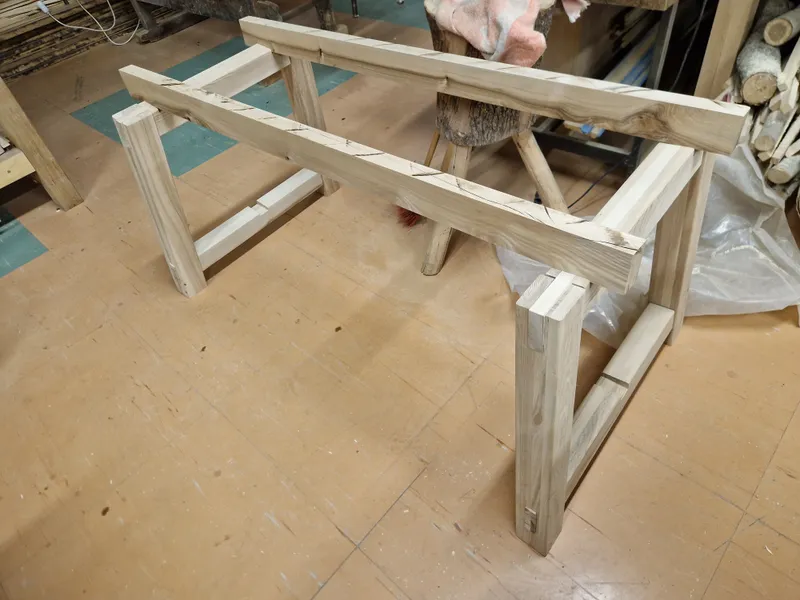
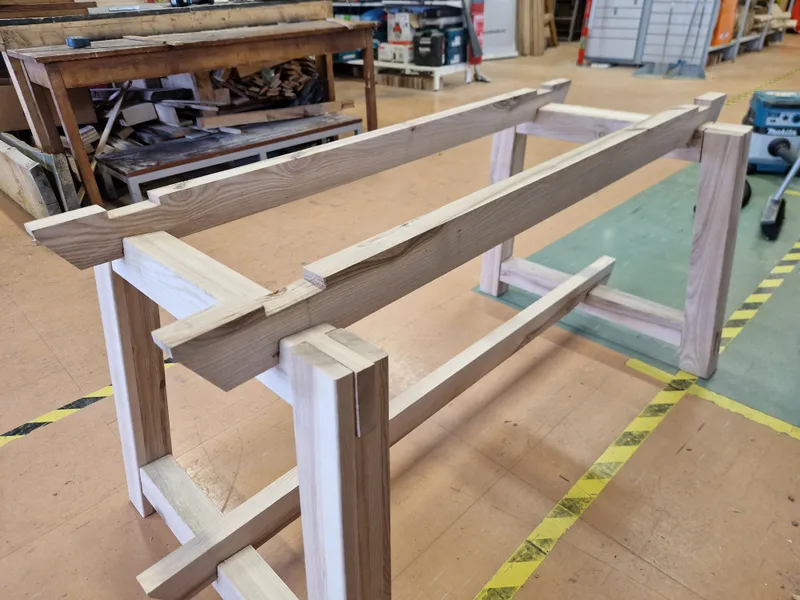
A trestle-style table, with a connecting stretcher in the bottom and walnut tabletop. The legs are angled inwards by 5 degrees in both directions, from the side and from the front. The table features many different joints - mortise & tenon, cross lap & dovetail grooves.
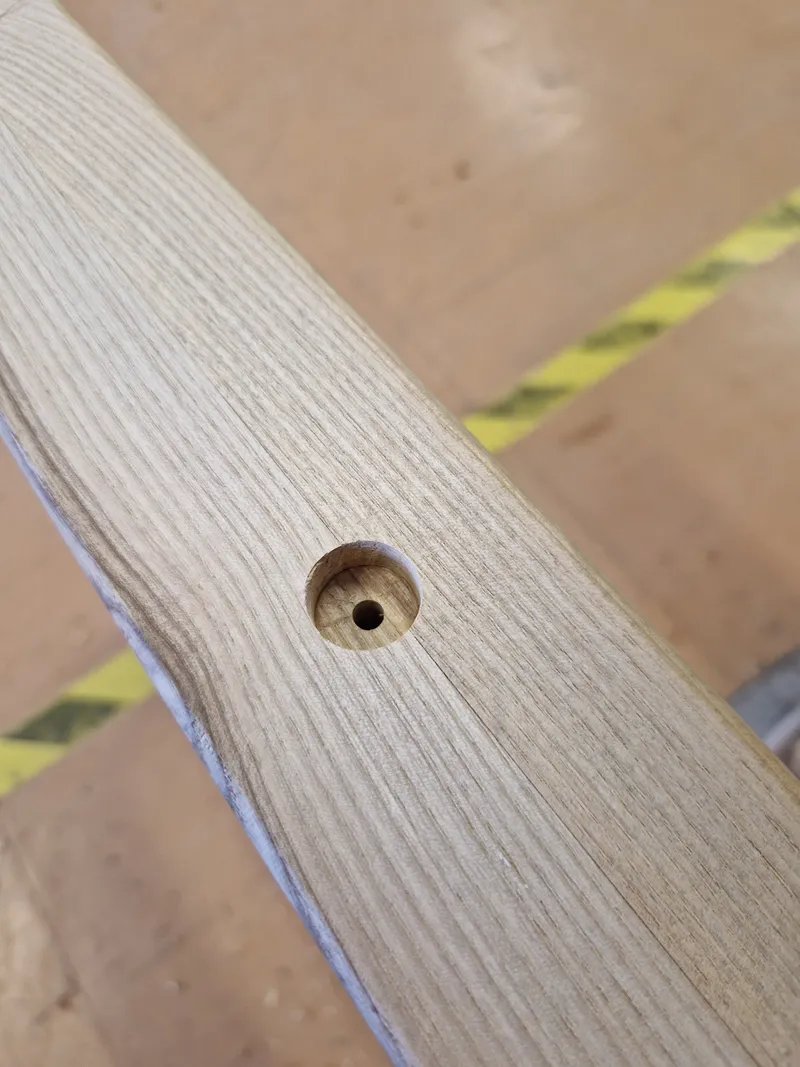
The bottom stretcher is attached via threaded inserts and bolts, allowing it to be removed for transport. The top stretchers are glued.
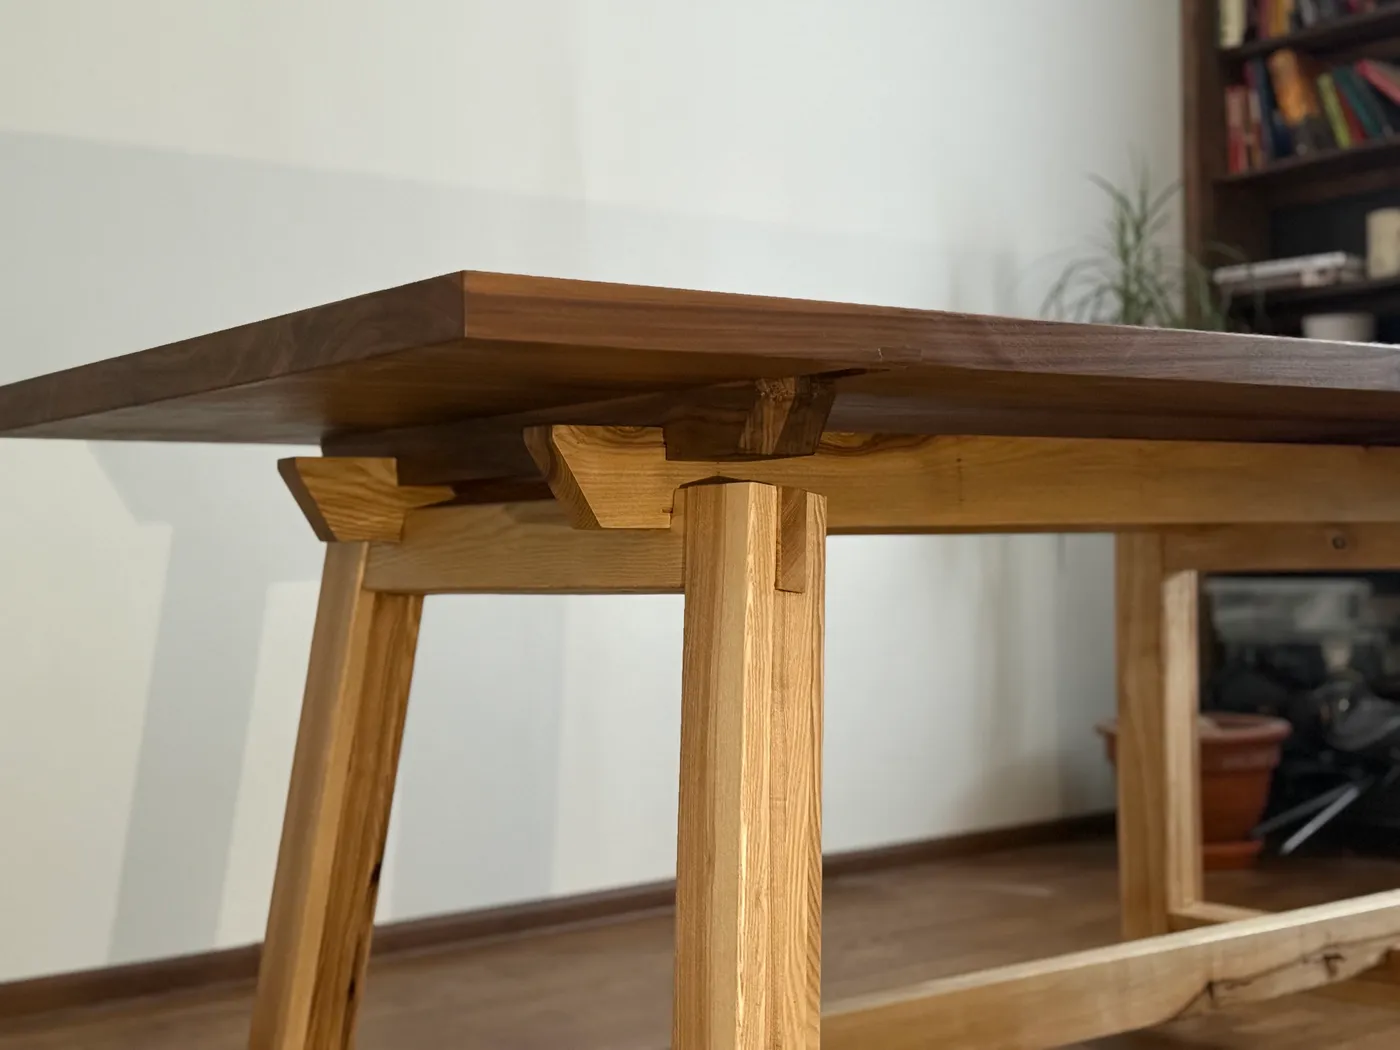
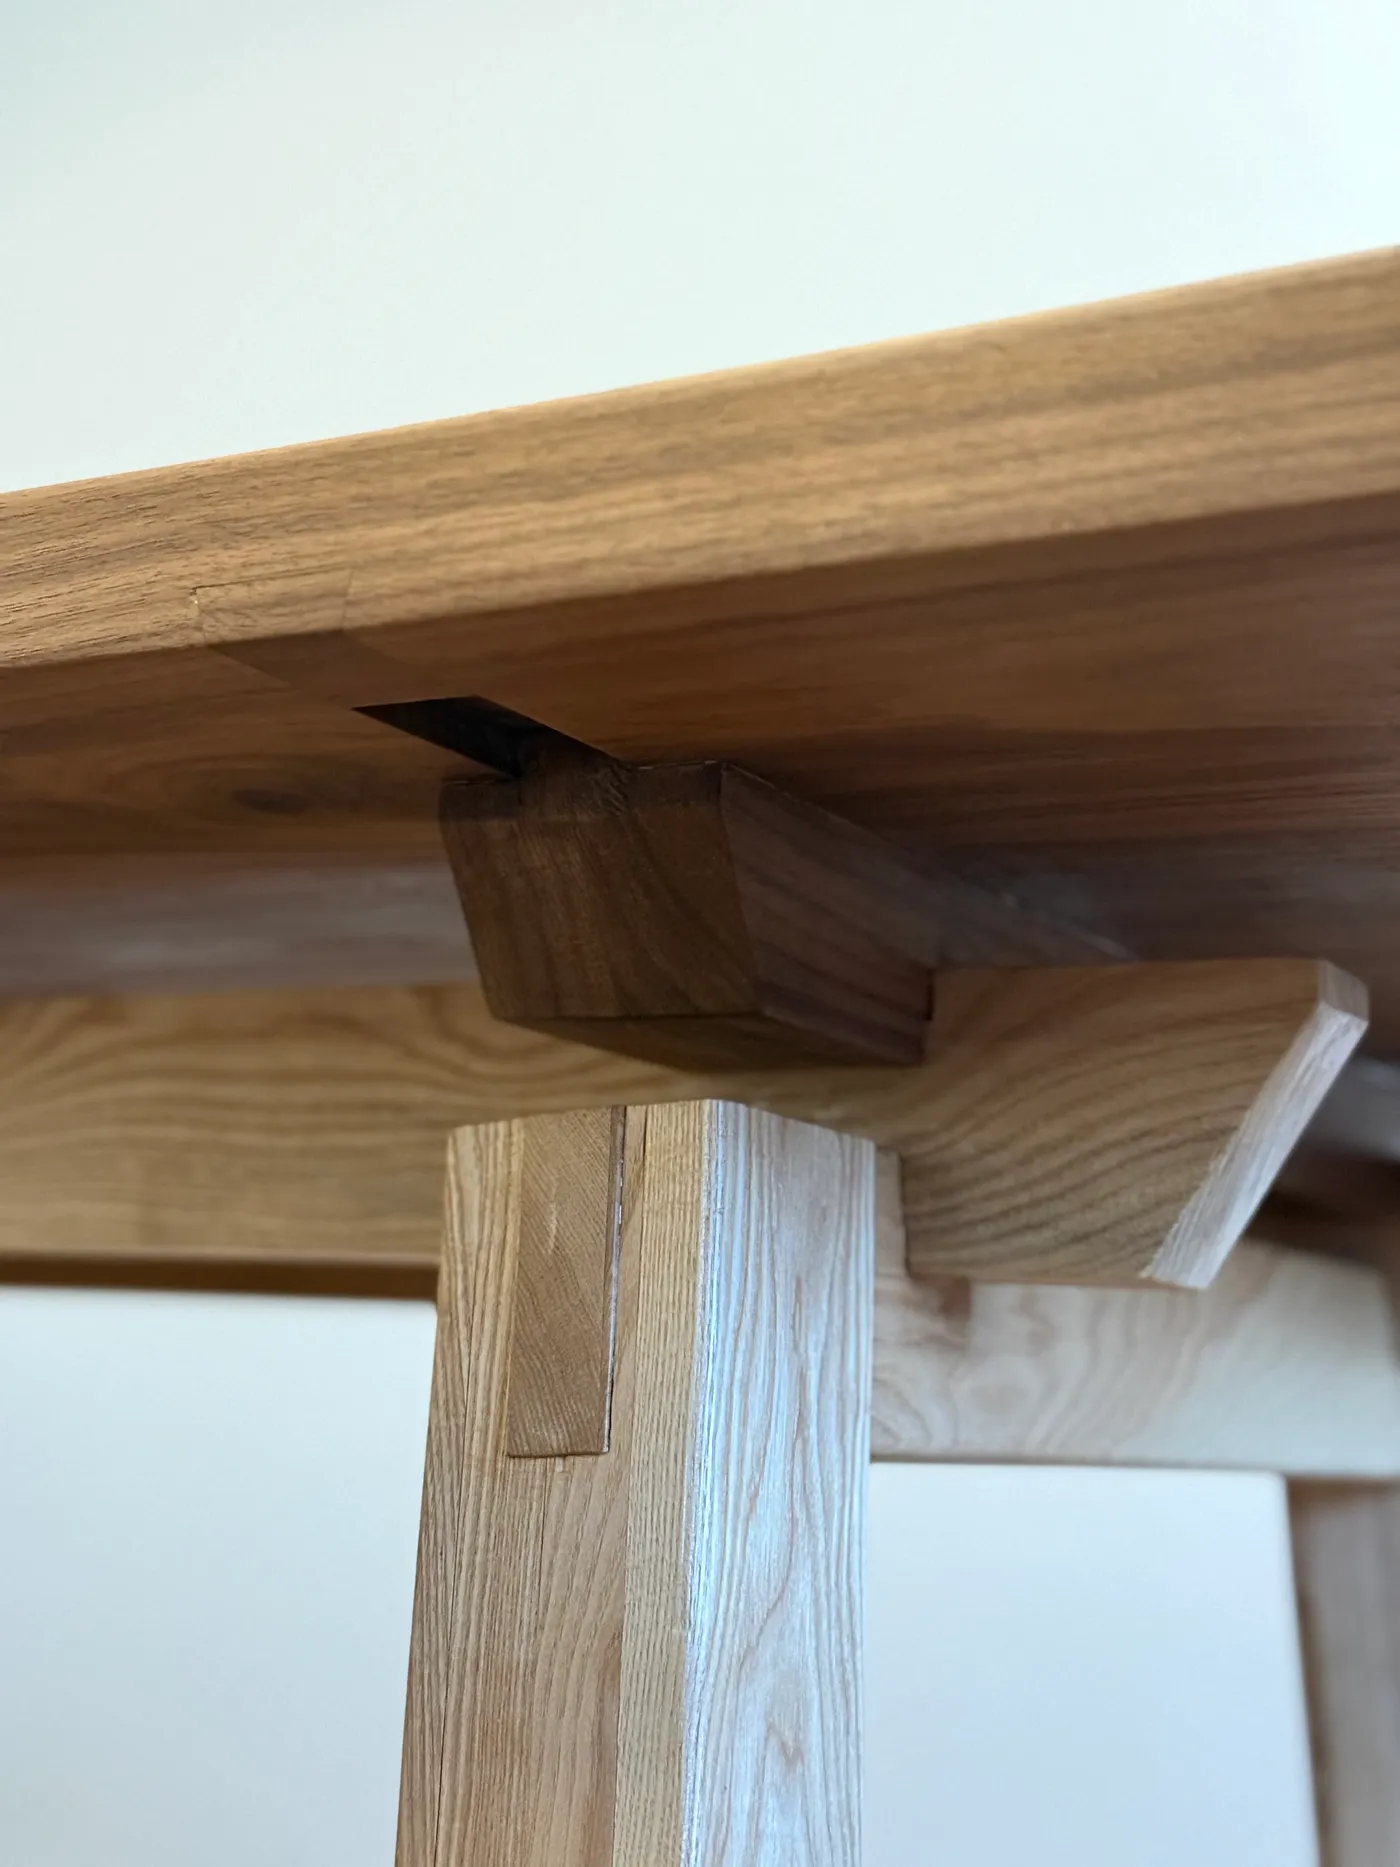
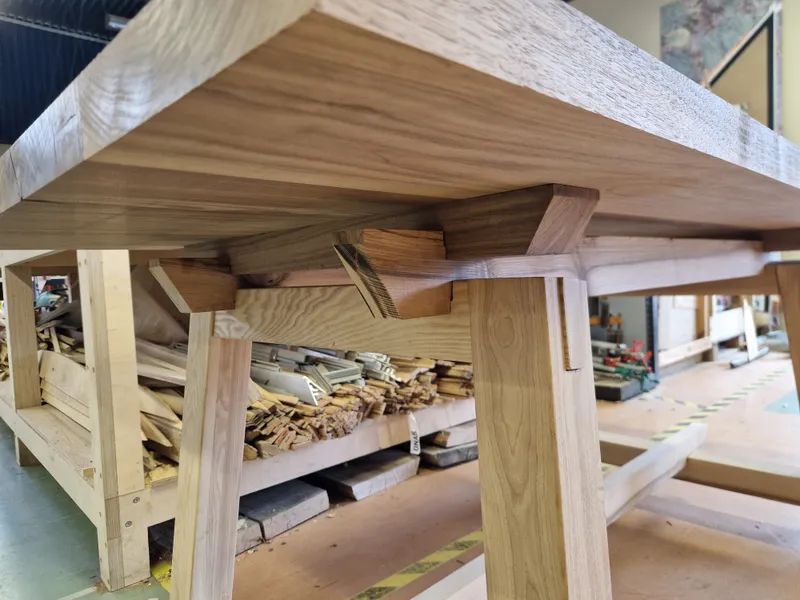
The tabletop has two dovetailed battens at the bottom, allowing for seasonal wood movement and targeted weight distribution right above the table legs, making the entire table very sturdy and strong. The table weighs around 70-80kg when assembled.

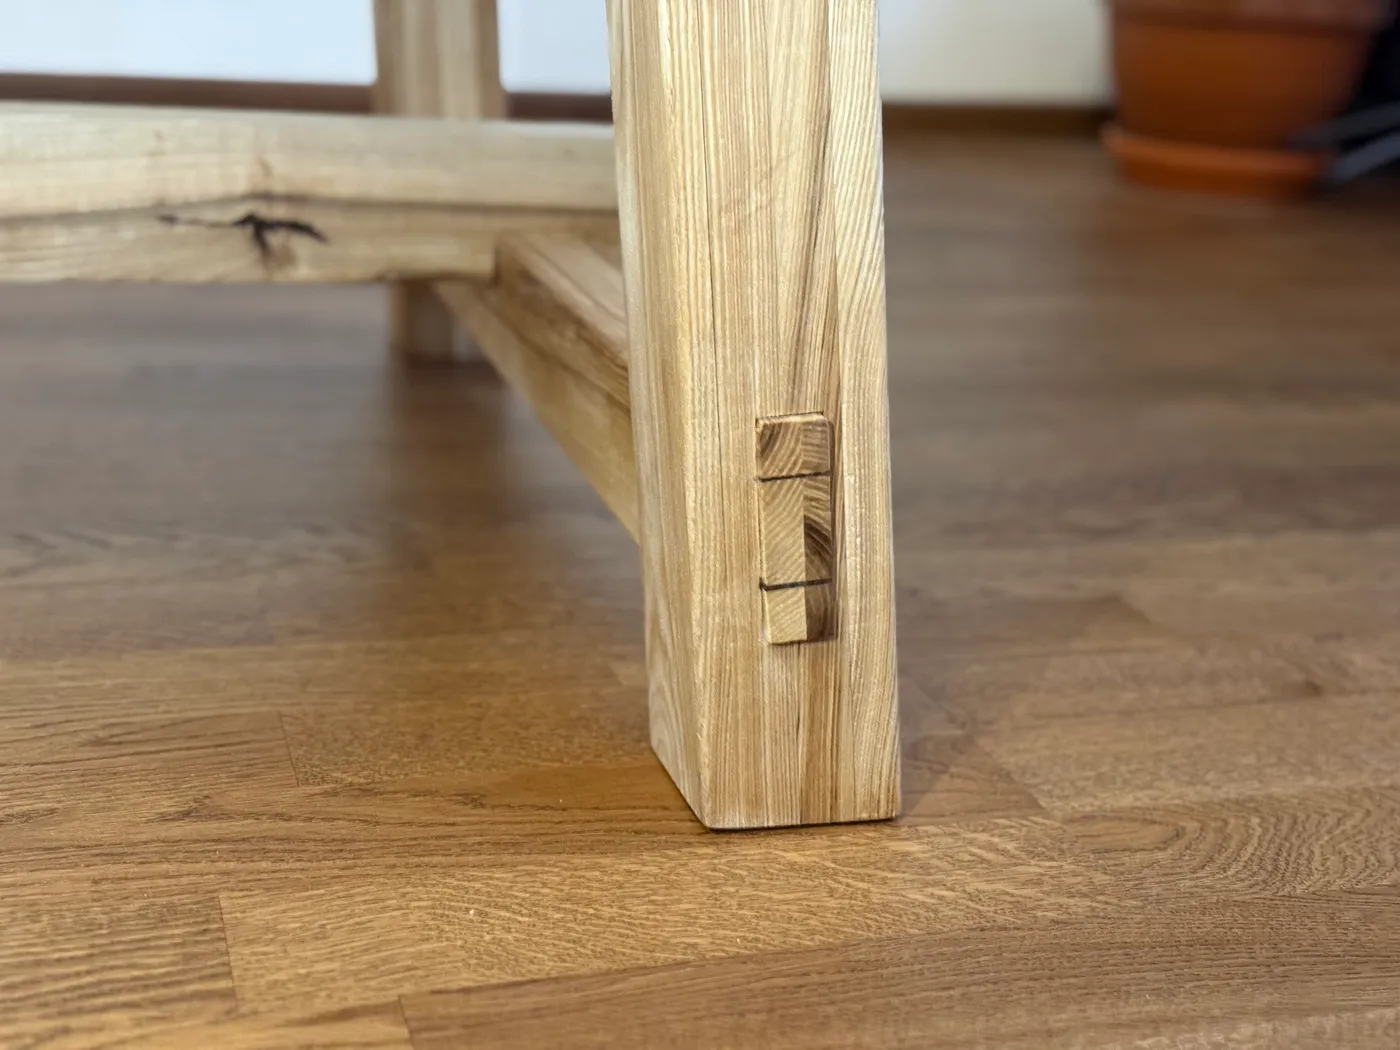


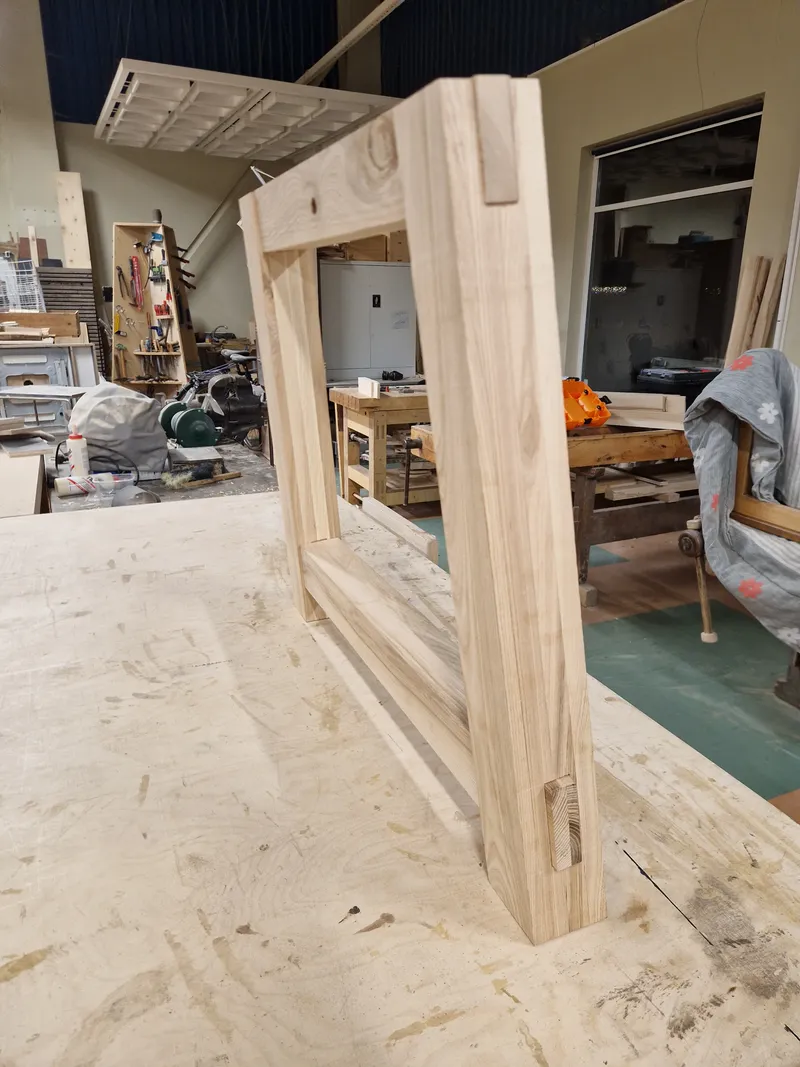
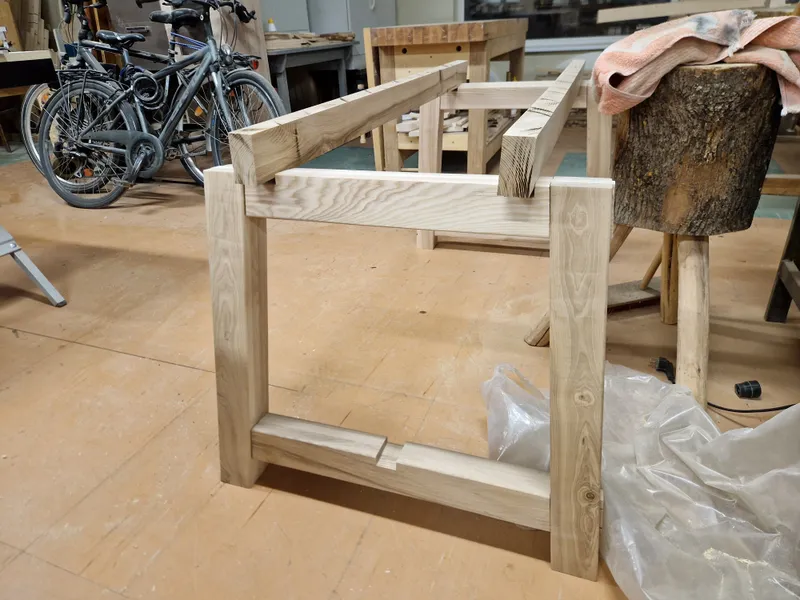
Inspired by the coffee table build, I decided to keep practicing my chiseling skills and opted to try a mortise-and-tenon (mortise is the hole, tenon is the part of the wood going through the hole) joined table legs. Also decided to add a 5 degree angle inwards towards the table in two directions, which made every cut and measurement many times more complicated than a standard 90 degree approach. I would say this decision turned a simple 20 hour process into ~100 hours of work just for the legs and frame.
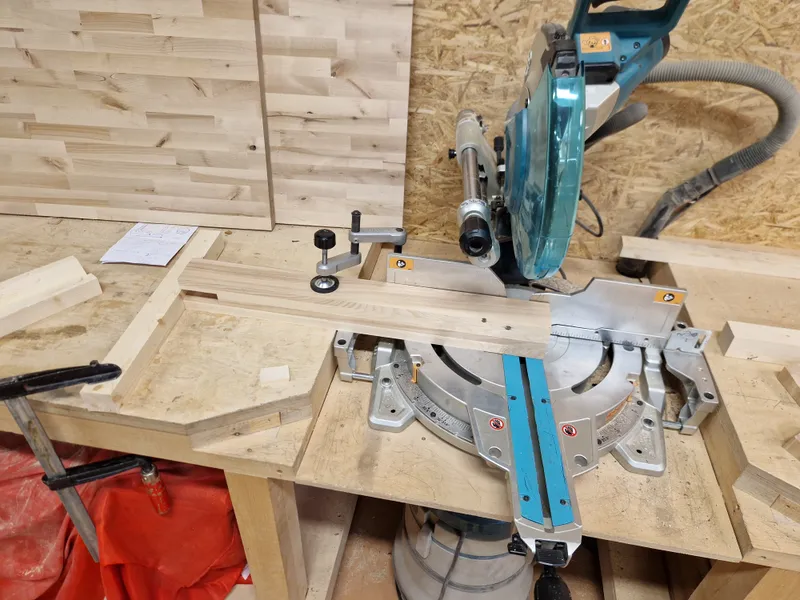
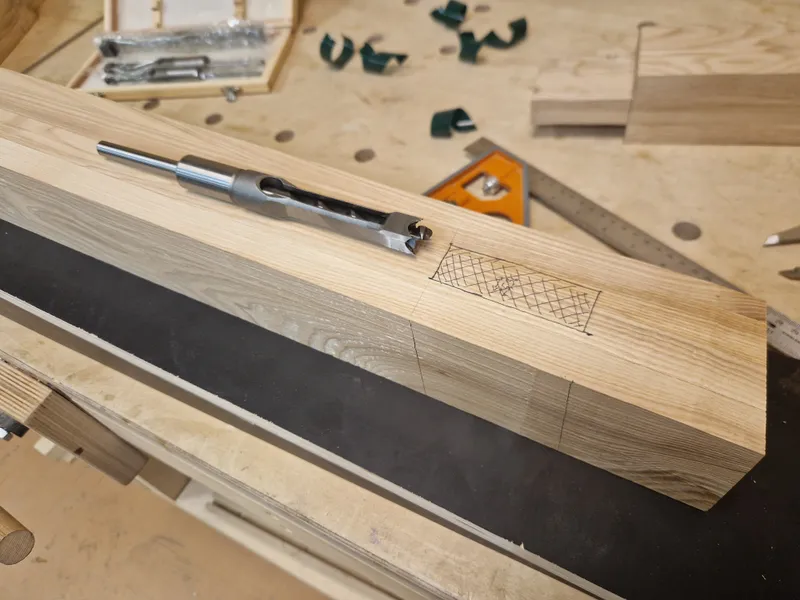
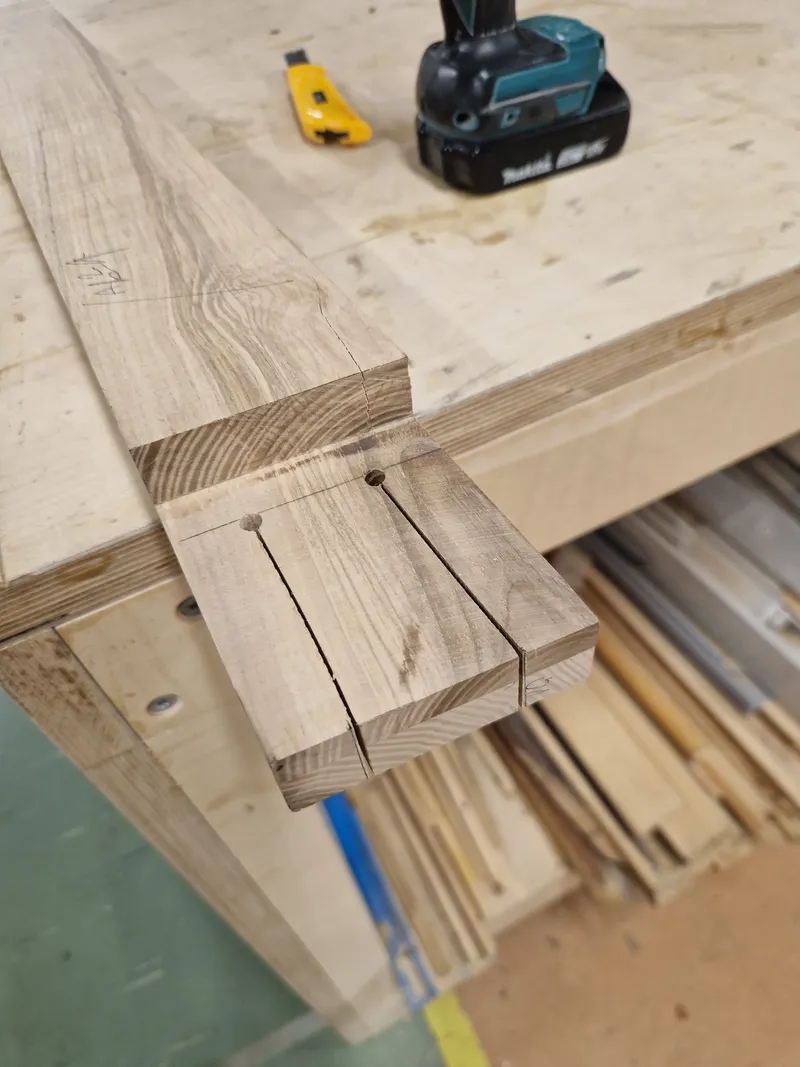
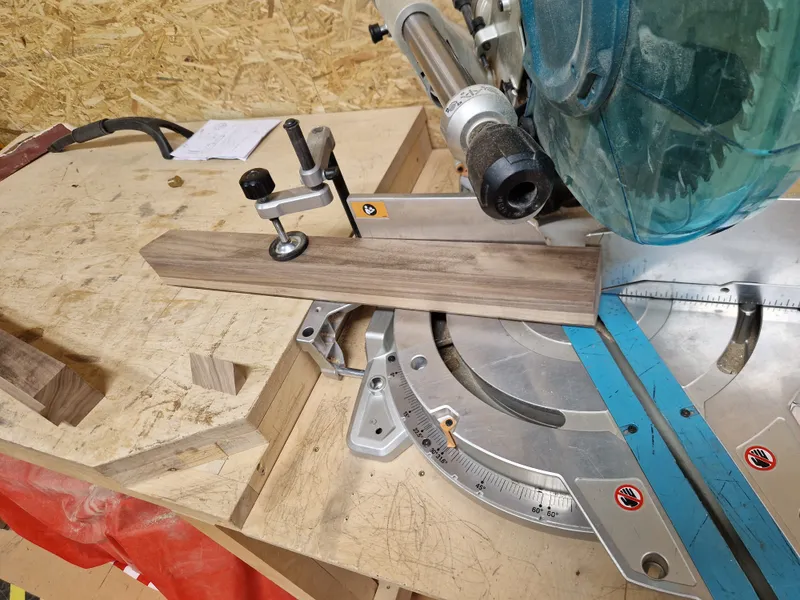
Before starting, I realised that there is no way I will be able to consistently mark 5 degrees every time I need to make a cut, so I tested out an approach where I simply cut piece of veneer into a triangle with a ~5 degree angle. The idea here was that if I keep attempting to configure saws and drills at a 5 degree angle, in reality one cut will be 4.9 degrees, the other will be 5.2 degrees, some will be 5.0 degrees and in the end it will probably look like a disaster when assemblying. But if we cut a piece of veneer in some specific angle, and always use this veneer as a guide for the cuts, it wont matter if the triangle is 4.9 degrees, 5.5 degrees or something else, every cut referencing this will be the exact same. In the end, this approach worked very very well.
1 / 8
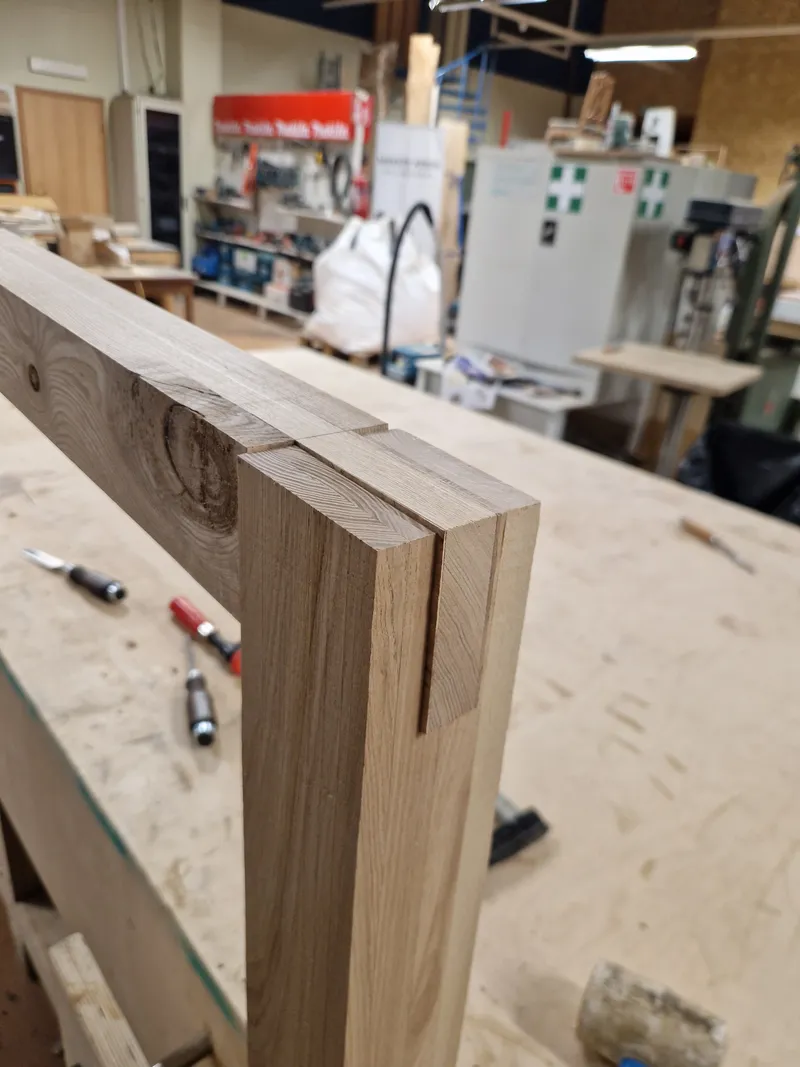
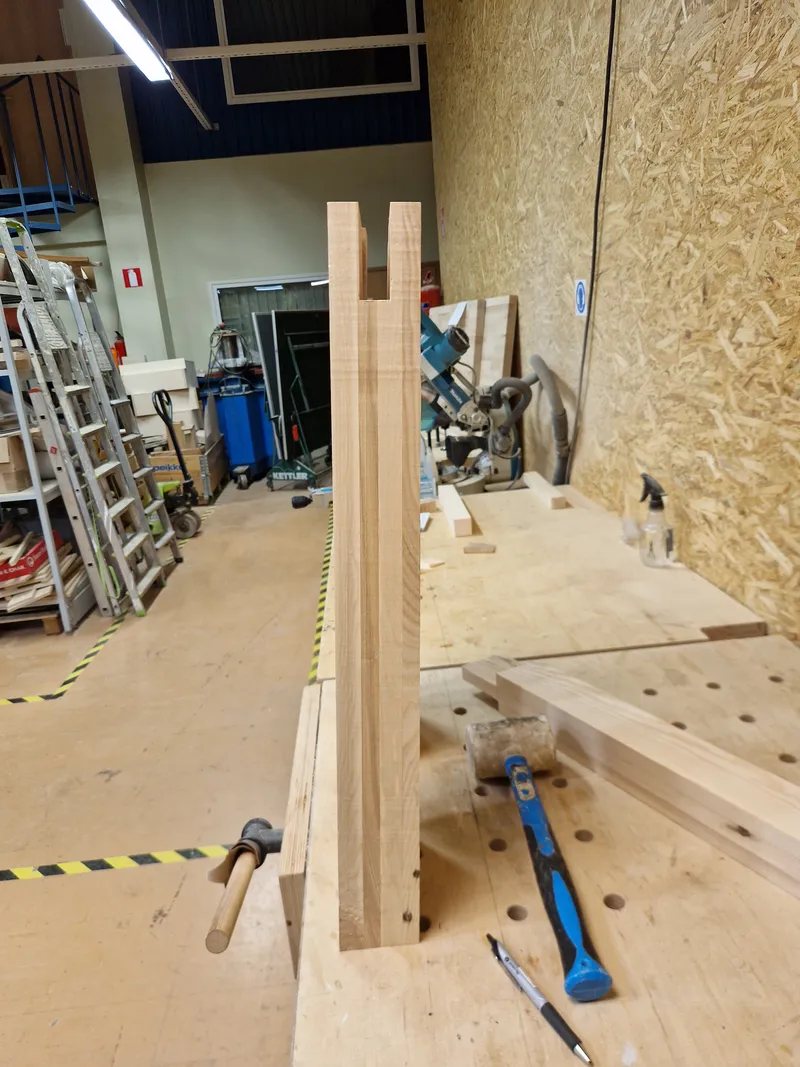
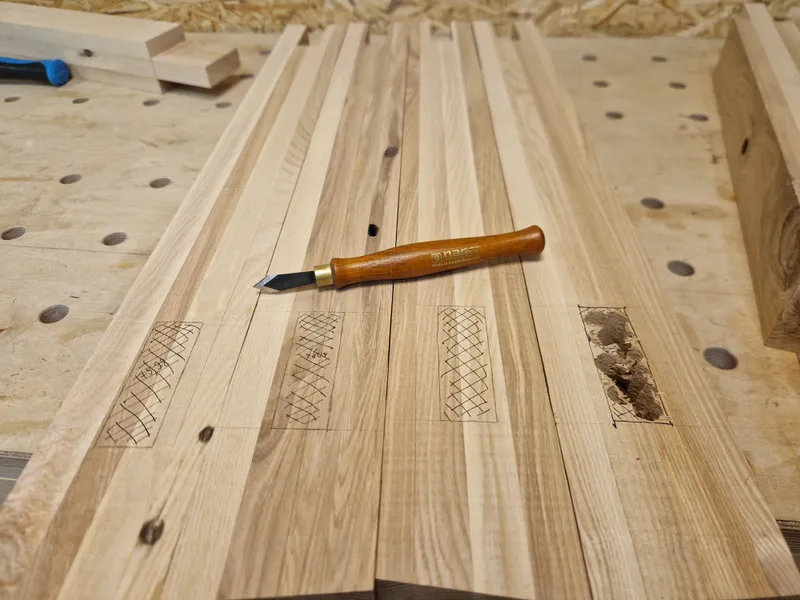
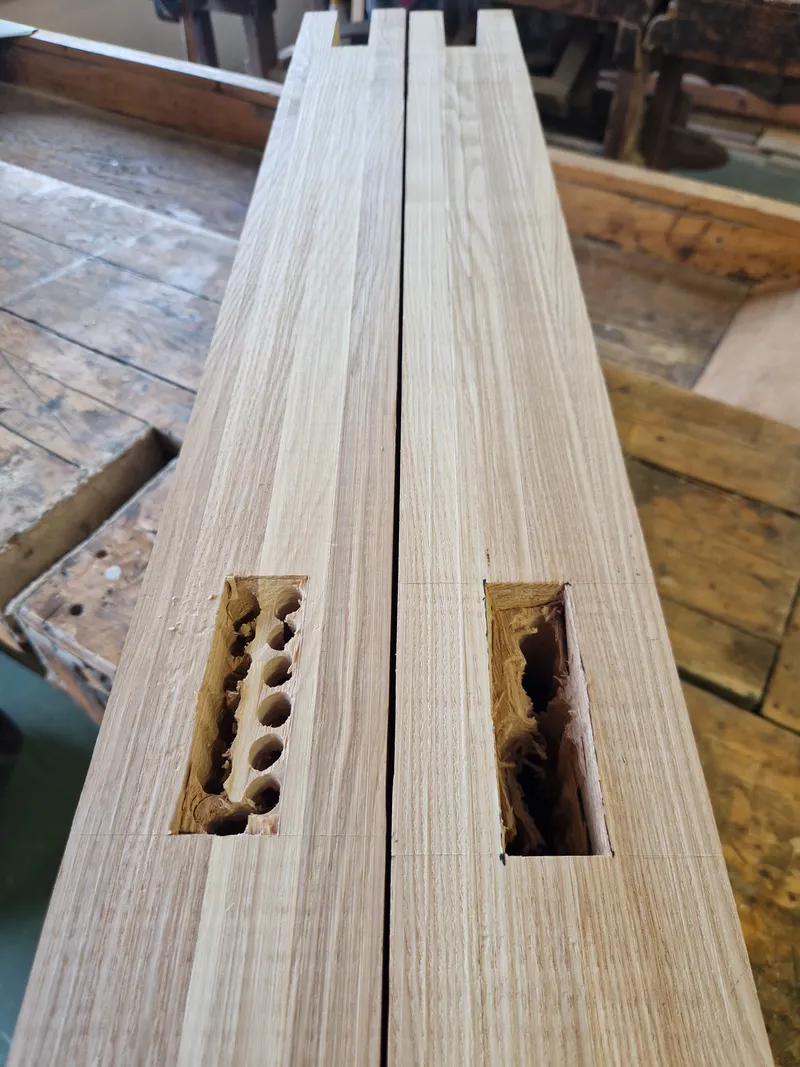
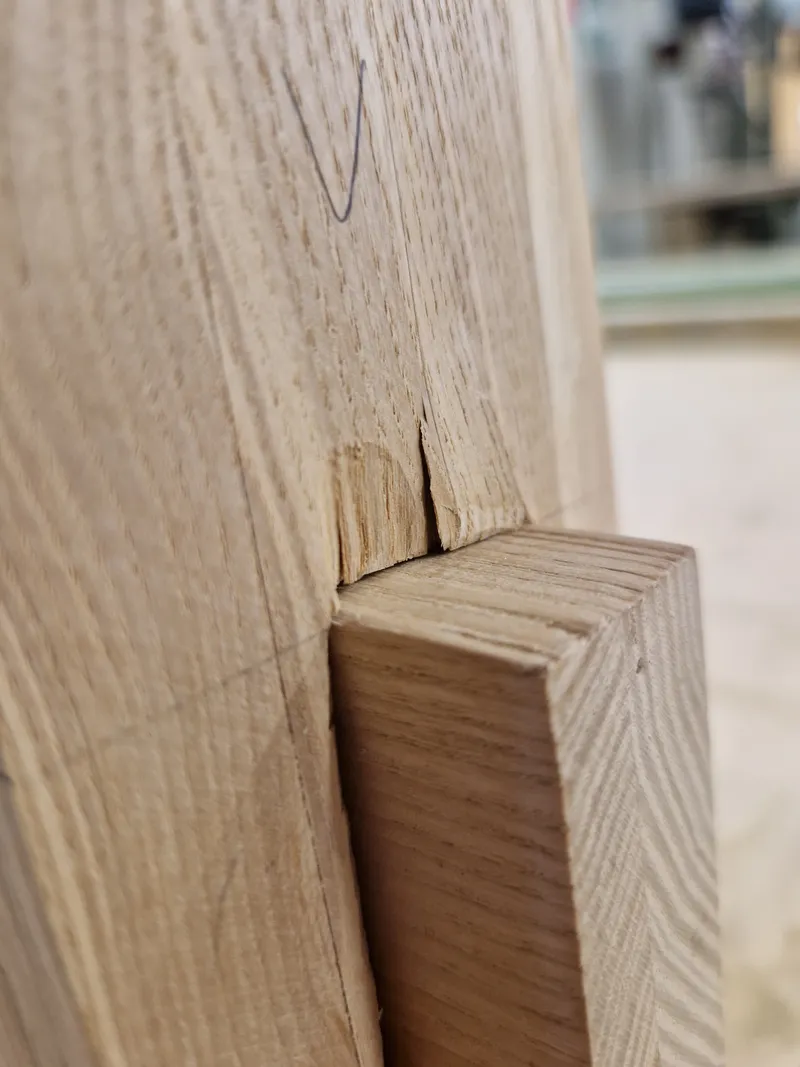
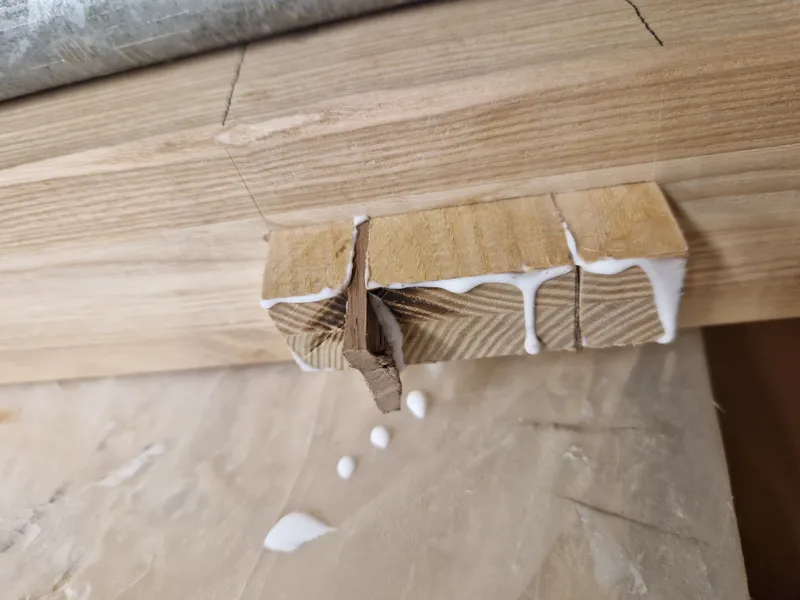
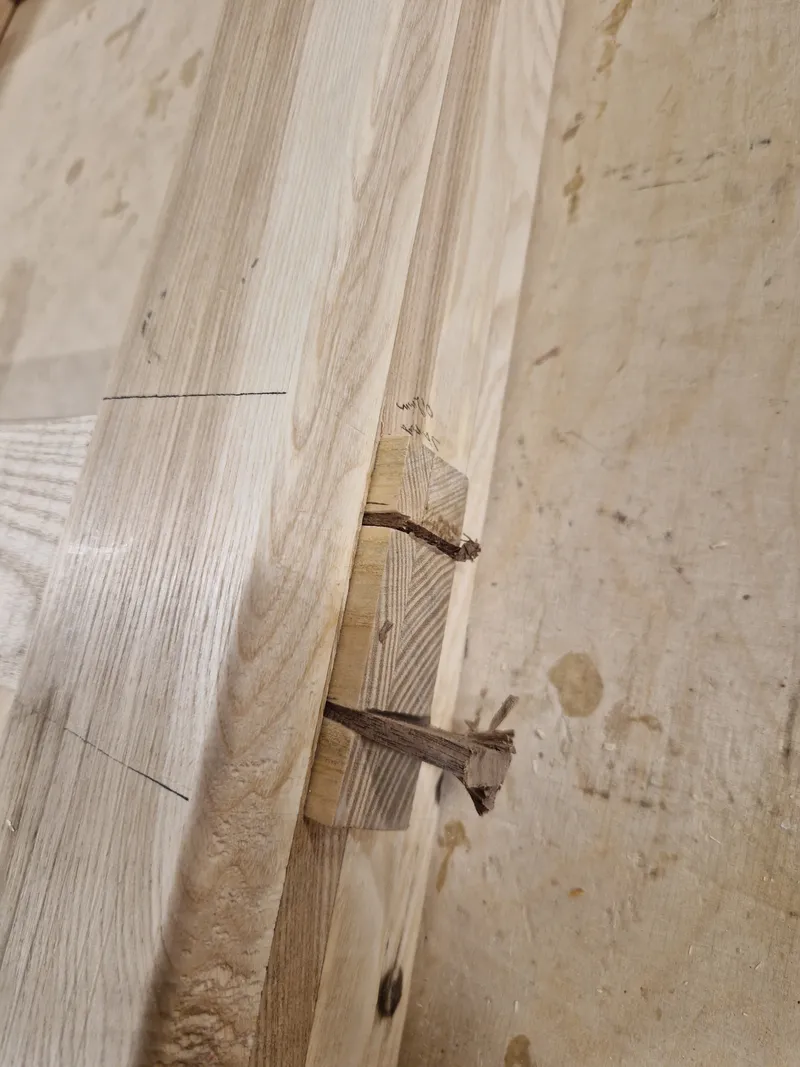
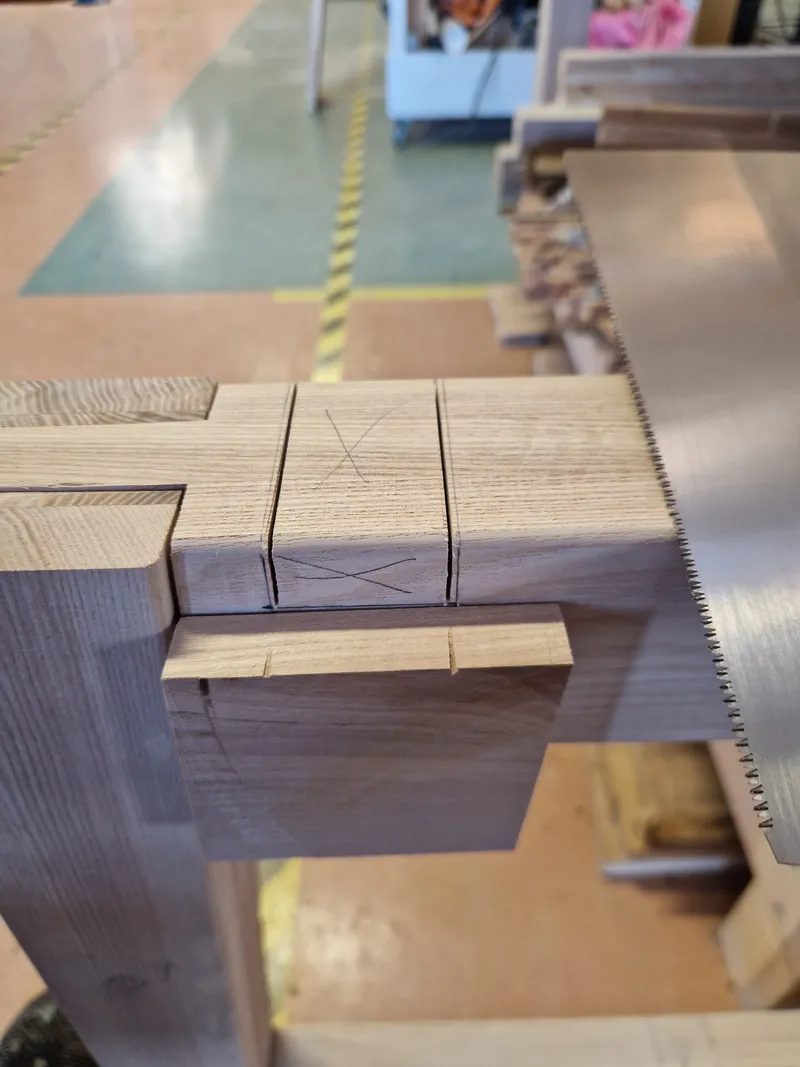
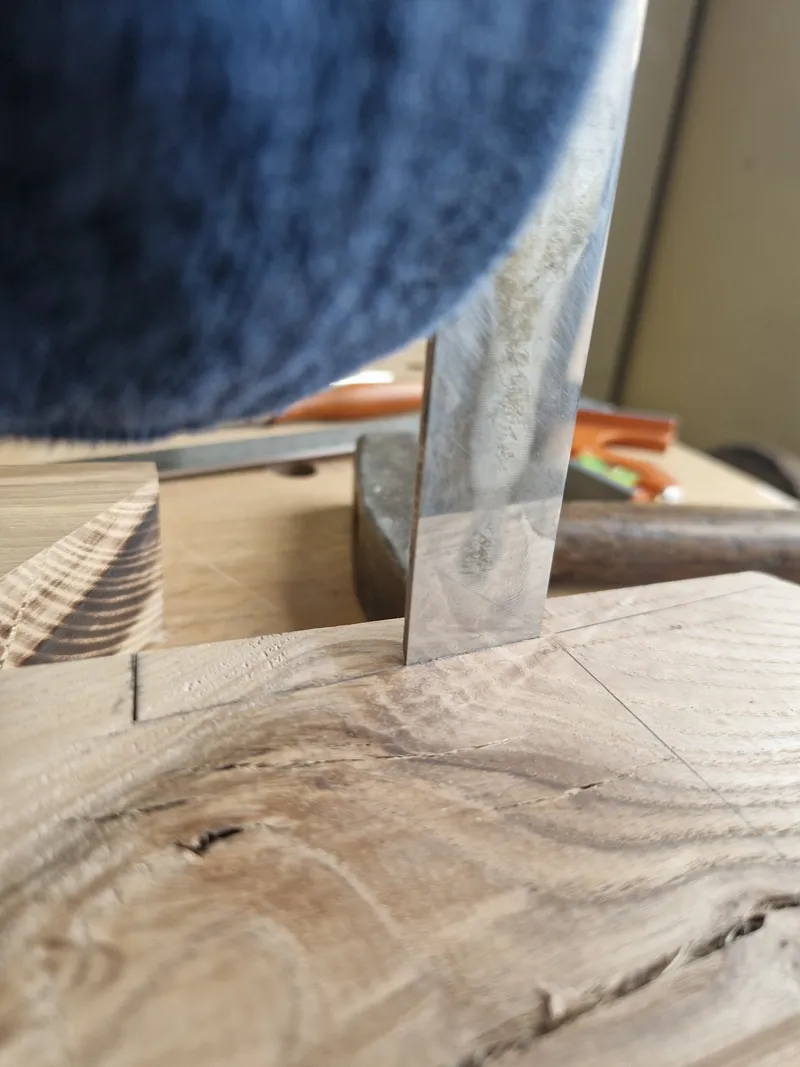
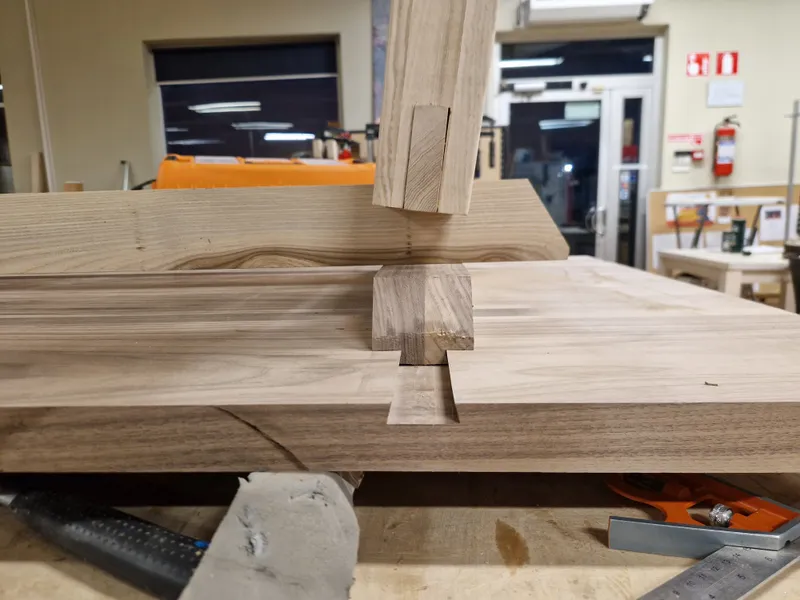
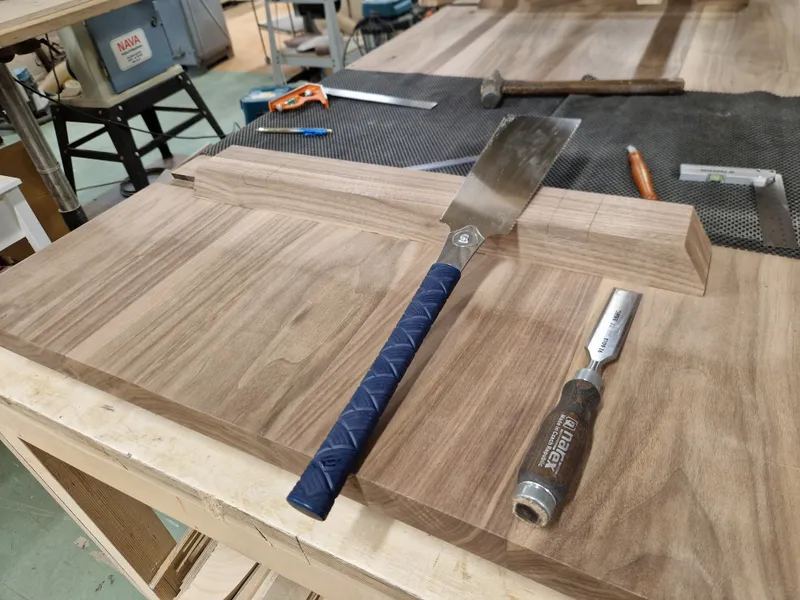
With the vertical and horizontal pieces done on the table saw, it was time to work on creating a mortise in the vertical elements for the tenon to connect into. For this I tested out the chisel-and-drill-bit which unfortunately did not work well, so I went back to the classic approach and simply drilled through the marked rectangle with a basic drill bit to get rid of excess material and then cleaned up the edges with chisels.
Beginner mistake that I kept repeating was attempting to dry-fit the mortise-and-tenon before the mortise was in the proper size, resulting in me repeatedly tearing out chunks of wood from the edges of the mortise. I will chalk it off to "character" of the piece, but for future reference, the fit should not be tight at all due to the actual tightness of the joint coming from the wedges applied in the end, not from kicking the tenon through the mortise.

1 / 8
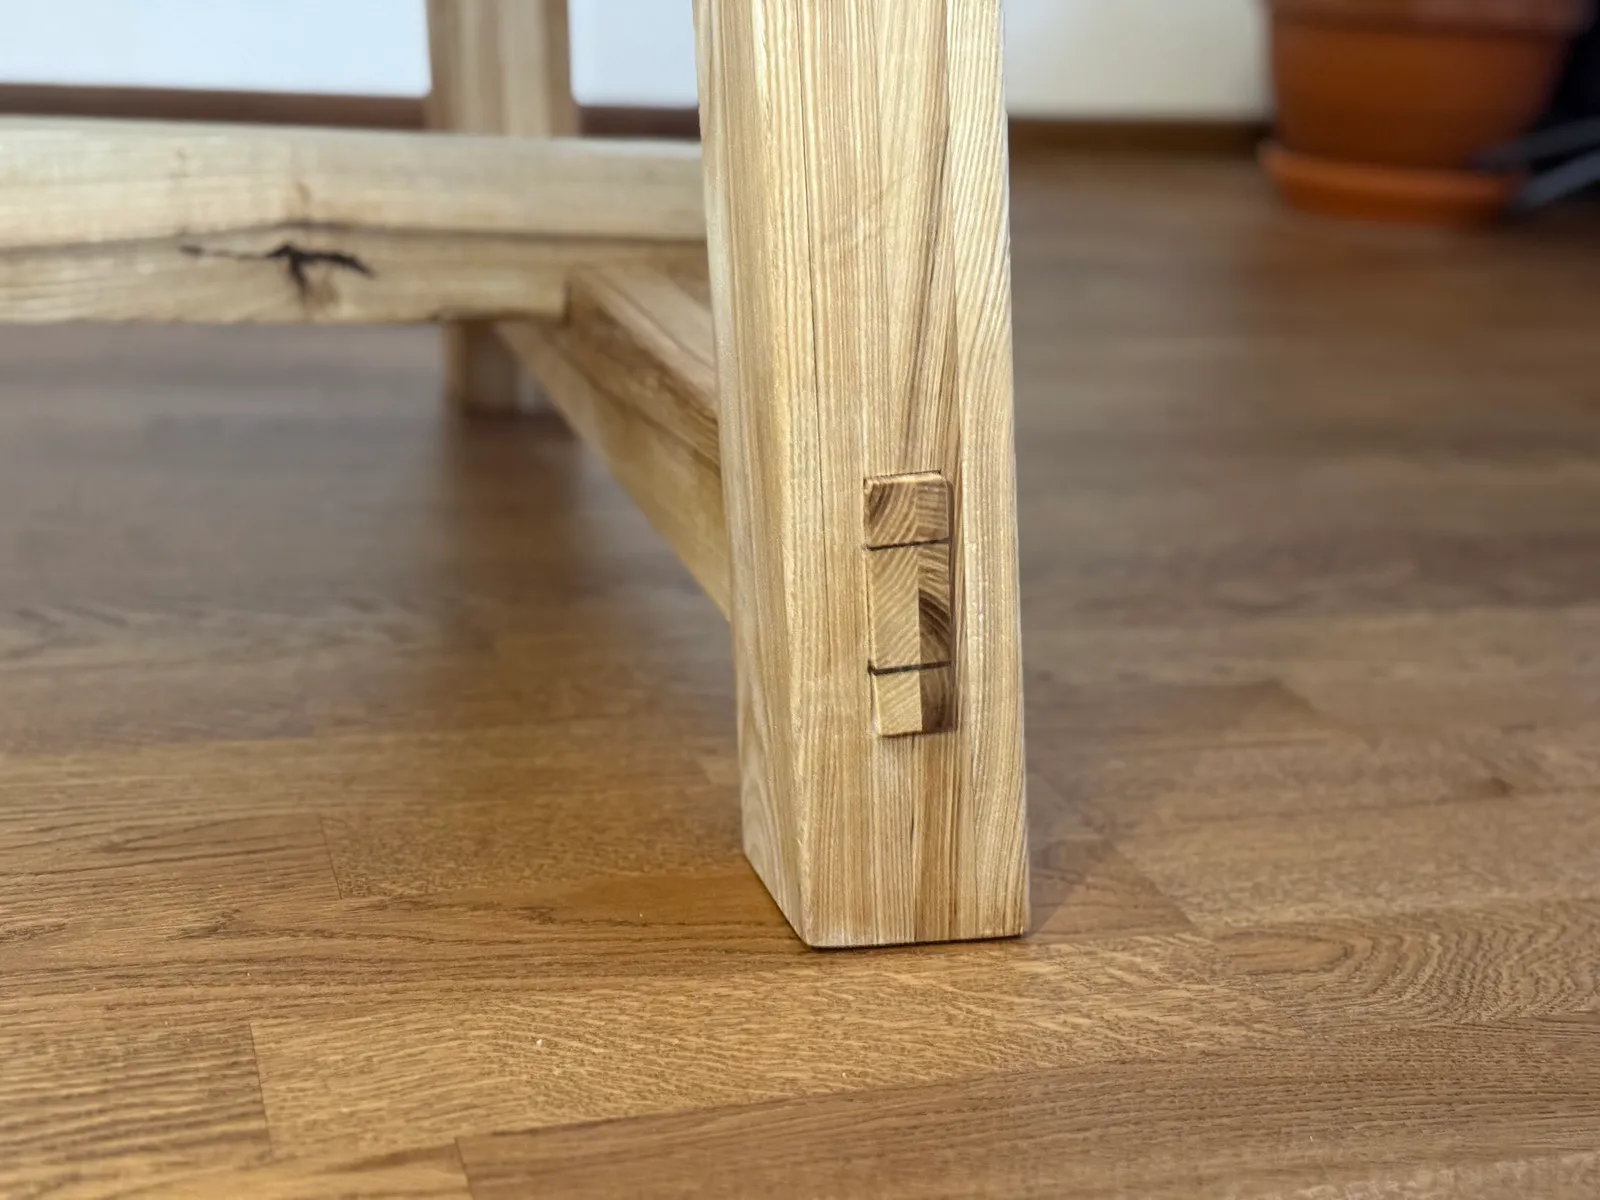
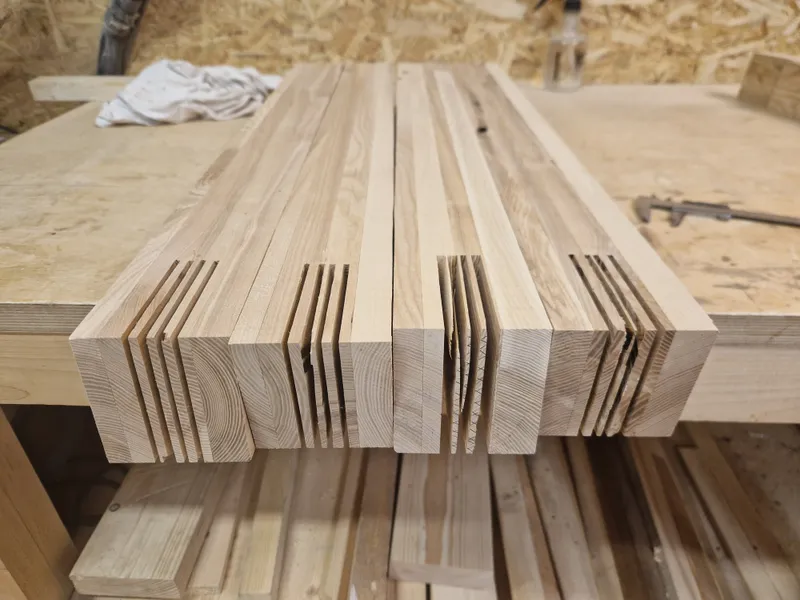
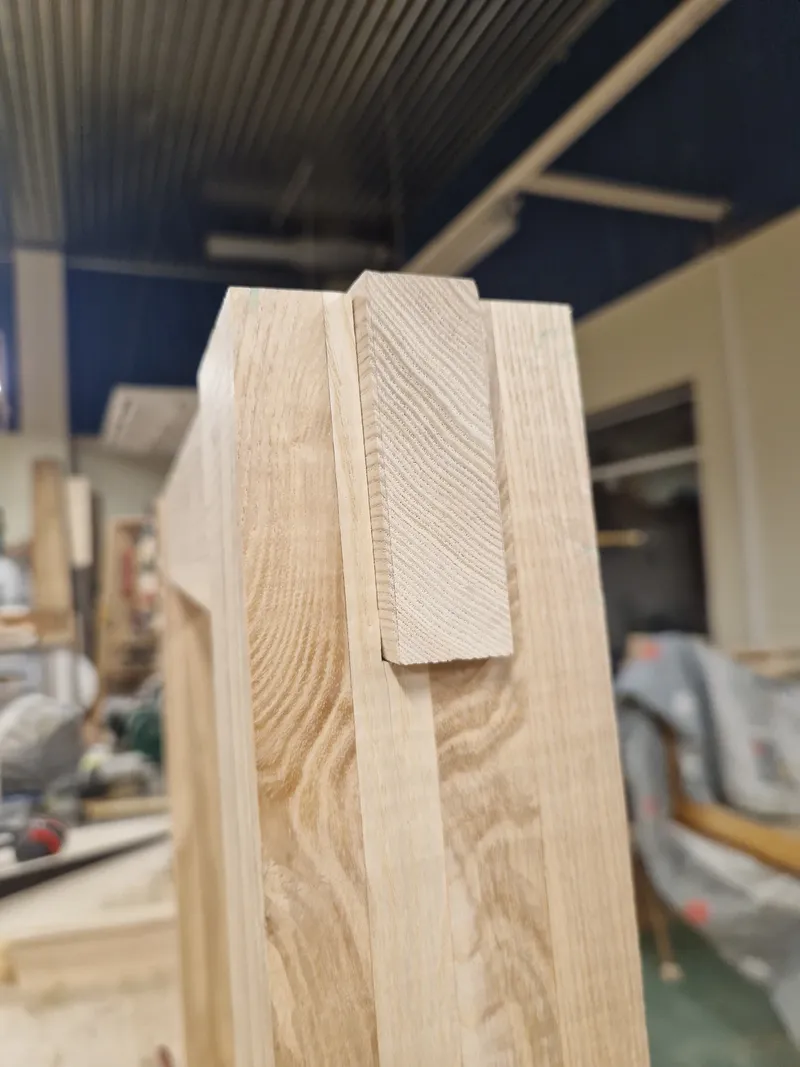
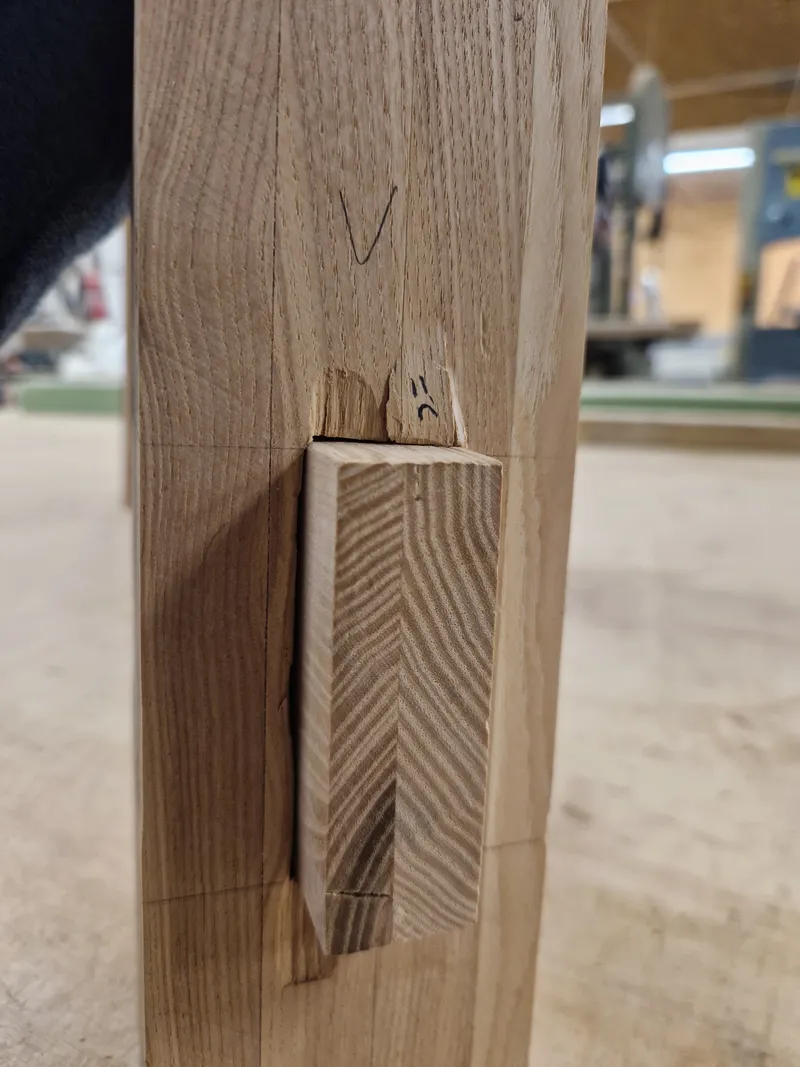
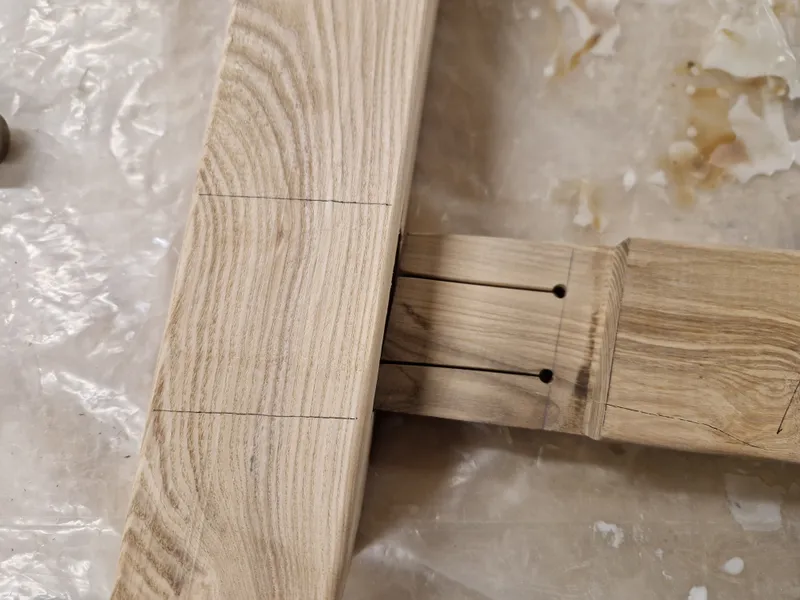
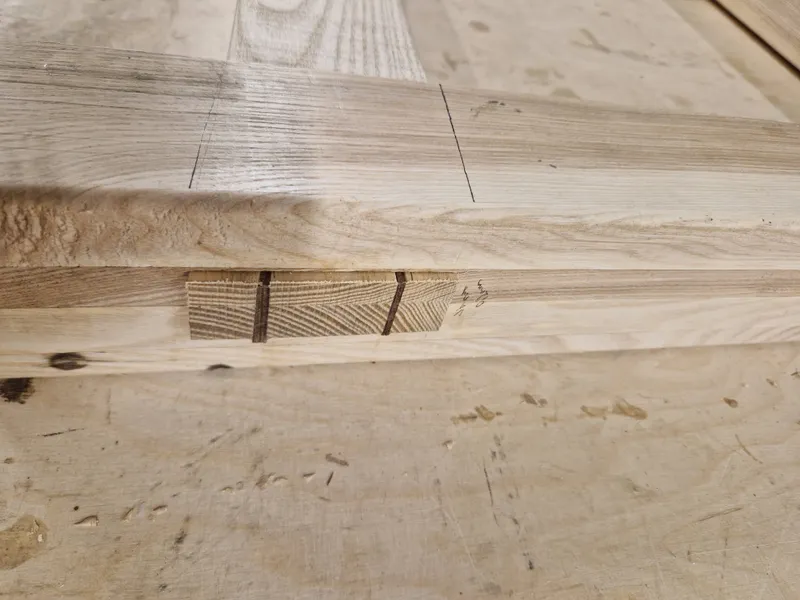
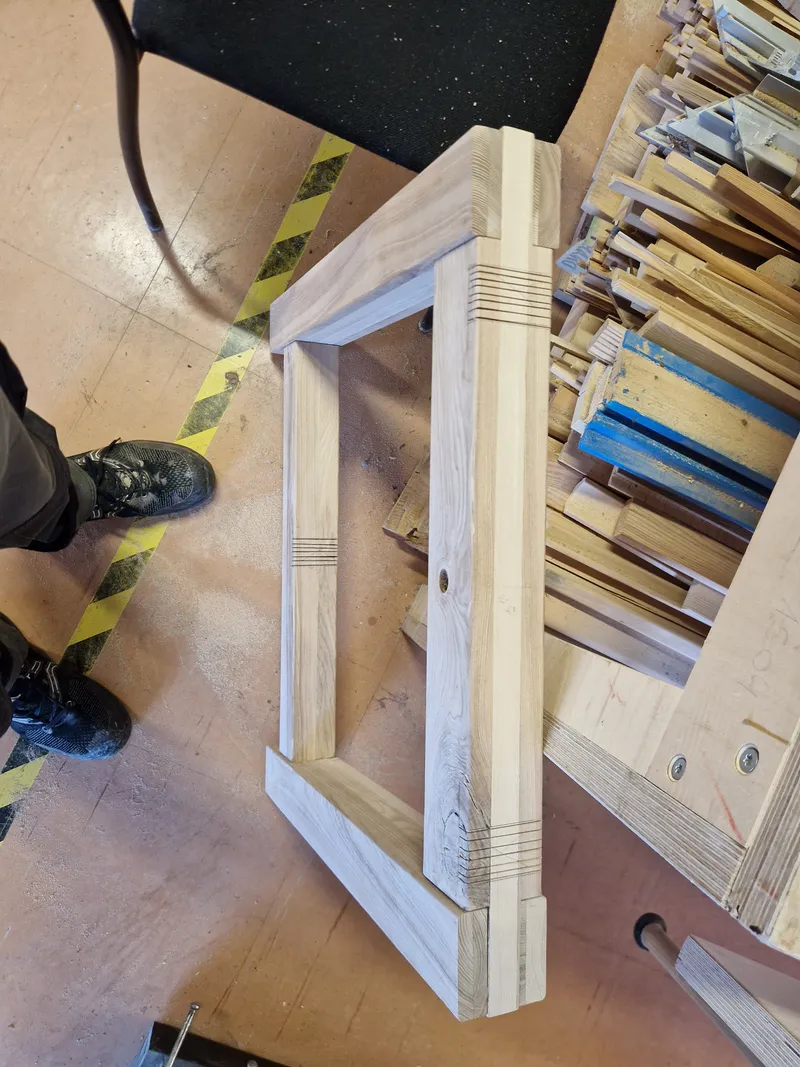
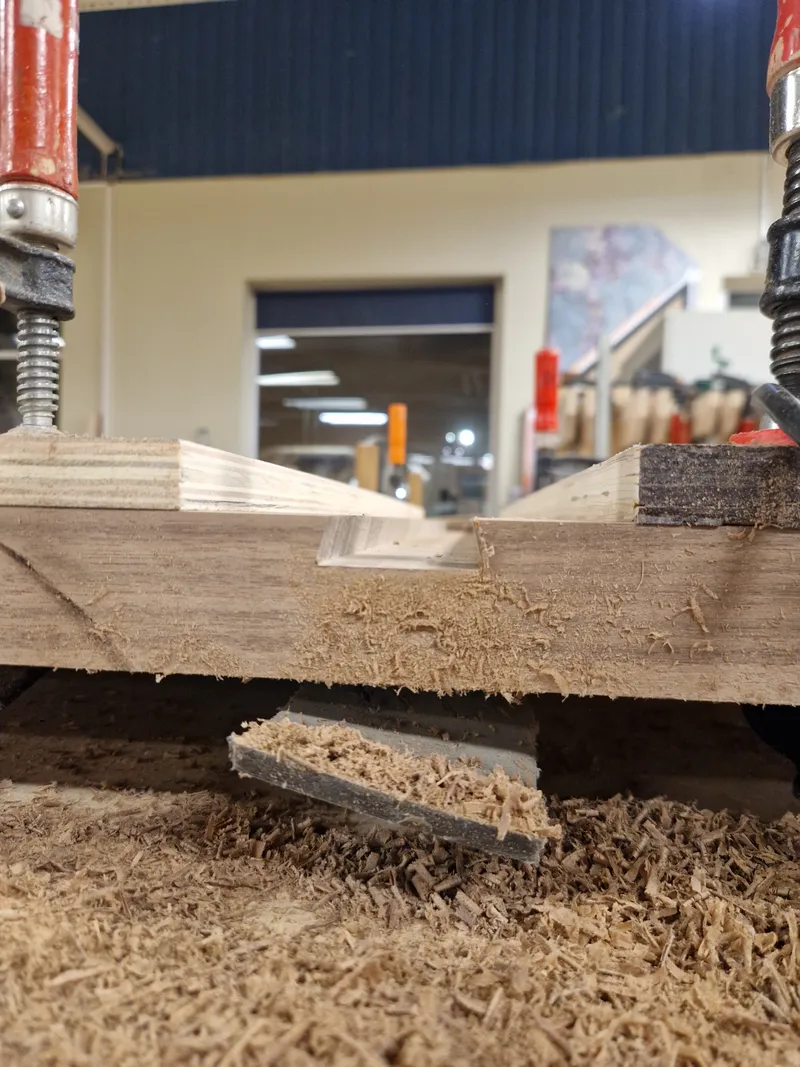
Used the bandsaw and a drill to create slots for the wedges and tension relief holes in the end of the slot. The core idea being that if something breaks then it will break in a controlled spot. Glued the pieces together, hammered in the wedges before the glue dried and quickly realised why it's critical to have all the wedges the same size and in the same depth - so that the wedge lines will be equal width. But I realised that after the wedges were hammered in so it will be yet another character-adding-feature to the project.


1 / 10
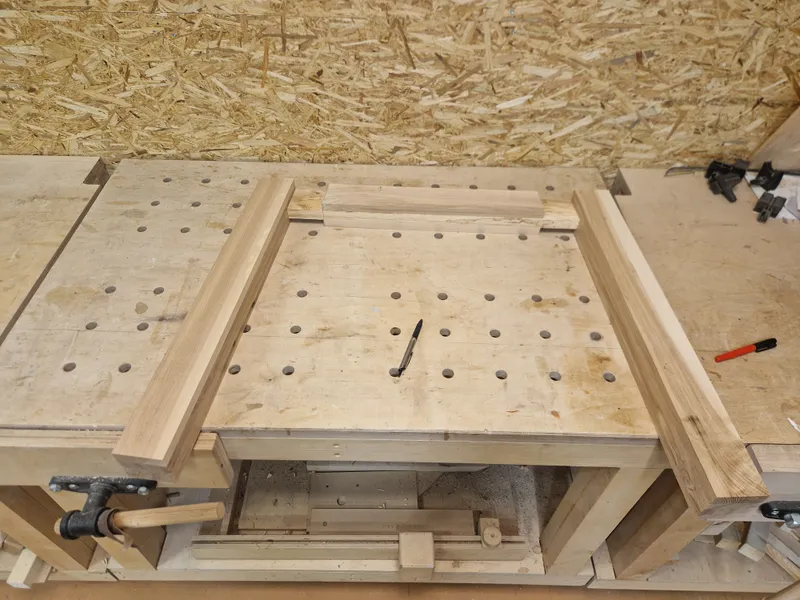
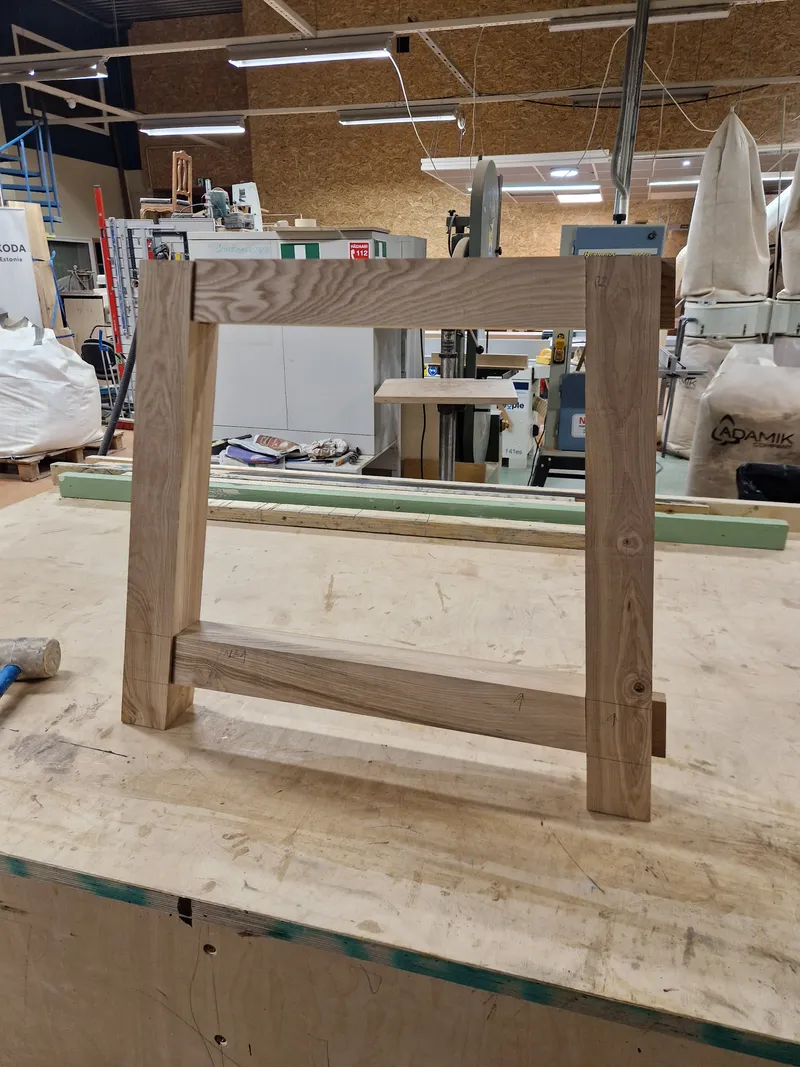
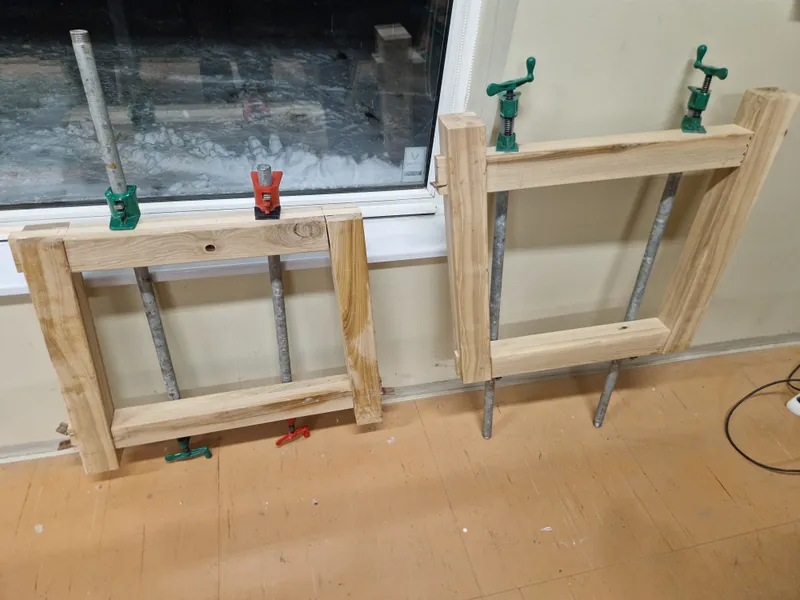
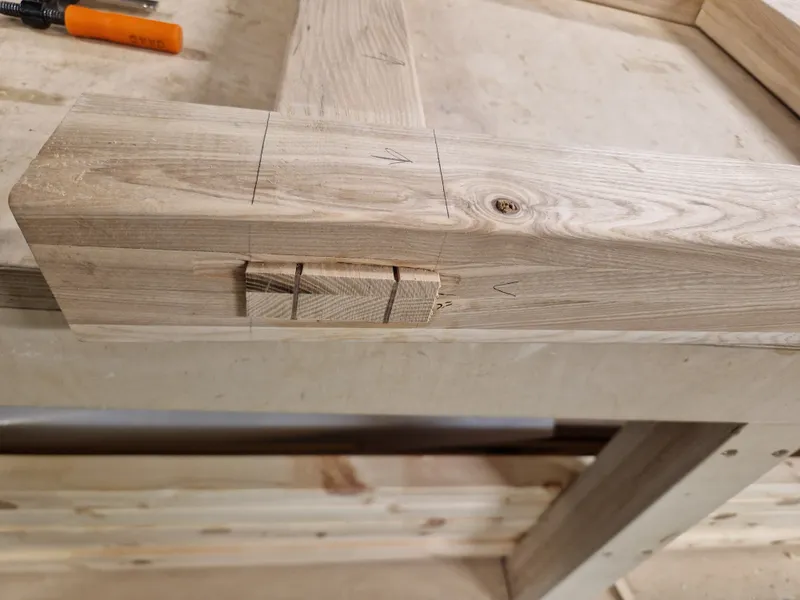
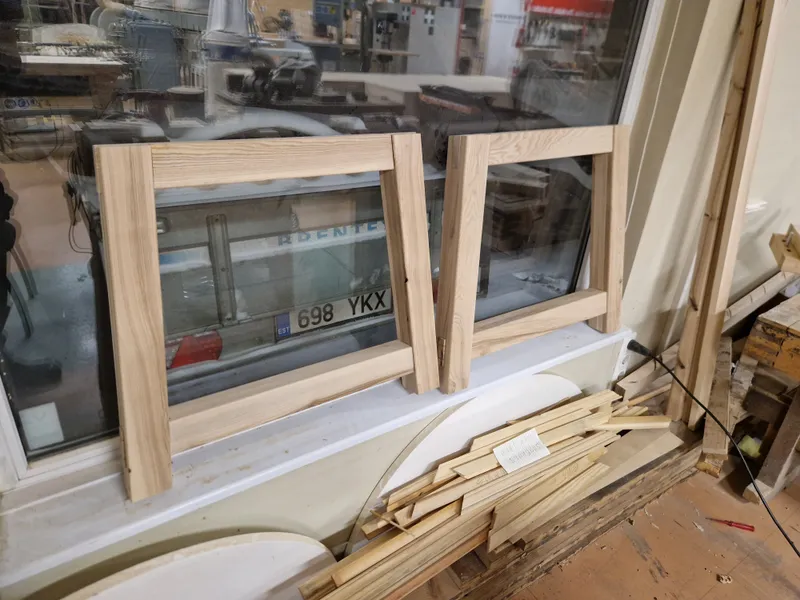
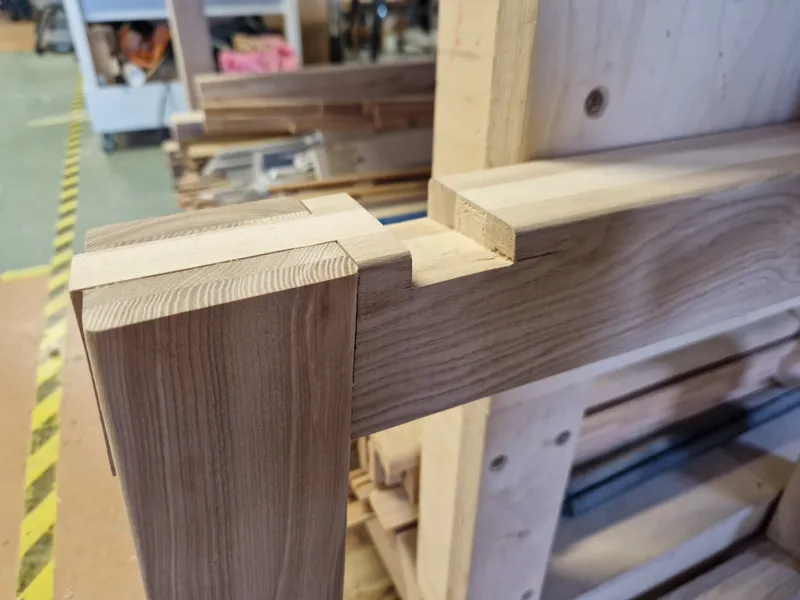
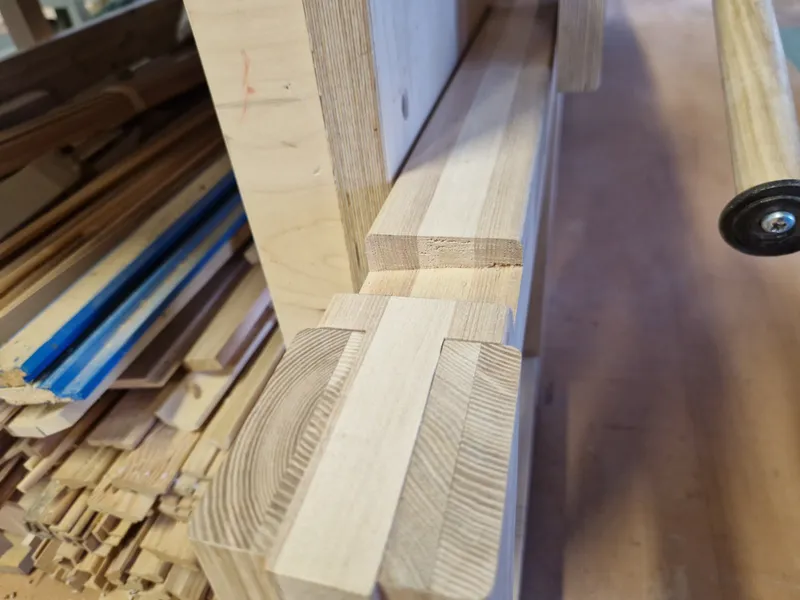
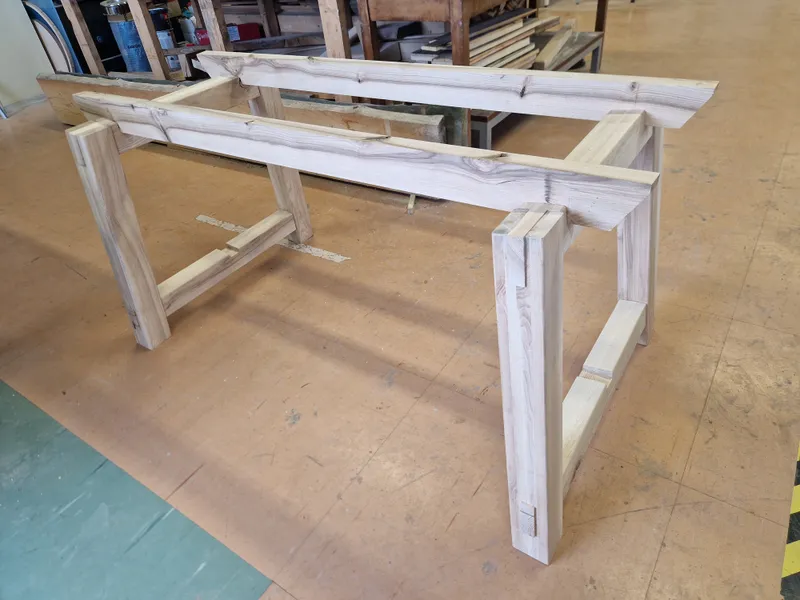
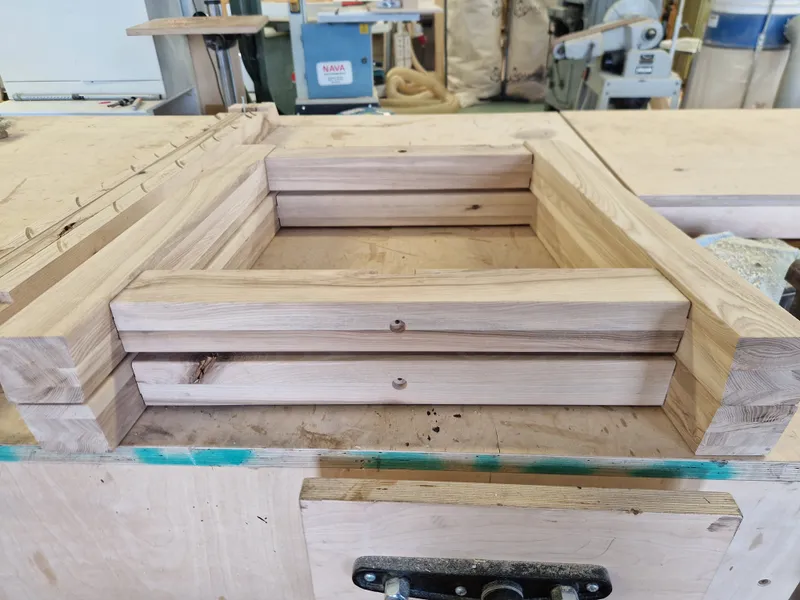
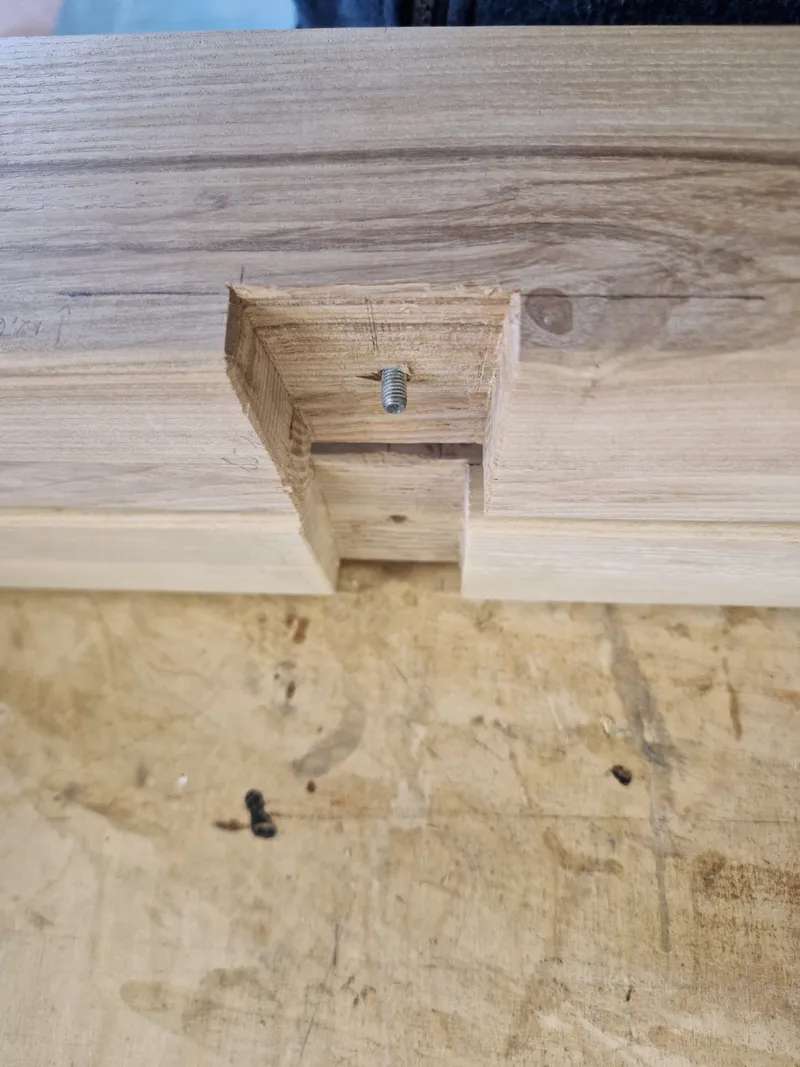
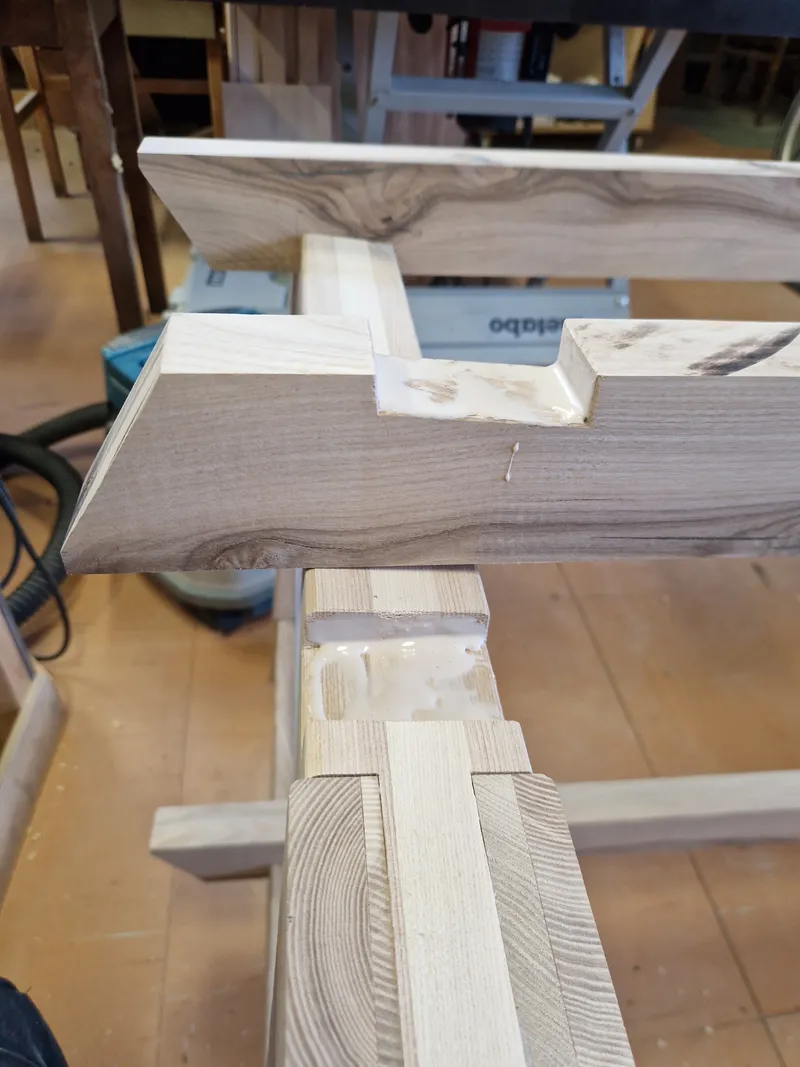
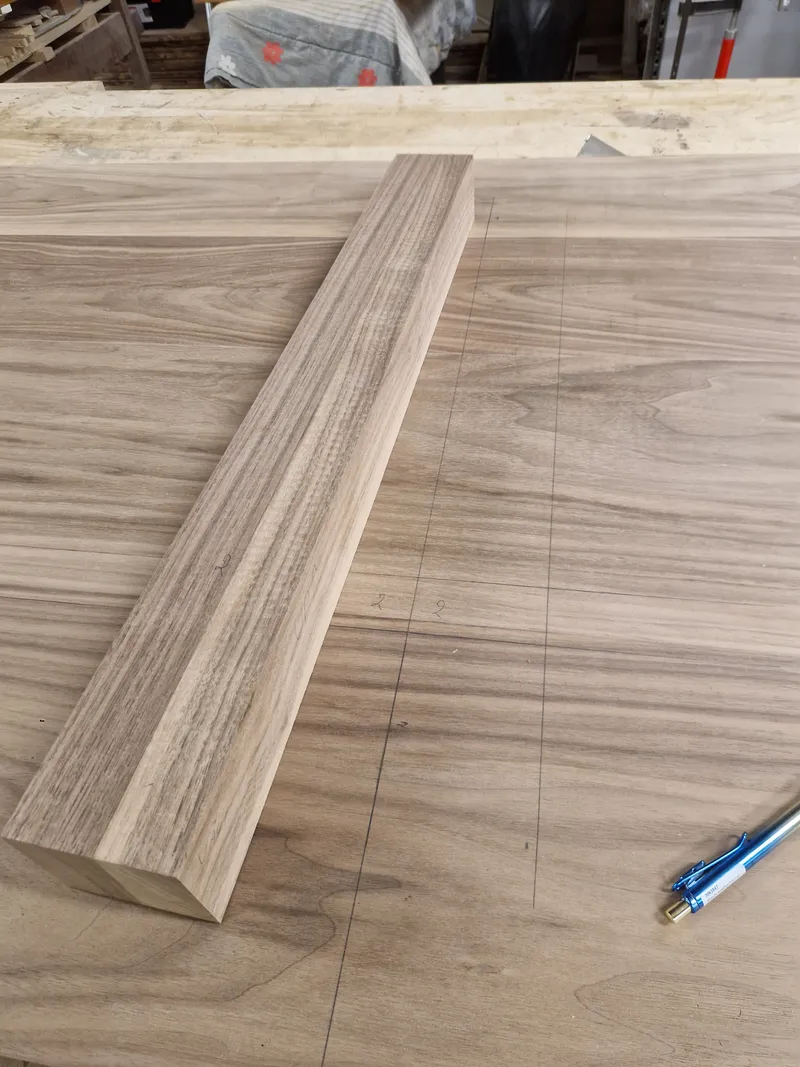
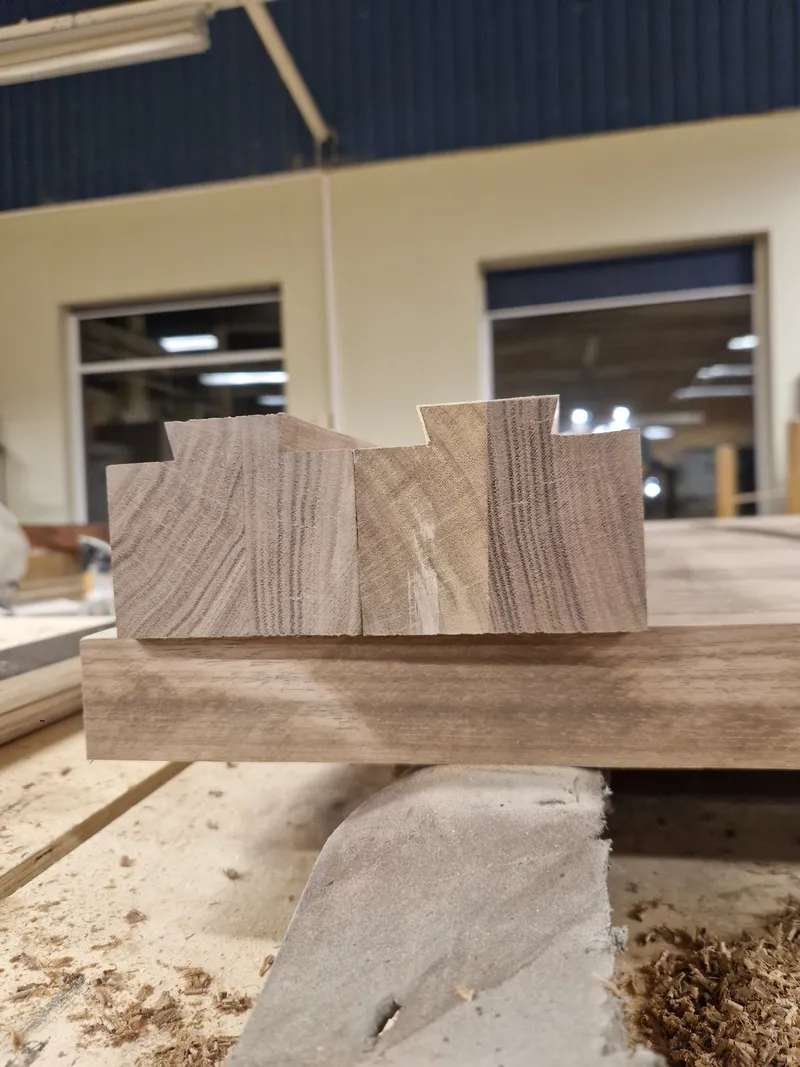
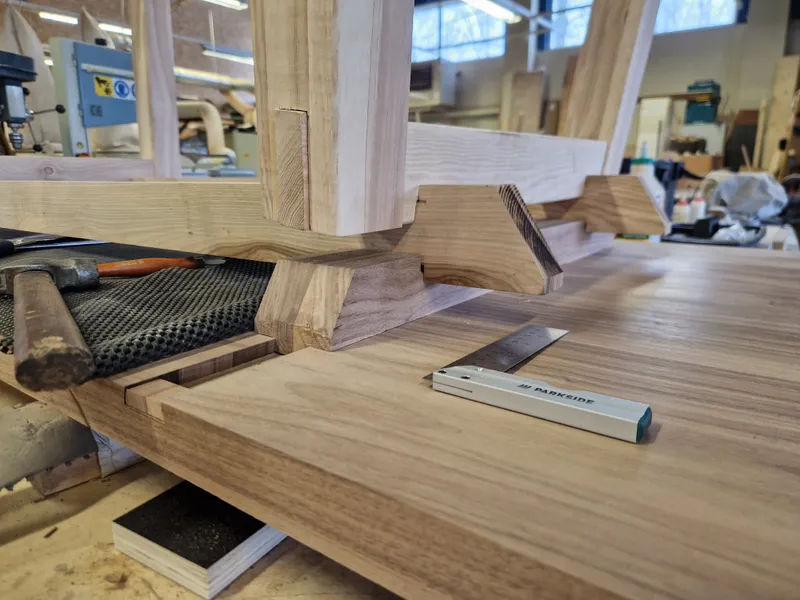
For attaching aprons (the horizontal pieces connecting the legs), I kept going with the traditional joinery and made cross lap (I think that's what they're called) joints to hold the aprons. Apron height matches the leg width, 75mm, and apron width is a modest 40mm, which I think looks beefy enough to hold the table together.
The only technical complexity here was that the cut had to be made in a 5 degree angle so that the apron would sit flat on the leg, parallel to the floor. Removed 1/4 in height from both the horizontal piece of the table leg and the apron.
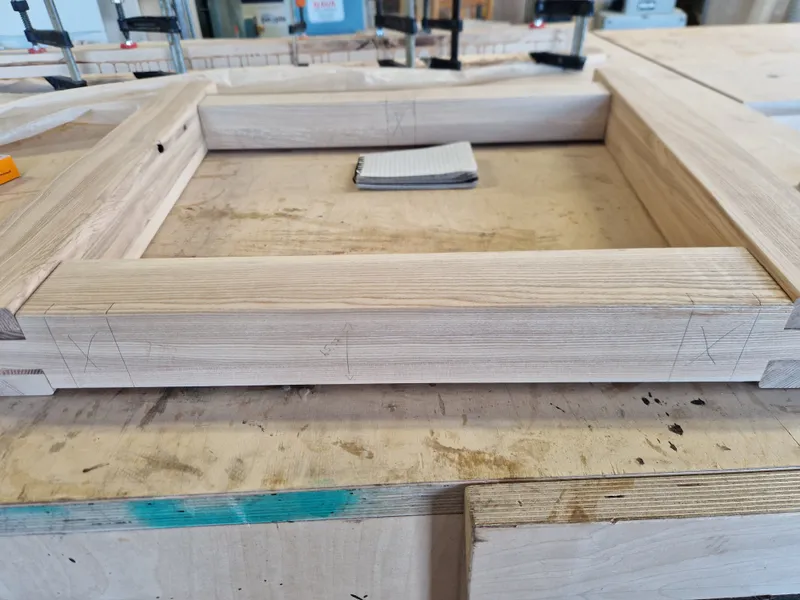
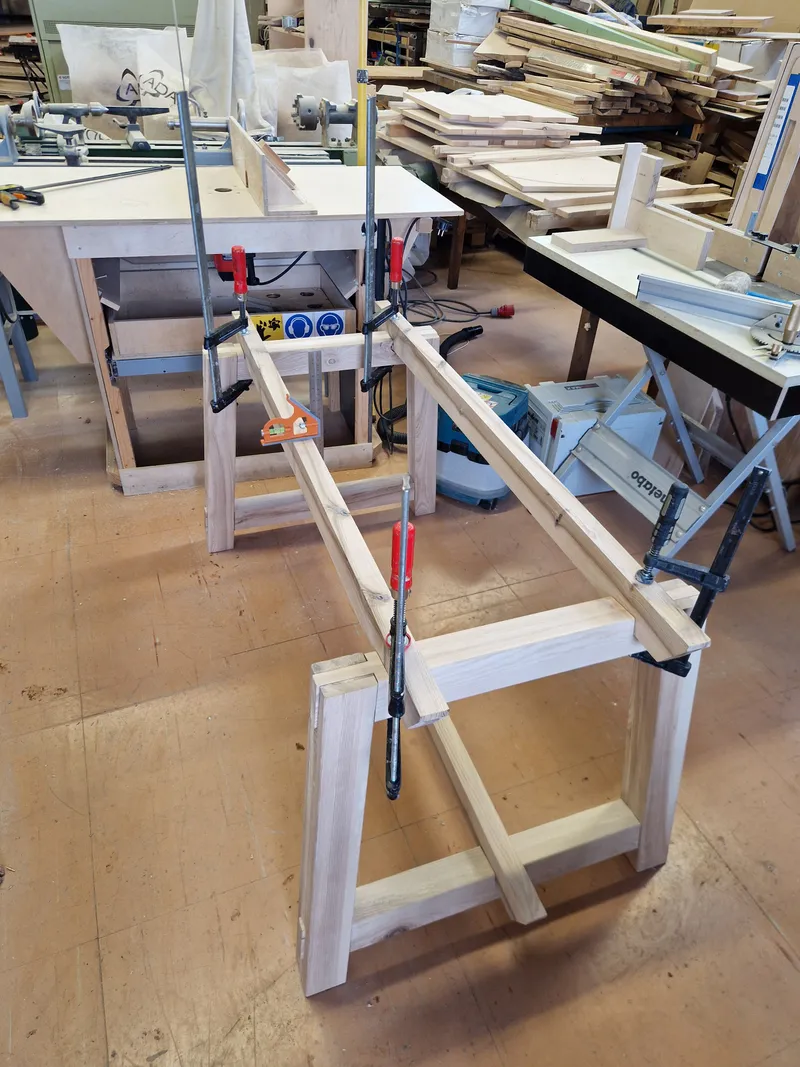
If the cuts were perfect then this joint would suffice without any glue nor screws, but obviously I did not reach perfection and decided to lock in the joints on the top two aprons with some wood glue which also helps keep the table legs steady and reduce wobble. The bottom apron is attached with bolts and threaded inserts so the table could be easily transported once it's time to get it home.

1 / 18
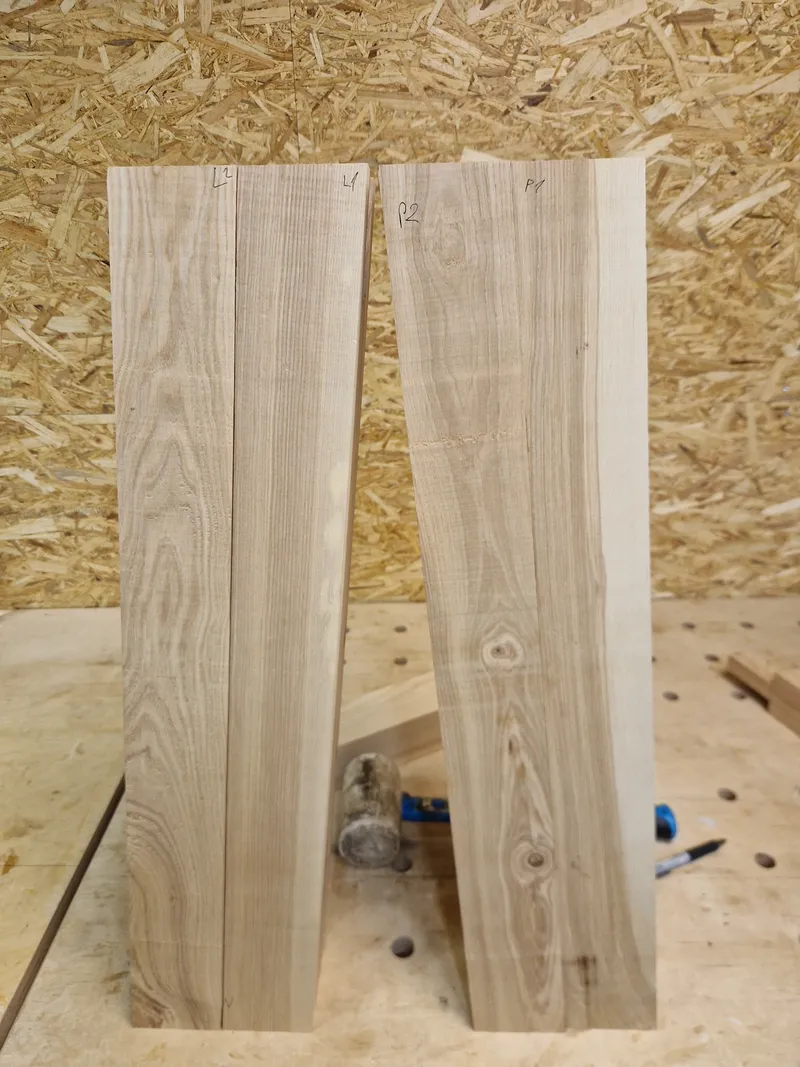
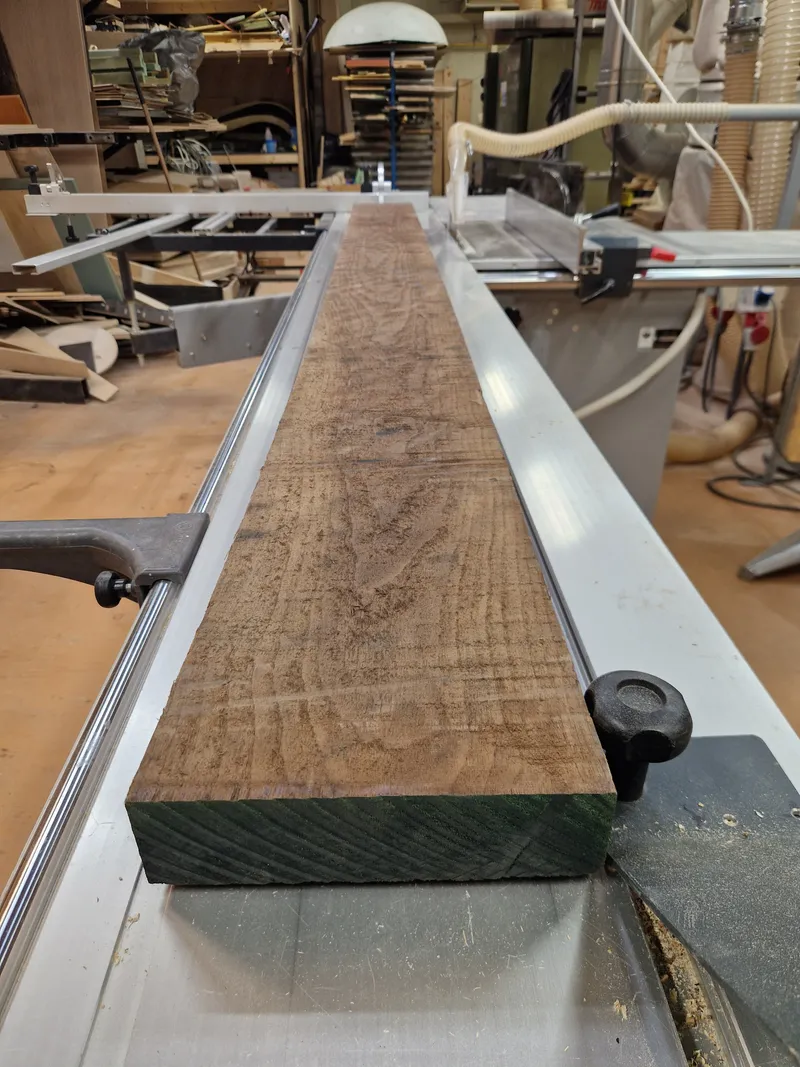
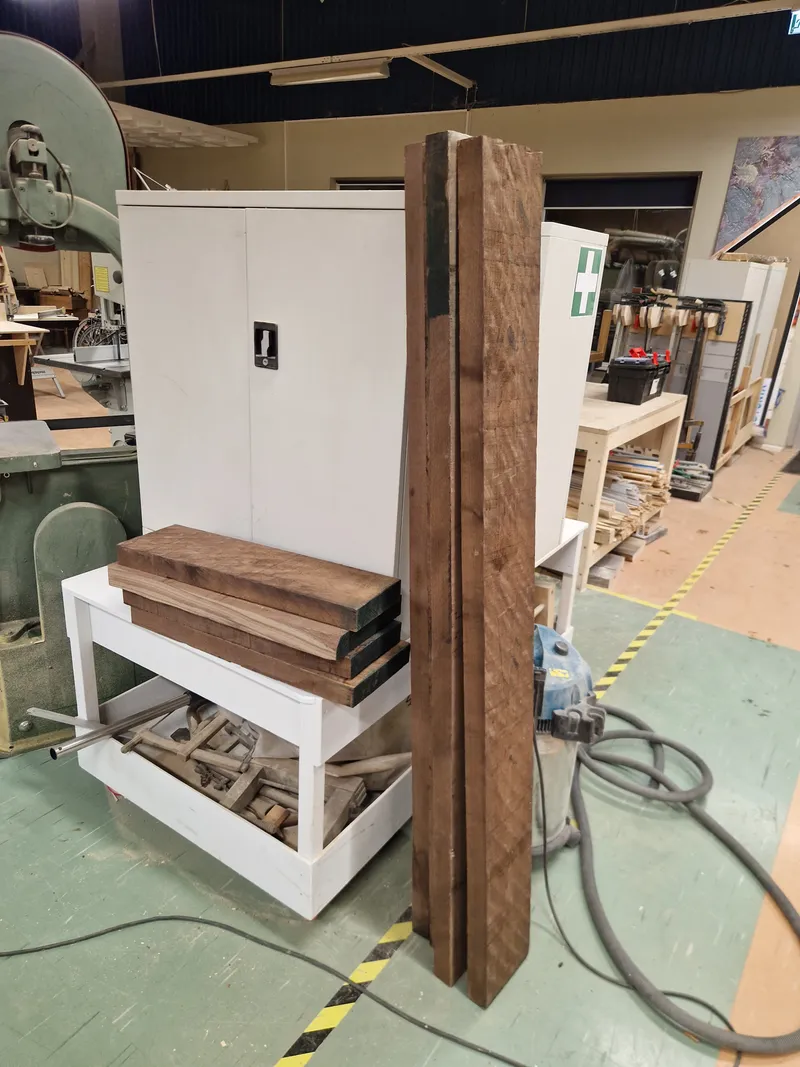
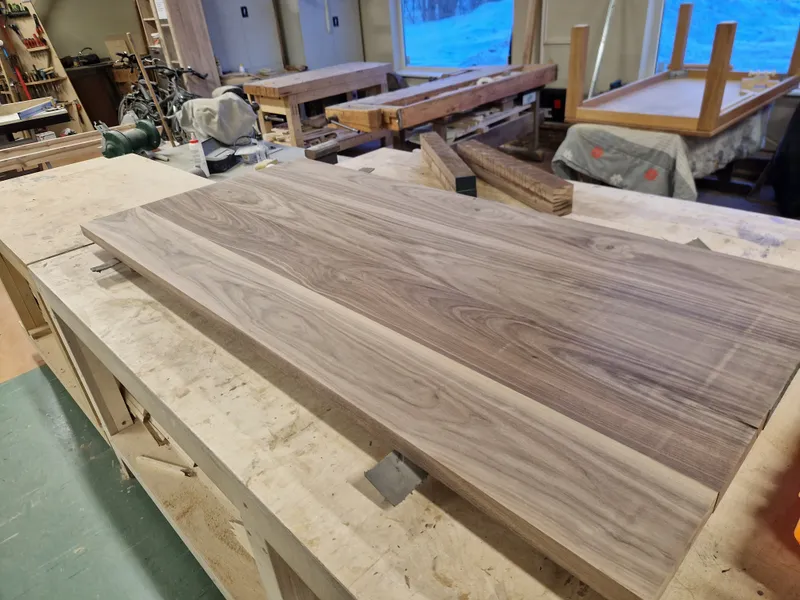
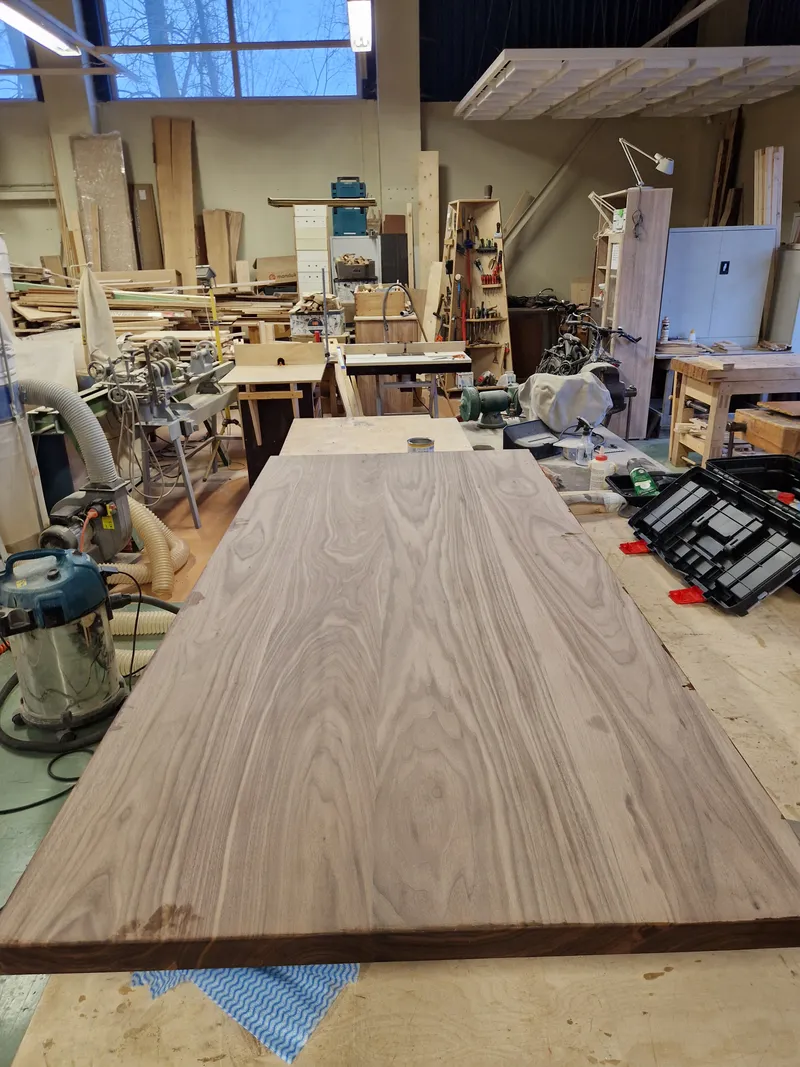
After a month long wait, finally got my hands on some walnut and did the usual process - flattened one side, reduced some material on the other side and let the planks sit in the workshop for 3 days to release inner tensions and acclimate to the moisture level in the workshop.
Since the plan was to attach sliding dovetail battens at the bottom of the tabletop, it was critical to get the material as stable as possible before moving on to the next steps because any kind of bend in the tabletop would turn the sliding of the battens into a massive headache. In this scenario it could mean that doing nothing for 3 days would save a lot of time down the line so it's better to practice some patience.
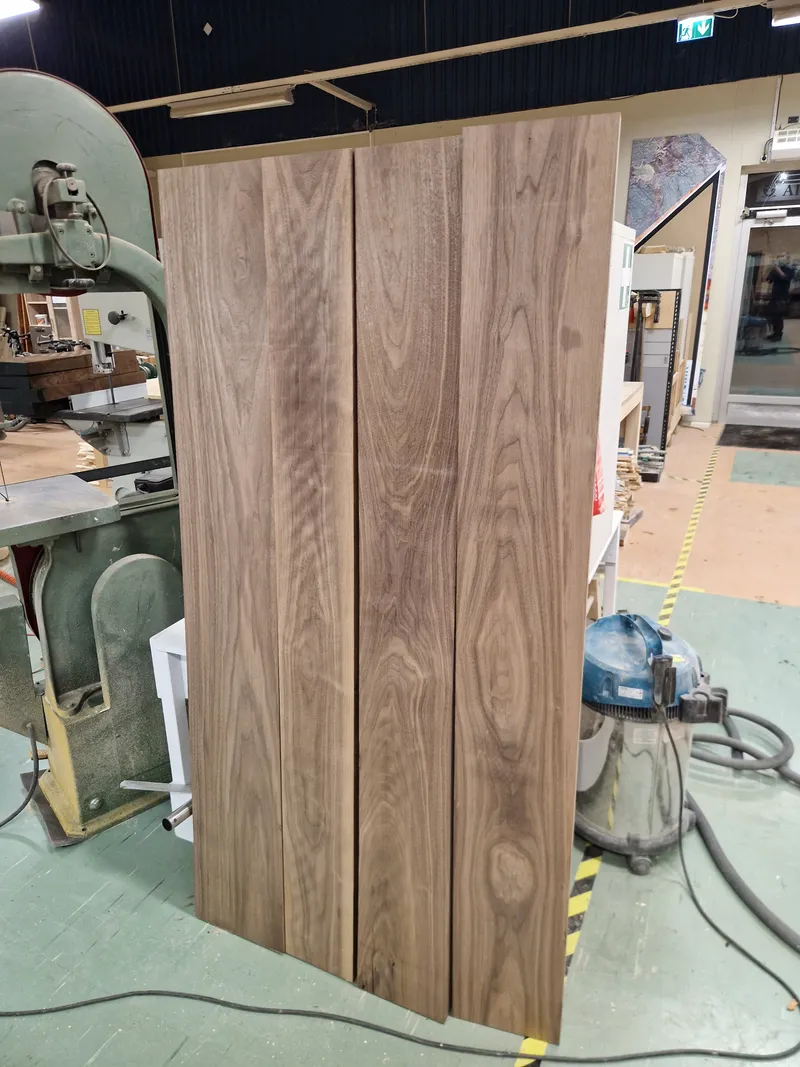
Once the painful process of being patient was done, flattened the second side. Found an alignment of the boards that I liked and used the in-out method for ripping the boards straight.

1 / 6
By far the most stressful part of the project that was sitting in the back of my mind for the whole build leading up to this. With almost everything else, in case of a catastrophic blunder, replacing the element is quite straightforward and doable, with just some minor time waste. With the tabletop however, it is obviously not as simple to replace the top. Luckily everything went quite smooth and I'm extremely happy with the result.
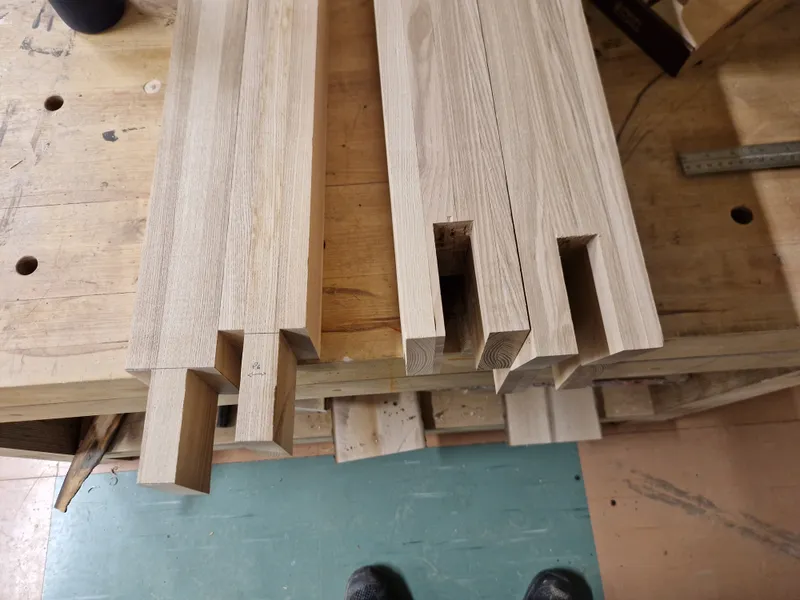
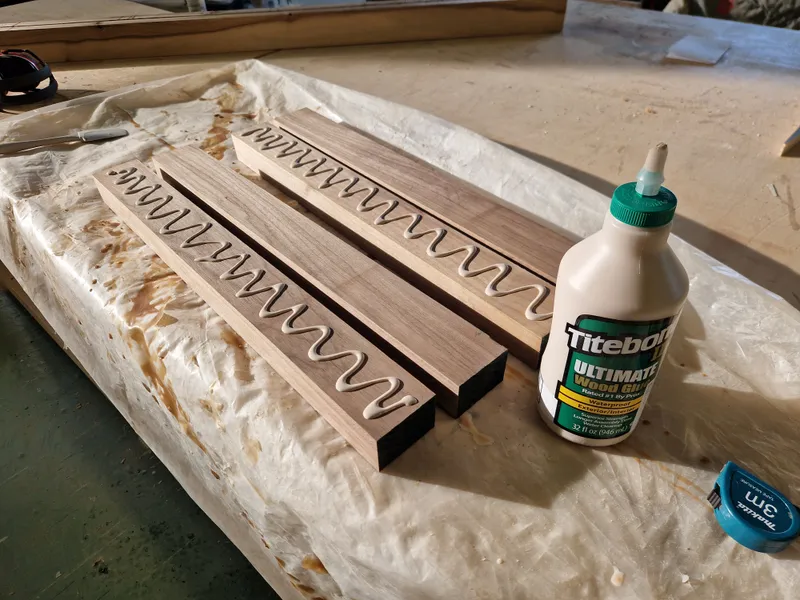
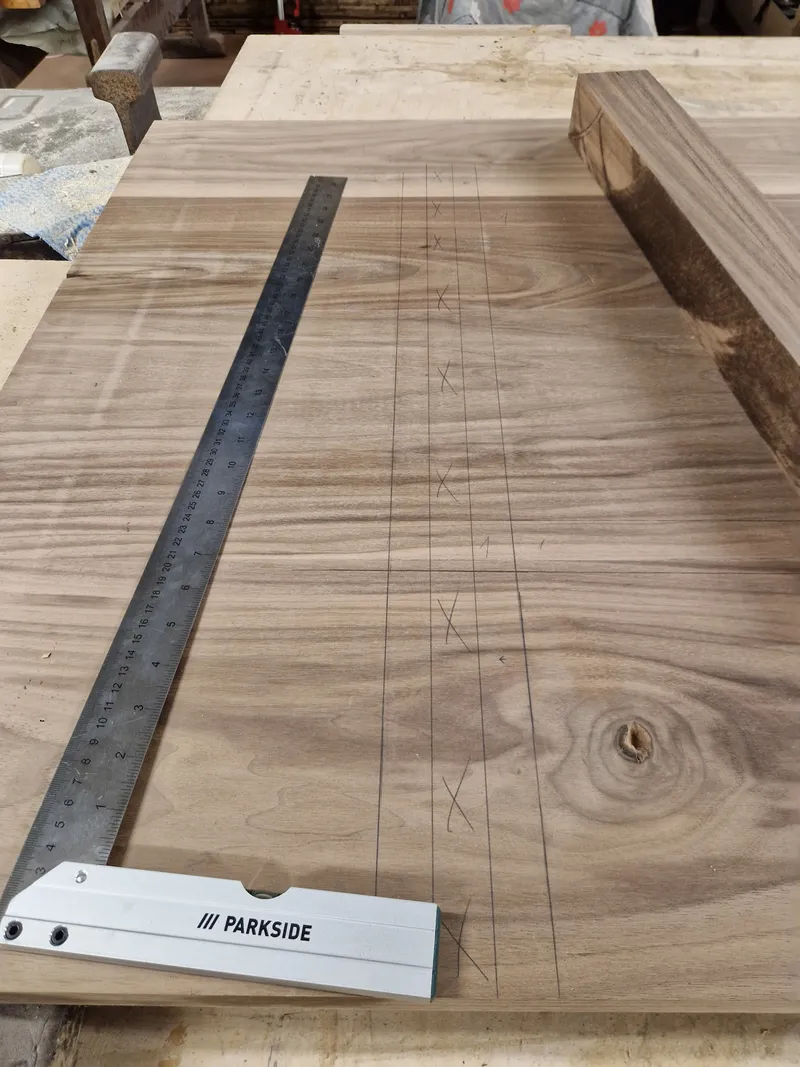
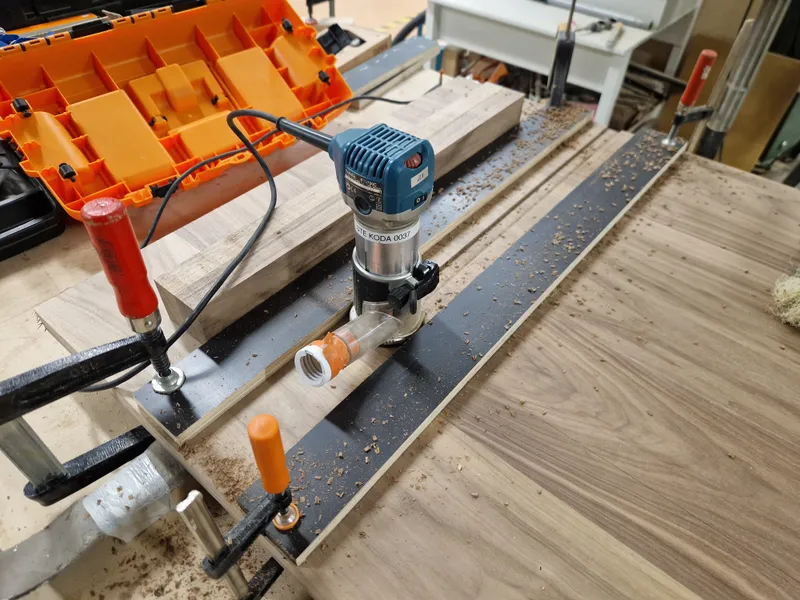
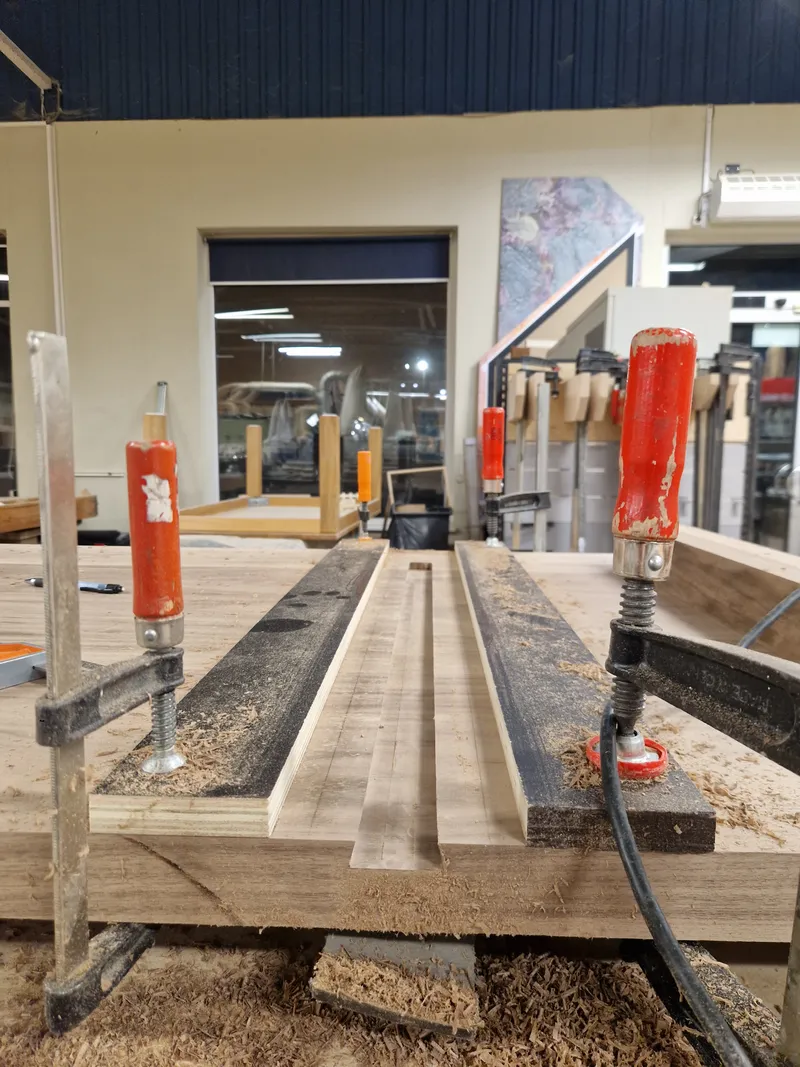
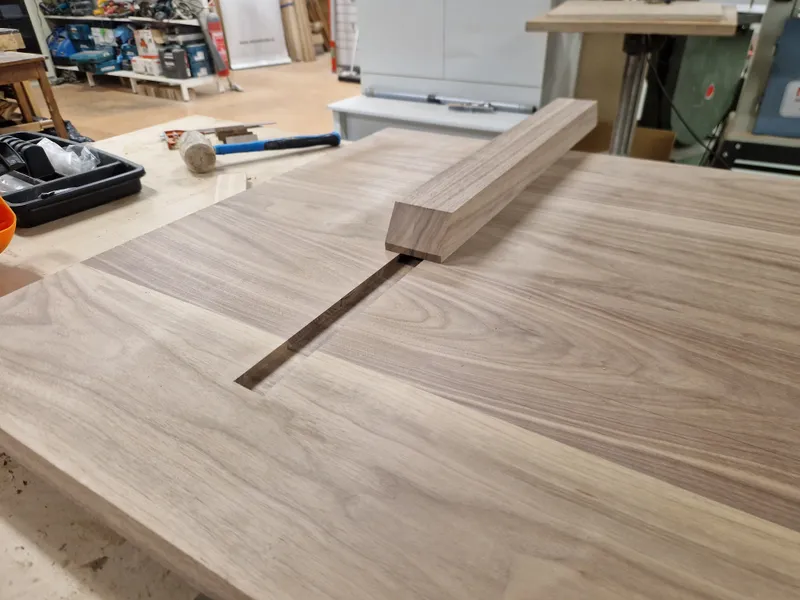
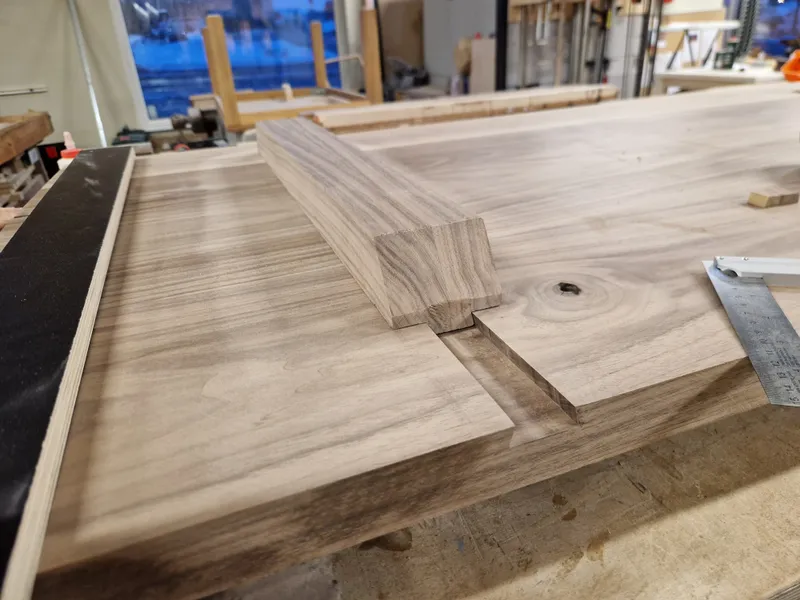
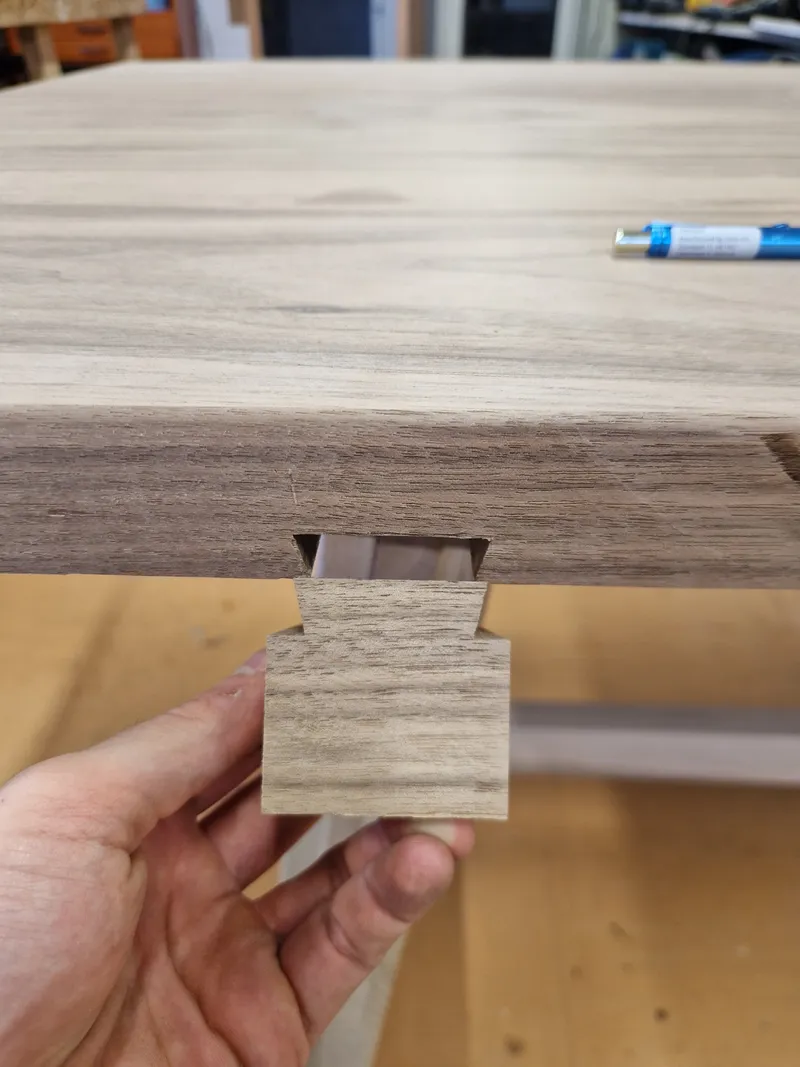
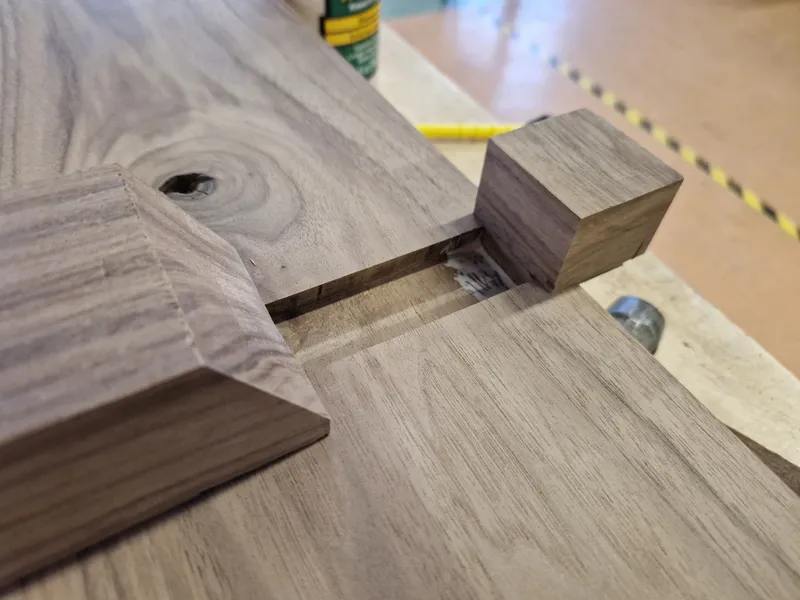
Started off by cutting the dovetail grooves in the tabletop with a router. After ensuring the groove was perfectly straight, started cutting matching dovetail joints on the battens on a router table. Nothing complicated, just need to make sure not to cut too much at once. As with everything in woodworking, it's better to slowly creep up on the correct dimensions instead of relying on measurements and attempting to cut it perfect immediately.
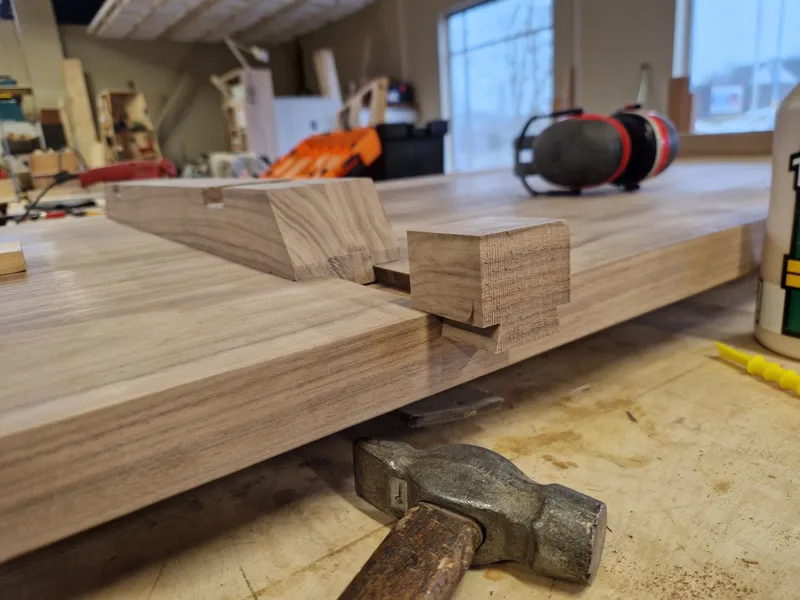
Cut the angles on the battens and hammered them in. The first batten was a bit tighter than needed, took about 150 hammer hits to get it in place, while the second one took around 30 hits. So pro tip here is to cut the dovetail (the part sliding into the table) in a size that allows half the batten to go in with no resistance and then start tapping it in, if it shows resistance from the beginning then it's a bit too tight and you risk breaking either the batten or the table.
1 / 11
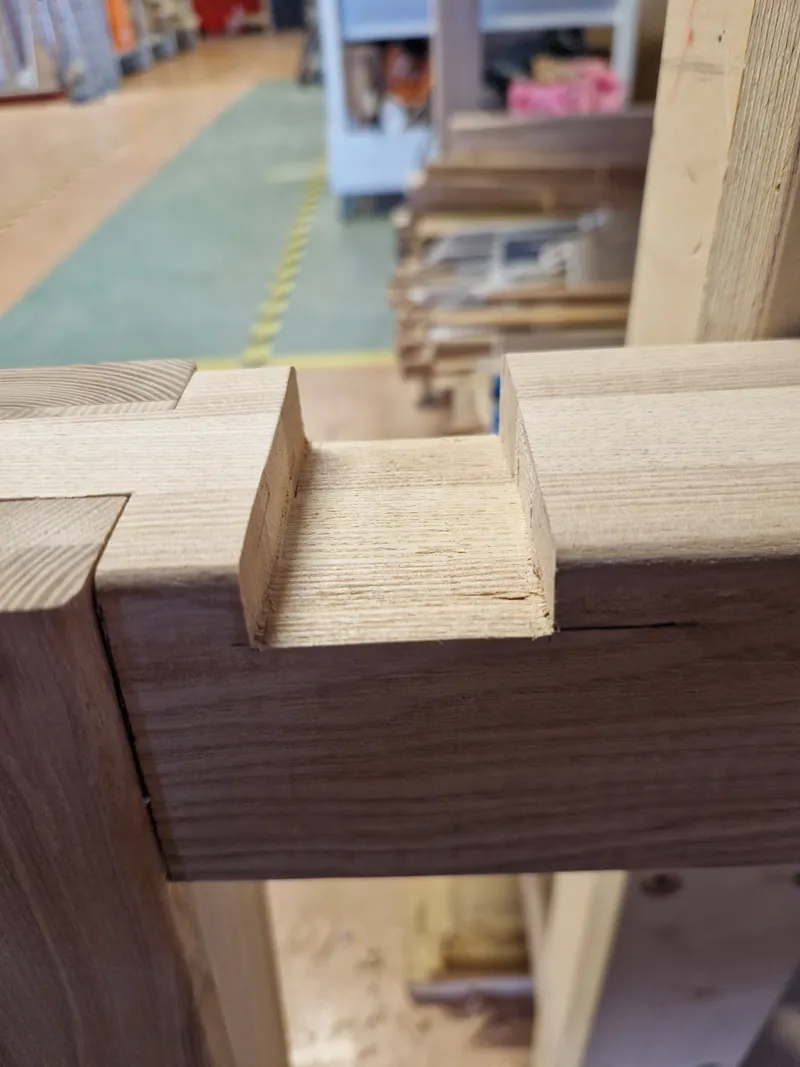
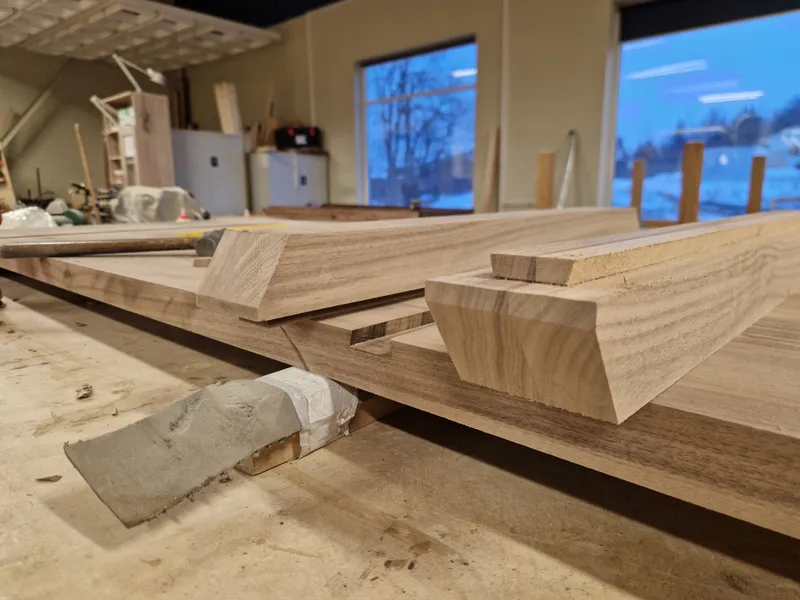
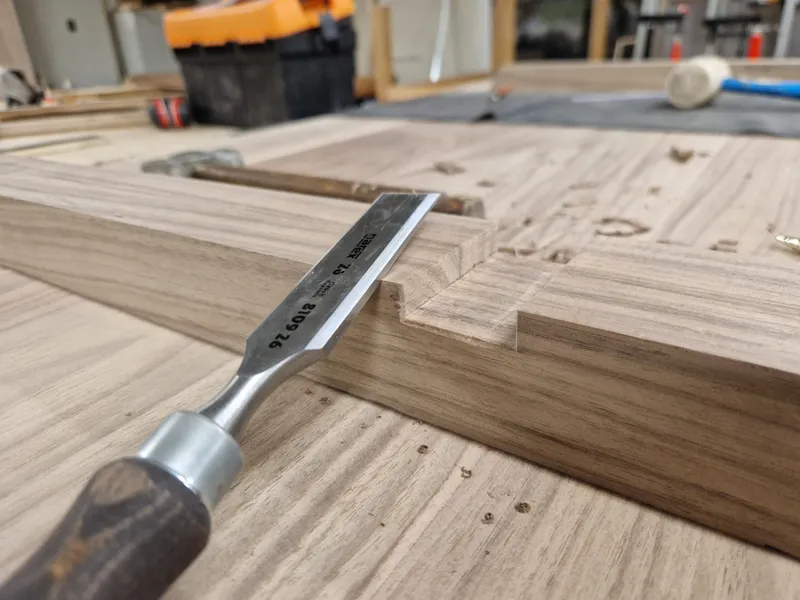
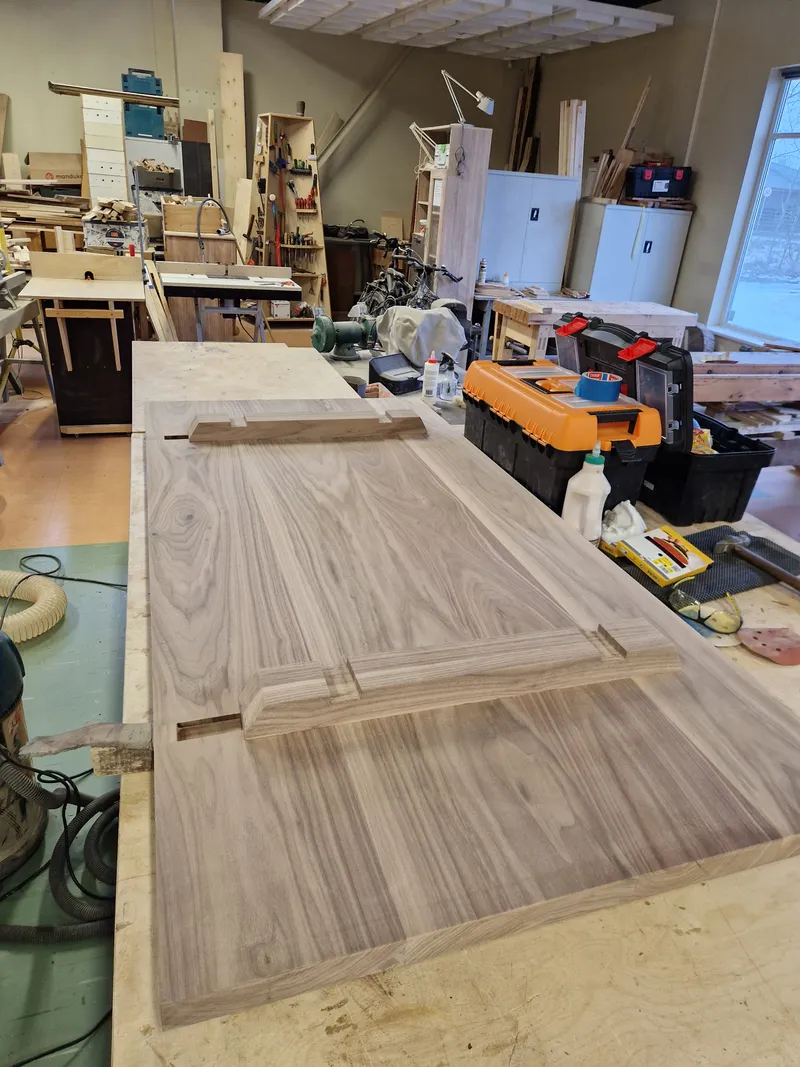
A relatively simple step of removing material for the cross-lap joint between the tabletop battens and frame aprons. Since these cuts had no angle-shenanigans then it was a quick and simple process of sawing the guide lines and chiseling the joint. It was nice to do something simple for a change of pace.
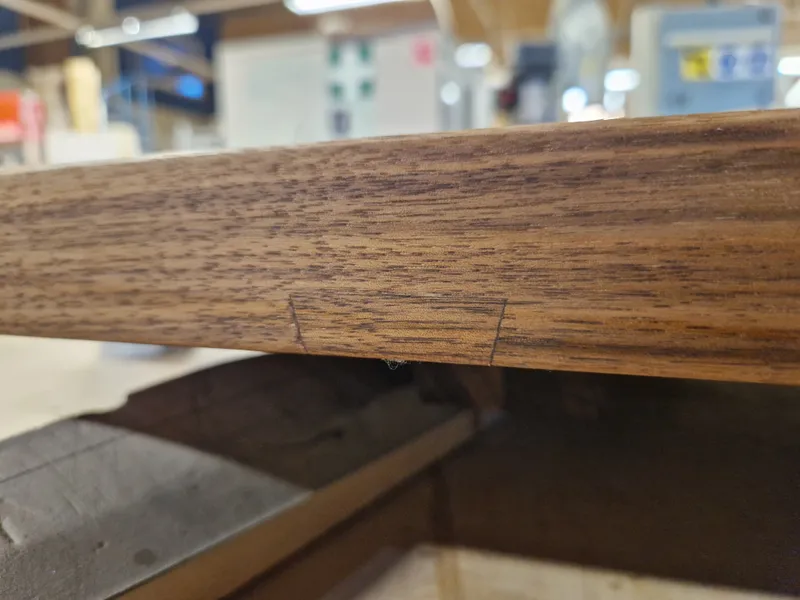
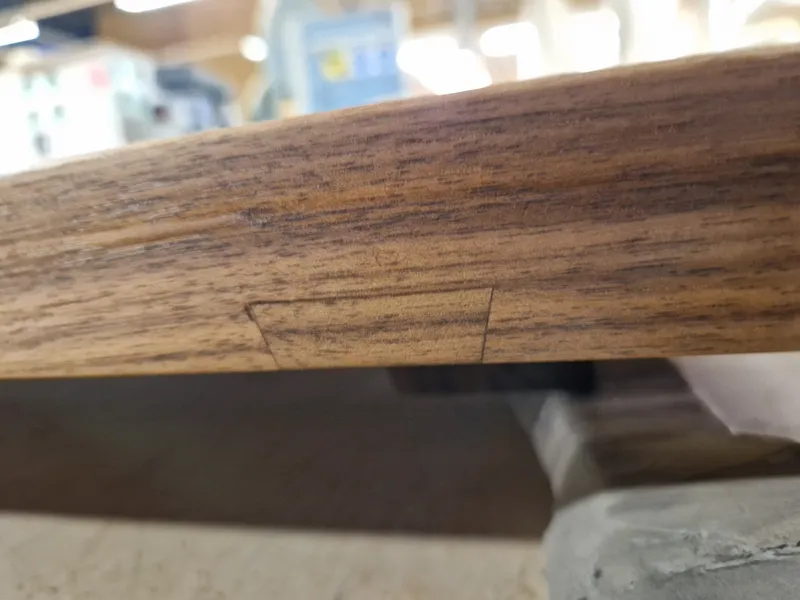
Cut dovetail plugs to cover the dovetail groove at the edge of the table. For future reference, it's much simpler to do this in the previous step when the machines are already configured to this exact width, rather than trying to get the measurements right for the second time.

1 / 11
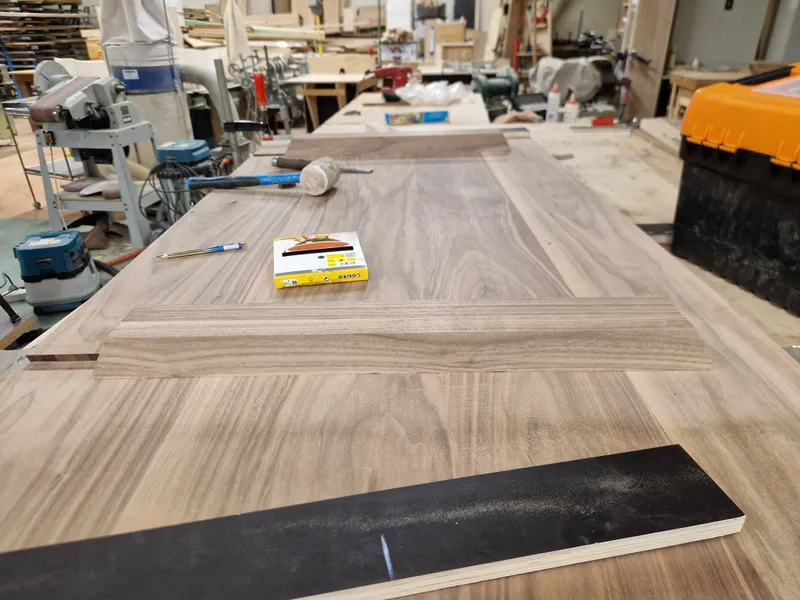
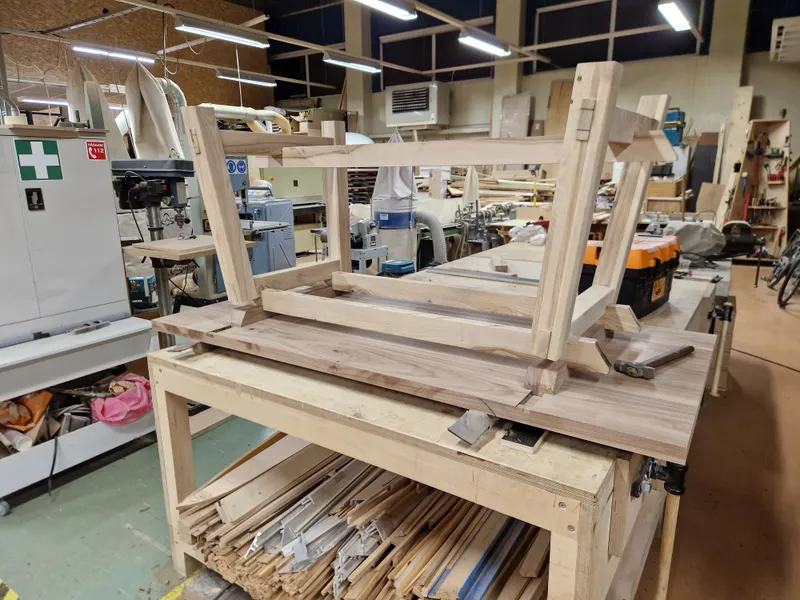
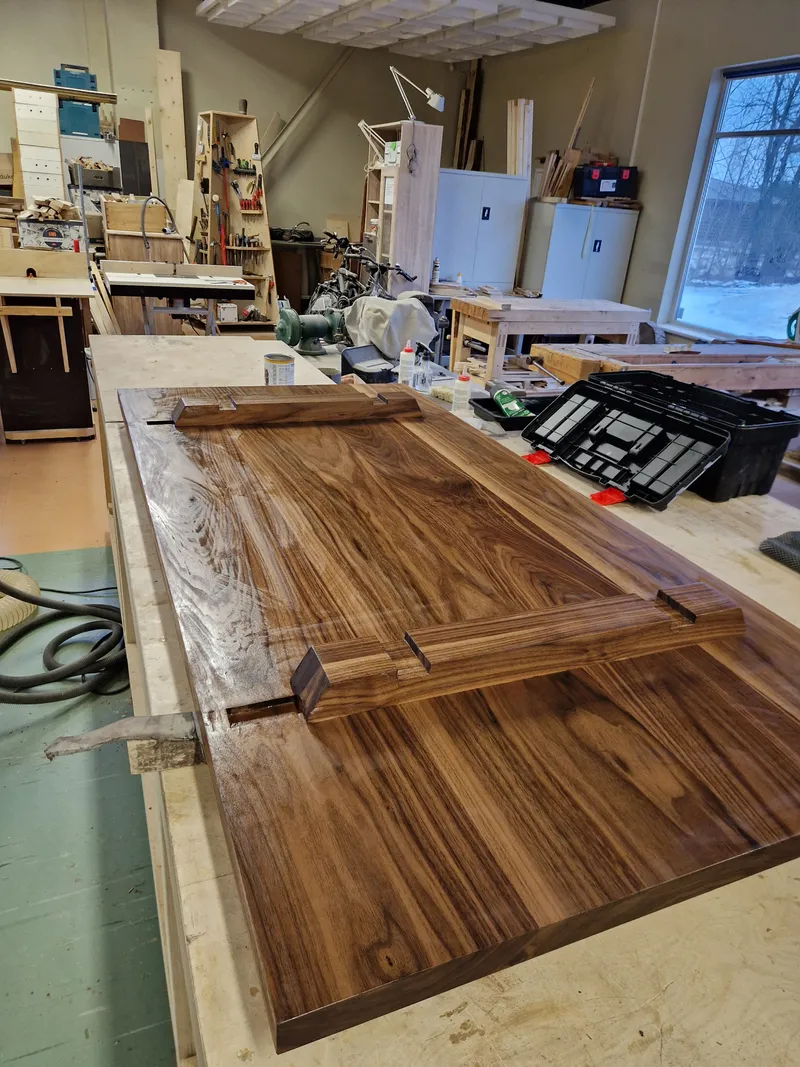
My initial plan was to use threaded inserts for attaching the tabletop to the frame. In fear of having to drill too much of the material away, I changed my plan to simply gluing the tabletop to the frame and accepting that transporting the table will be a nightmare but doable. Finally, after a dry-fit of the assembly, I realised the joints between the frame and tabletop were so tight, that alongside the sheer weight of the tabletop, there really was no need for any kind of extra attachments at all, because getting the tabletop off the frame after the dry-fit was surprisingly difficult.
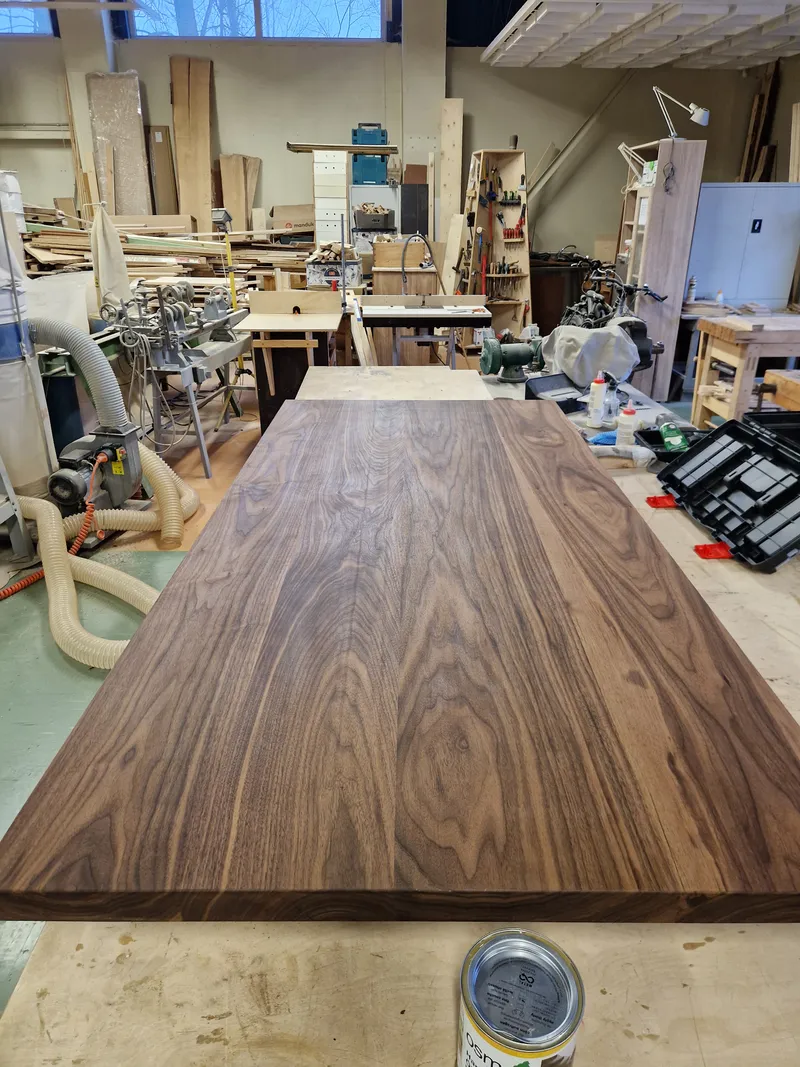
I knew that the "grain pop" when oiling walnut is massive but I was not prepared for the absolutely insane change in tone that a *CLEAR* coat of oil does on walnut, where the gray-ashy brown turns into a beautiful dark rich chocolate brown.
1 / 6