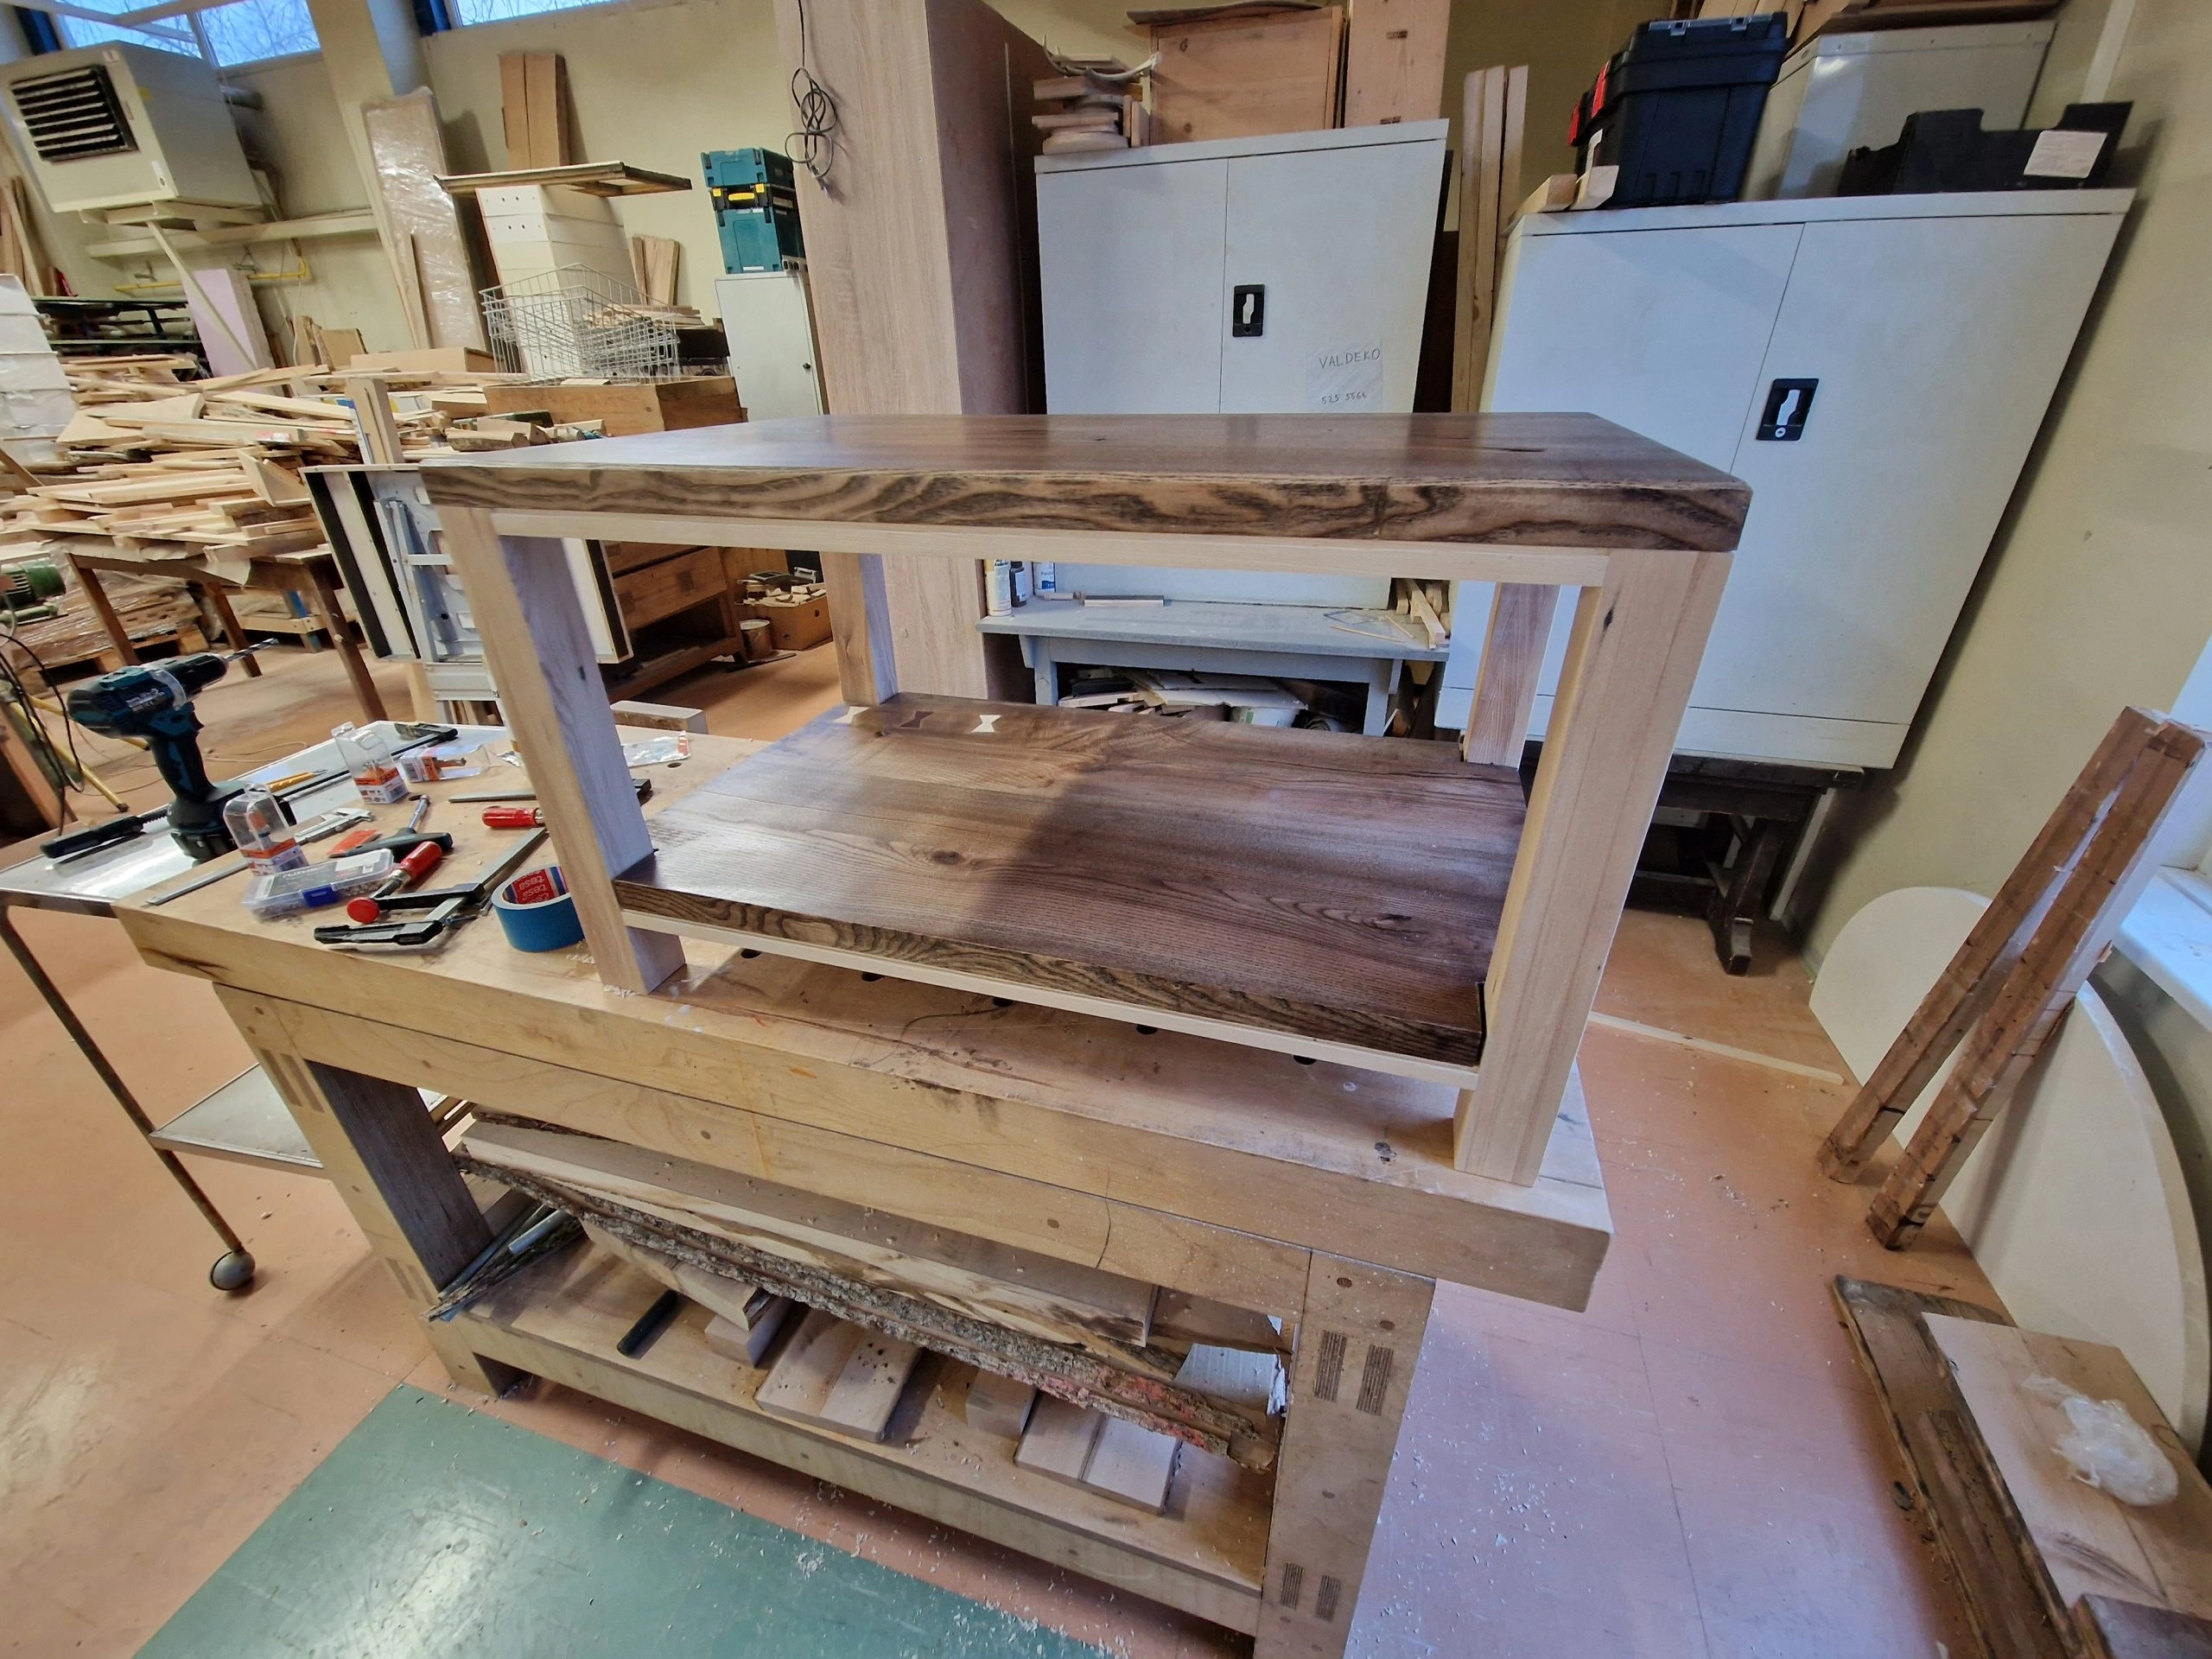
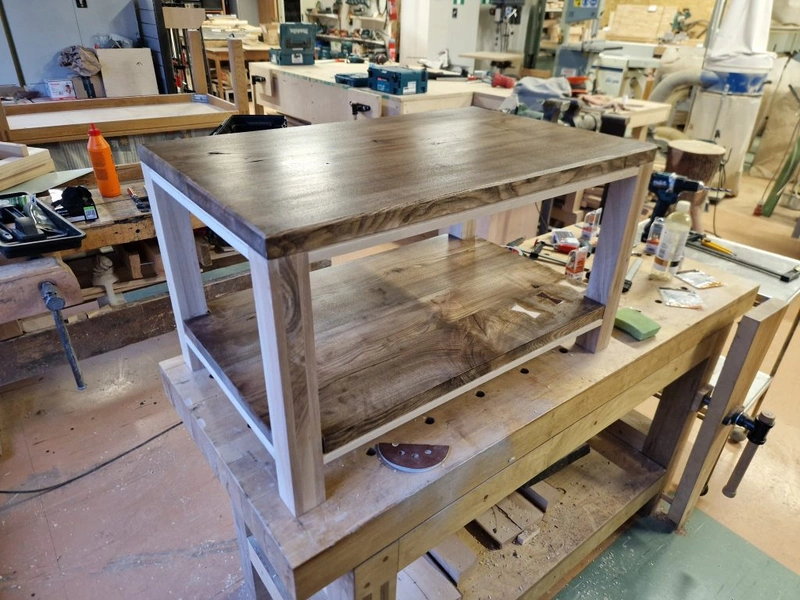
Coffee Table
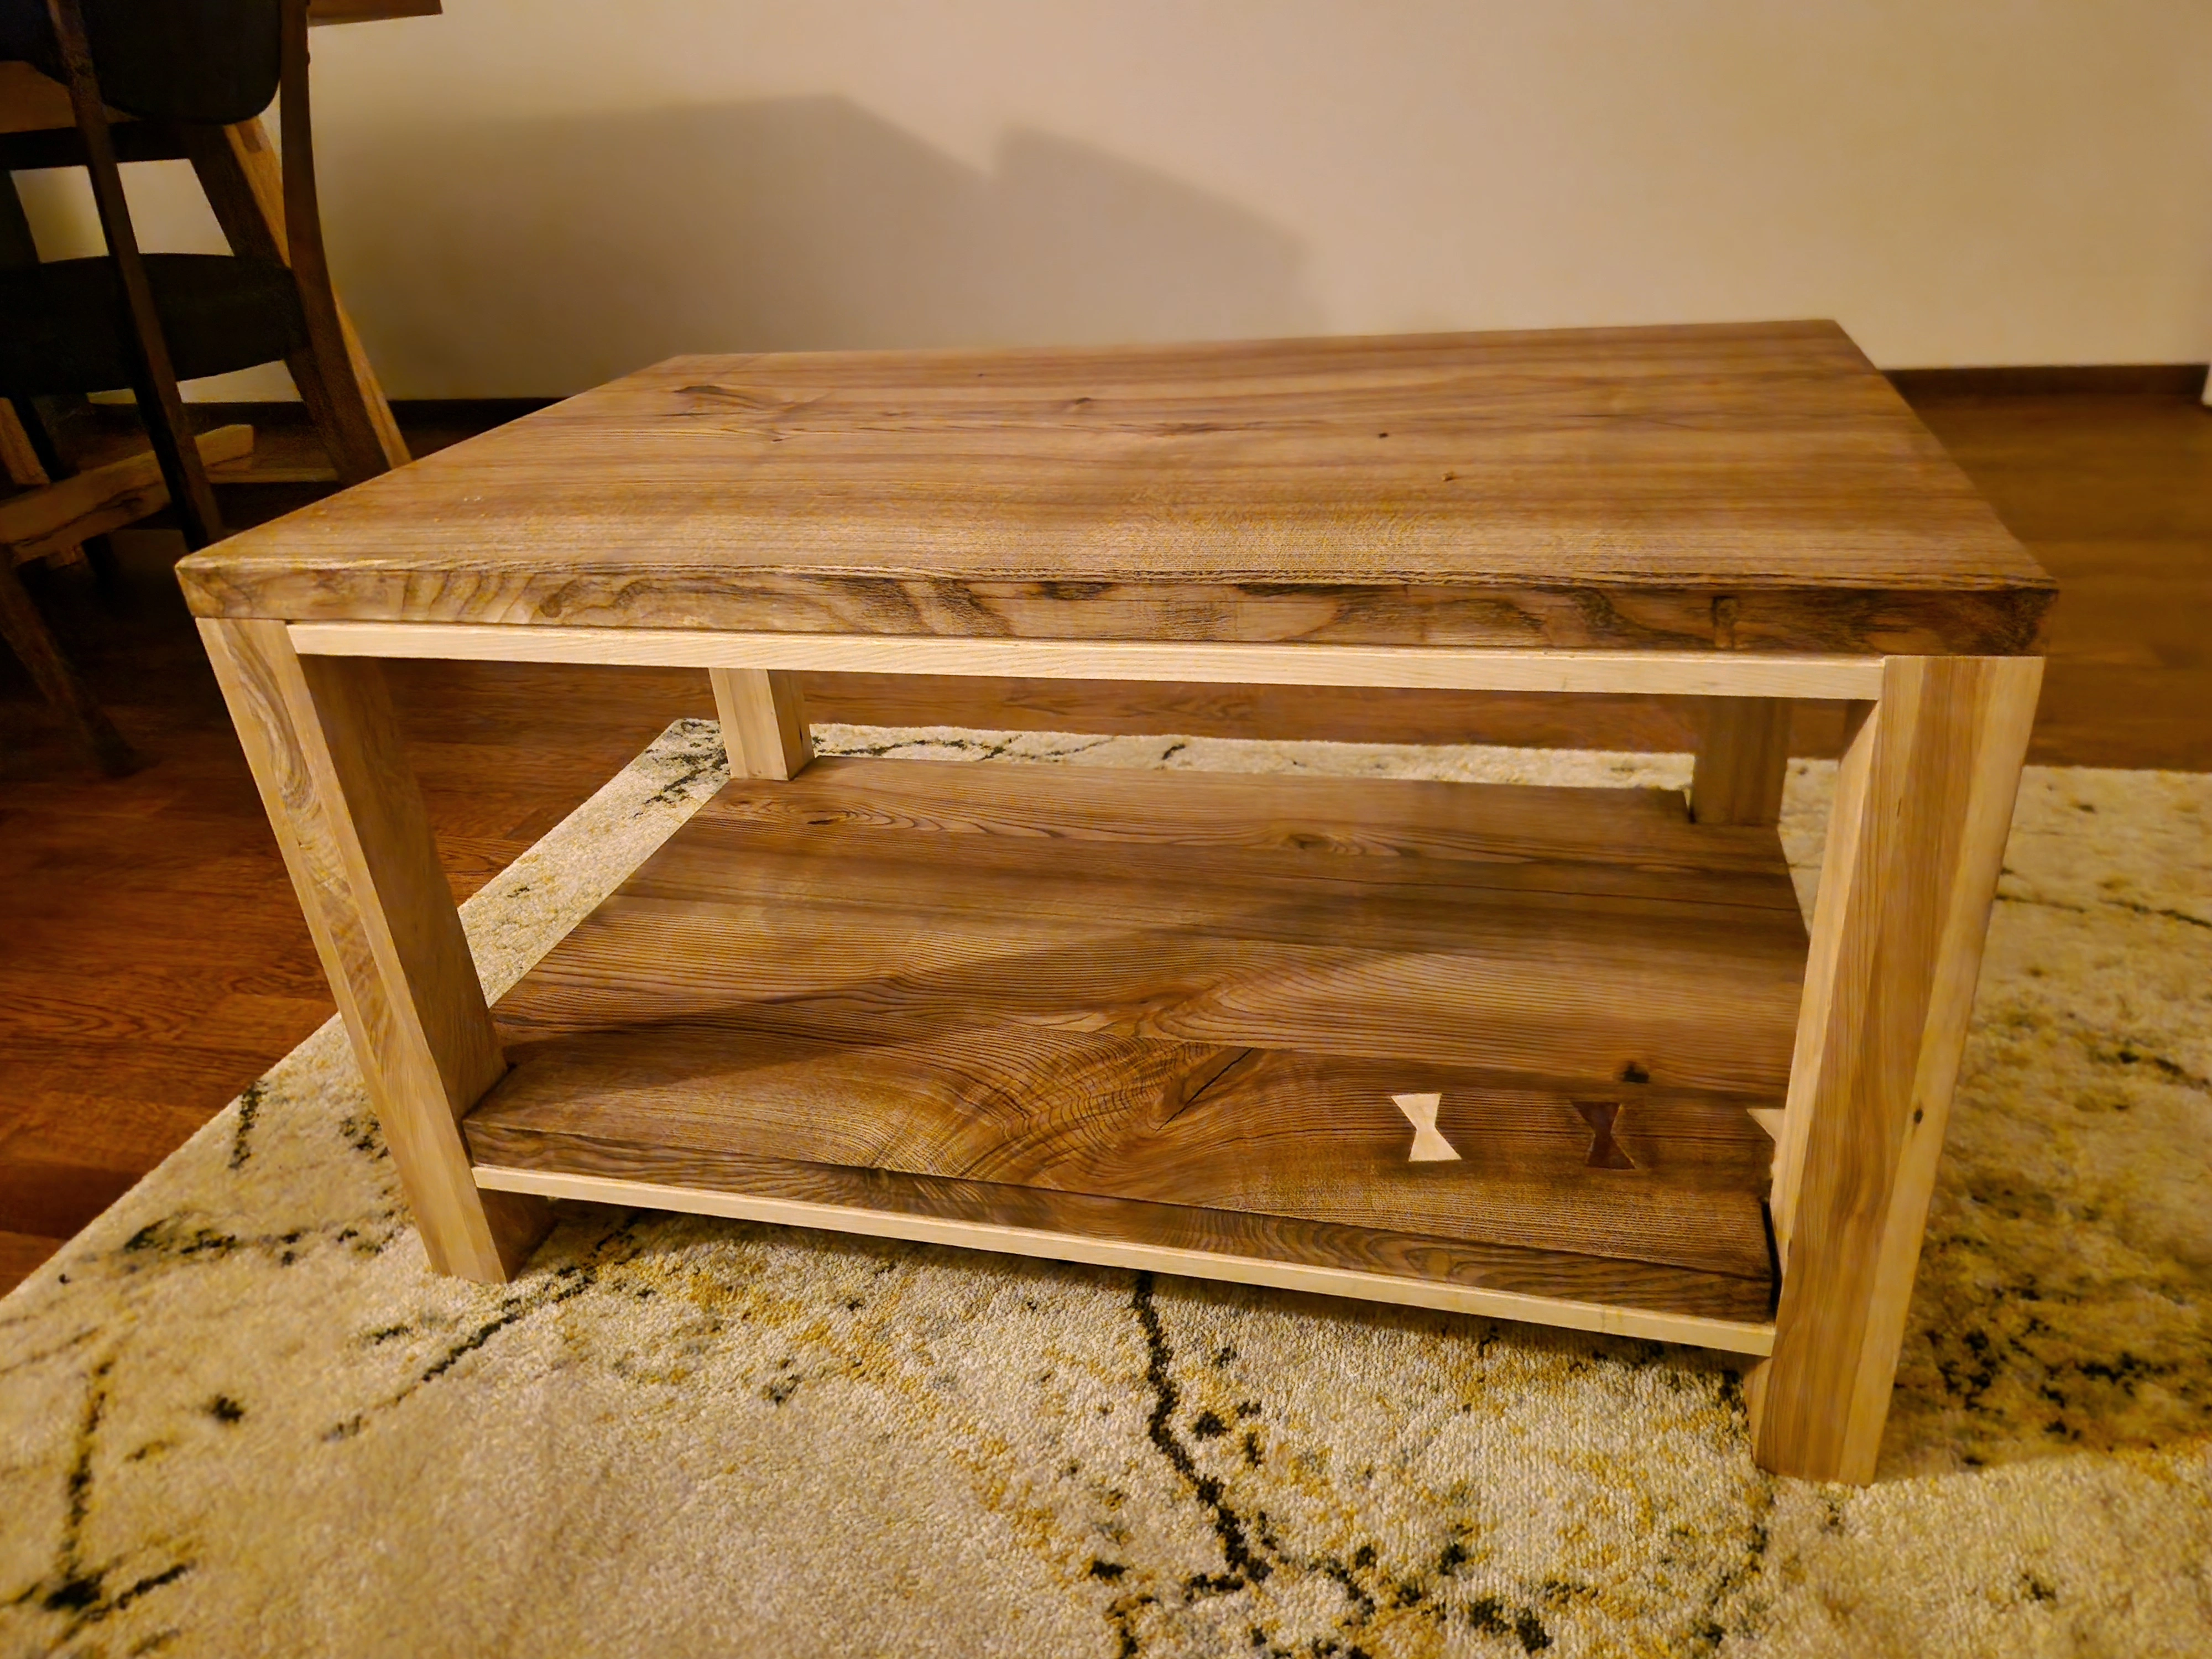
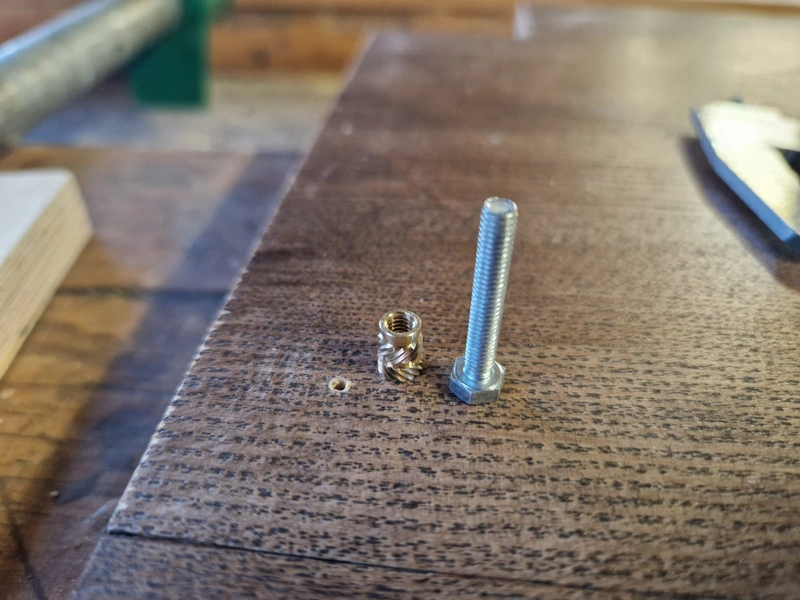
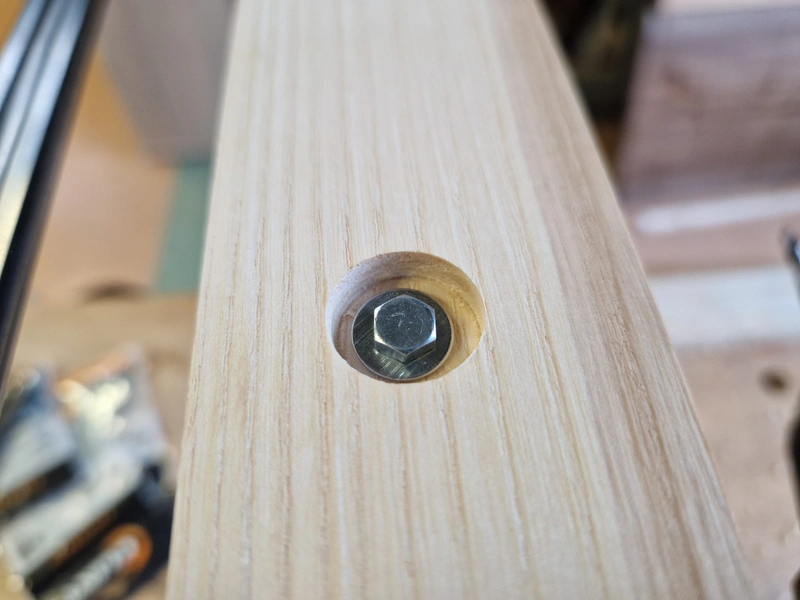
A light-framed coffee table featuring dark tabletops with decorative elements. Bowtie and square inlays address natural cracks and holes in the wood, extending the piece’s lifespan. The tabletops utilize threaded inserts connected to the frame via bolts and washers, enabling seasonal wood movement accommodation.
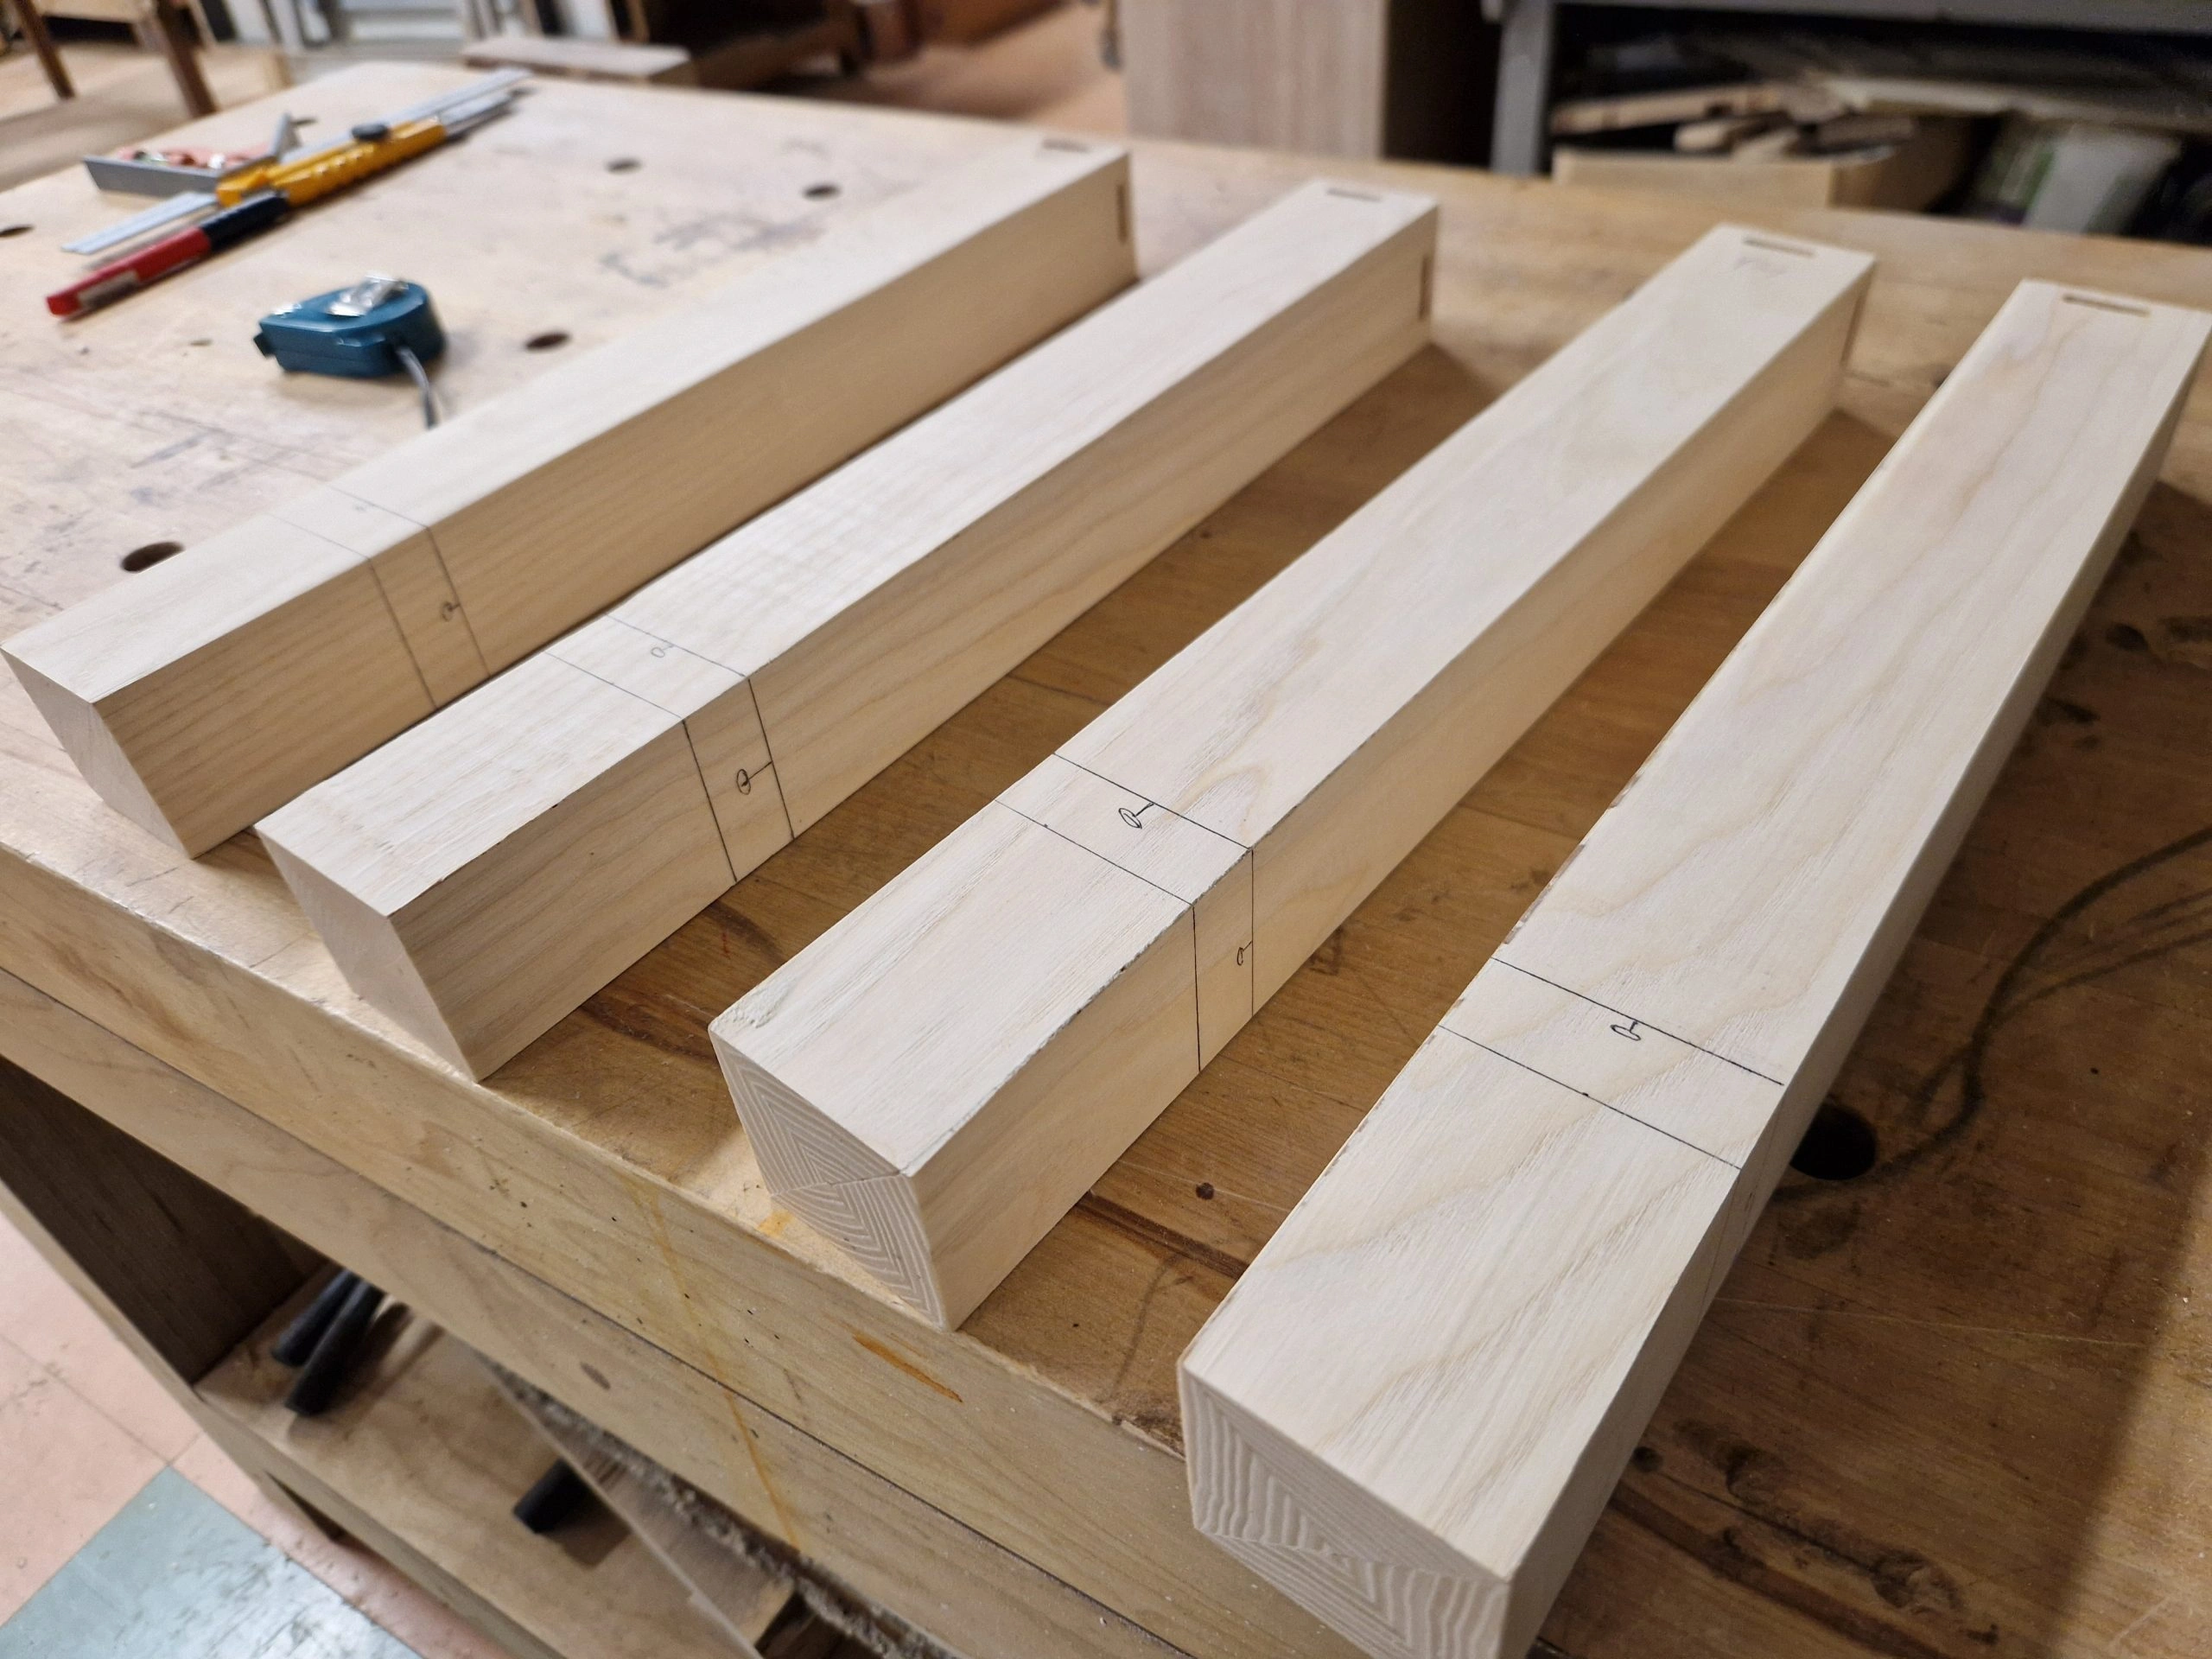


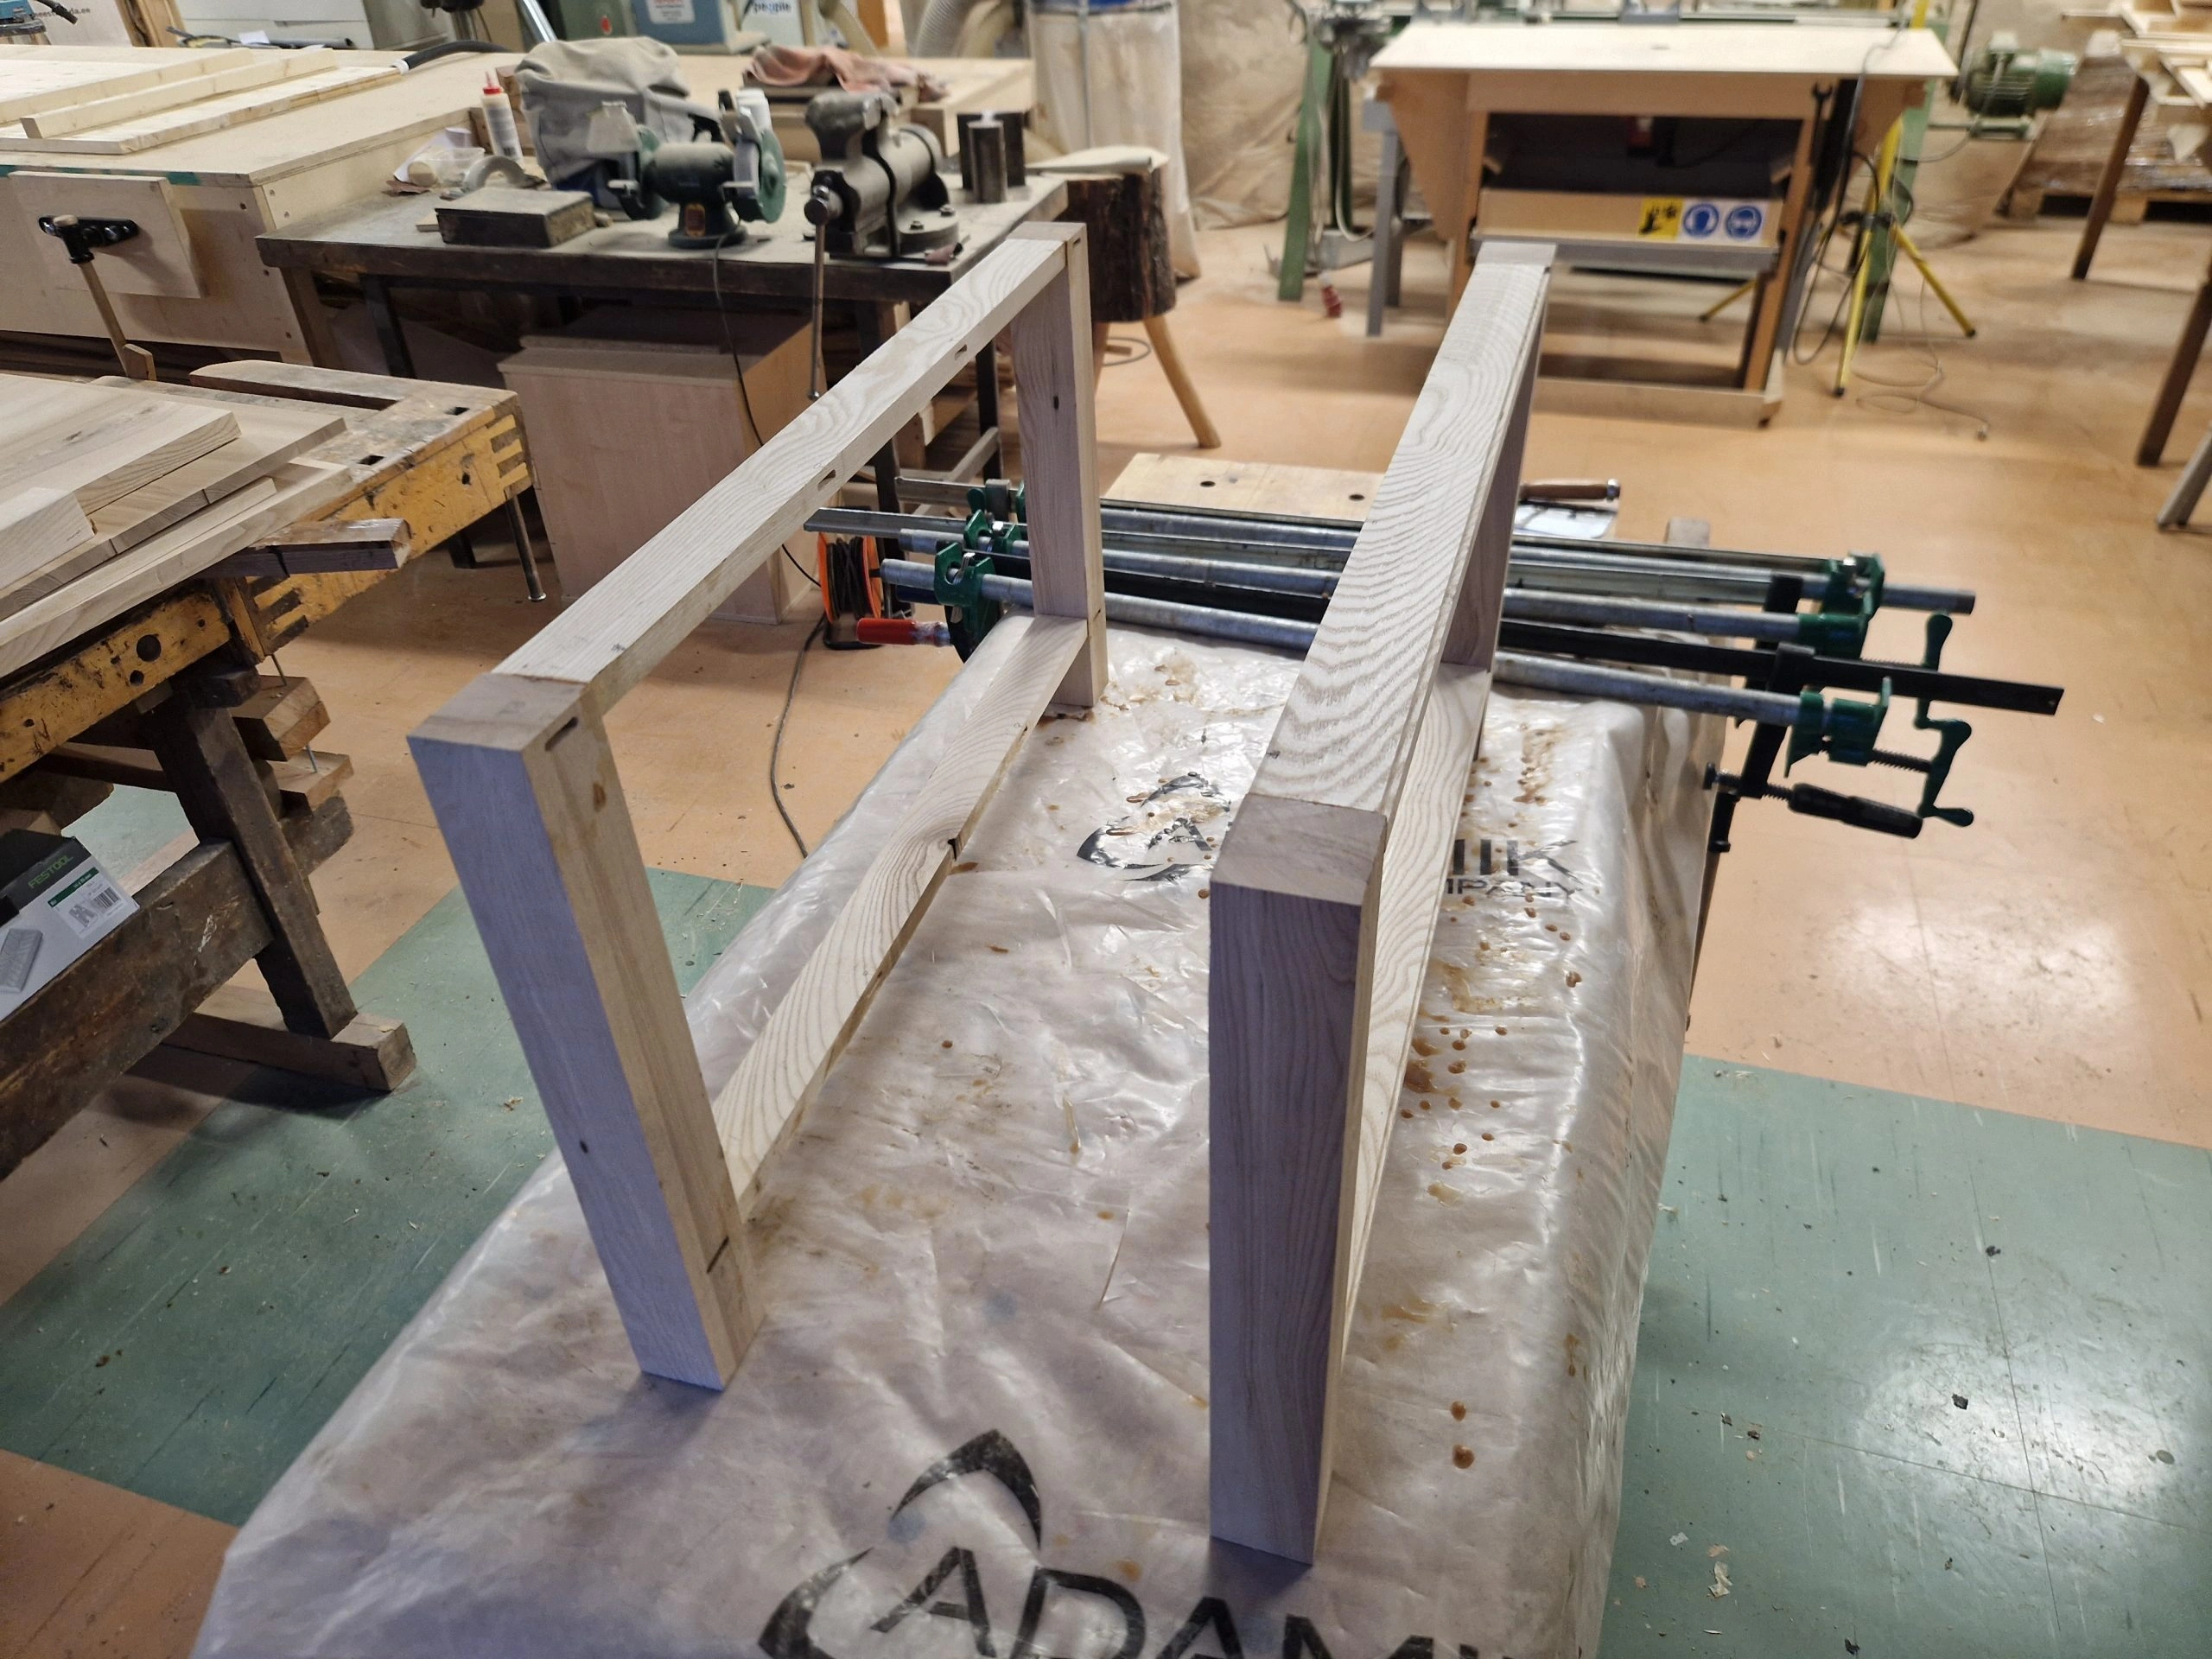


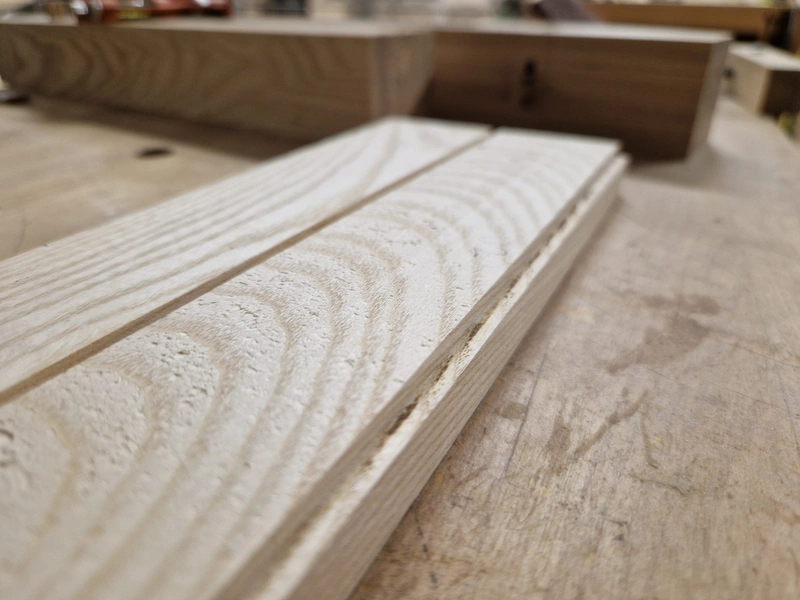
I was aiming for 50x50mm legs, and due to having 26mm thick material, I could not cut the legs out of one single piece of wood, which meant I had to glue multiple strips of wood together to form a single leg. Initial idea was to glue together 4 toblerone-shaped pieces of wood, where the long side was 50mm and the height of the "pyramid" 25mm, which would have resulted in a 50x50mm leg with each face being the same piece of wood. This however was a failure because it was extremely difficult to align the 4 pieces perfectly with eachother, which is critical because any deviation at all means the table leg is no longer a square with 90 degree angles, which would result in a lot of headache down the line during assembly (ask me how I know).
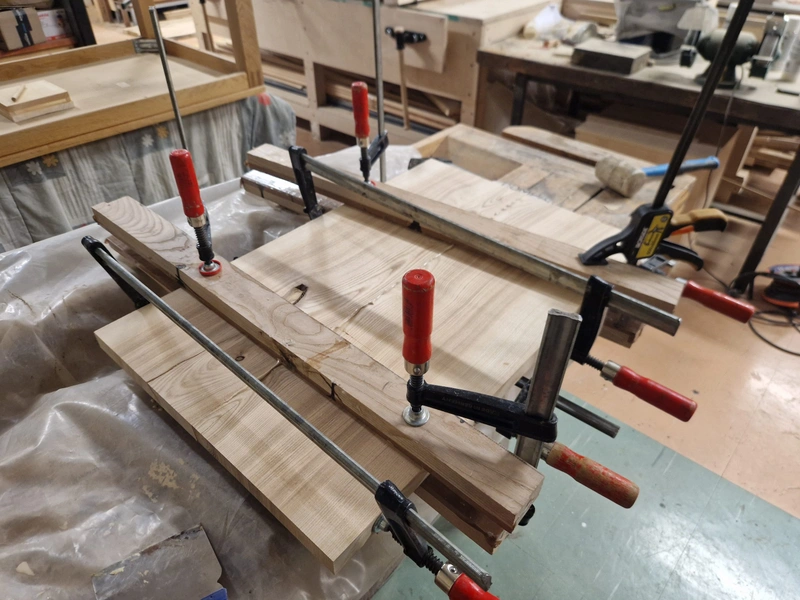
After scrapping those wonky legs I went for a simpler approach by simply gluing flat rectangular planks of wood together. In the end, the side faces of the legs clearly show 3 distinct wood patterns, which doesn't look as nice as the initial idea, but structurally the legs are very strong and a consistent 90 degrees on all 4 corners.

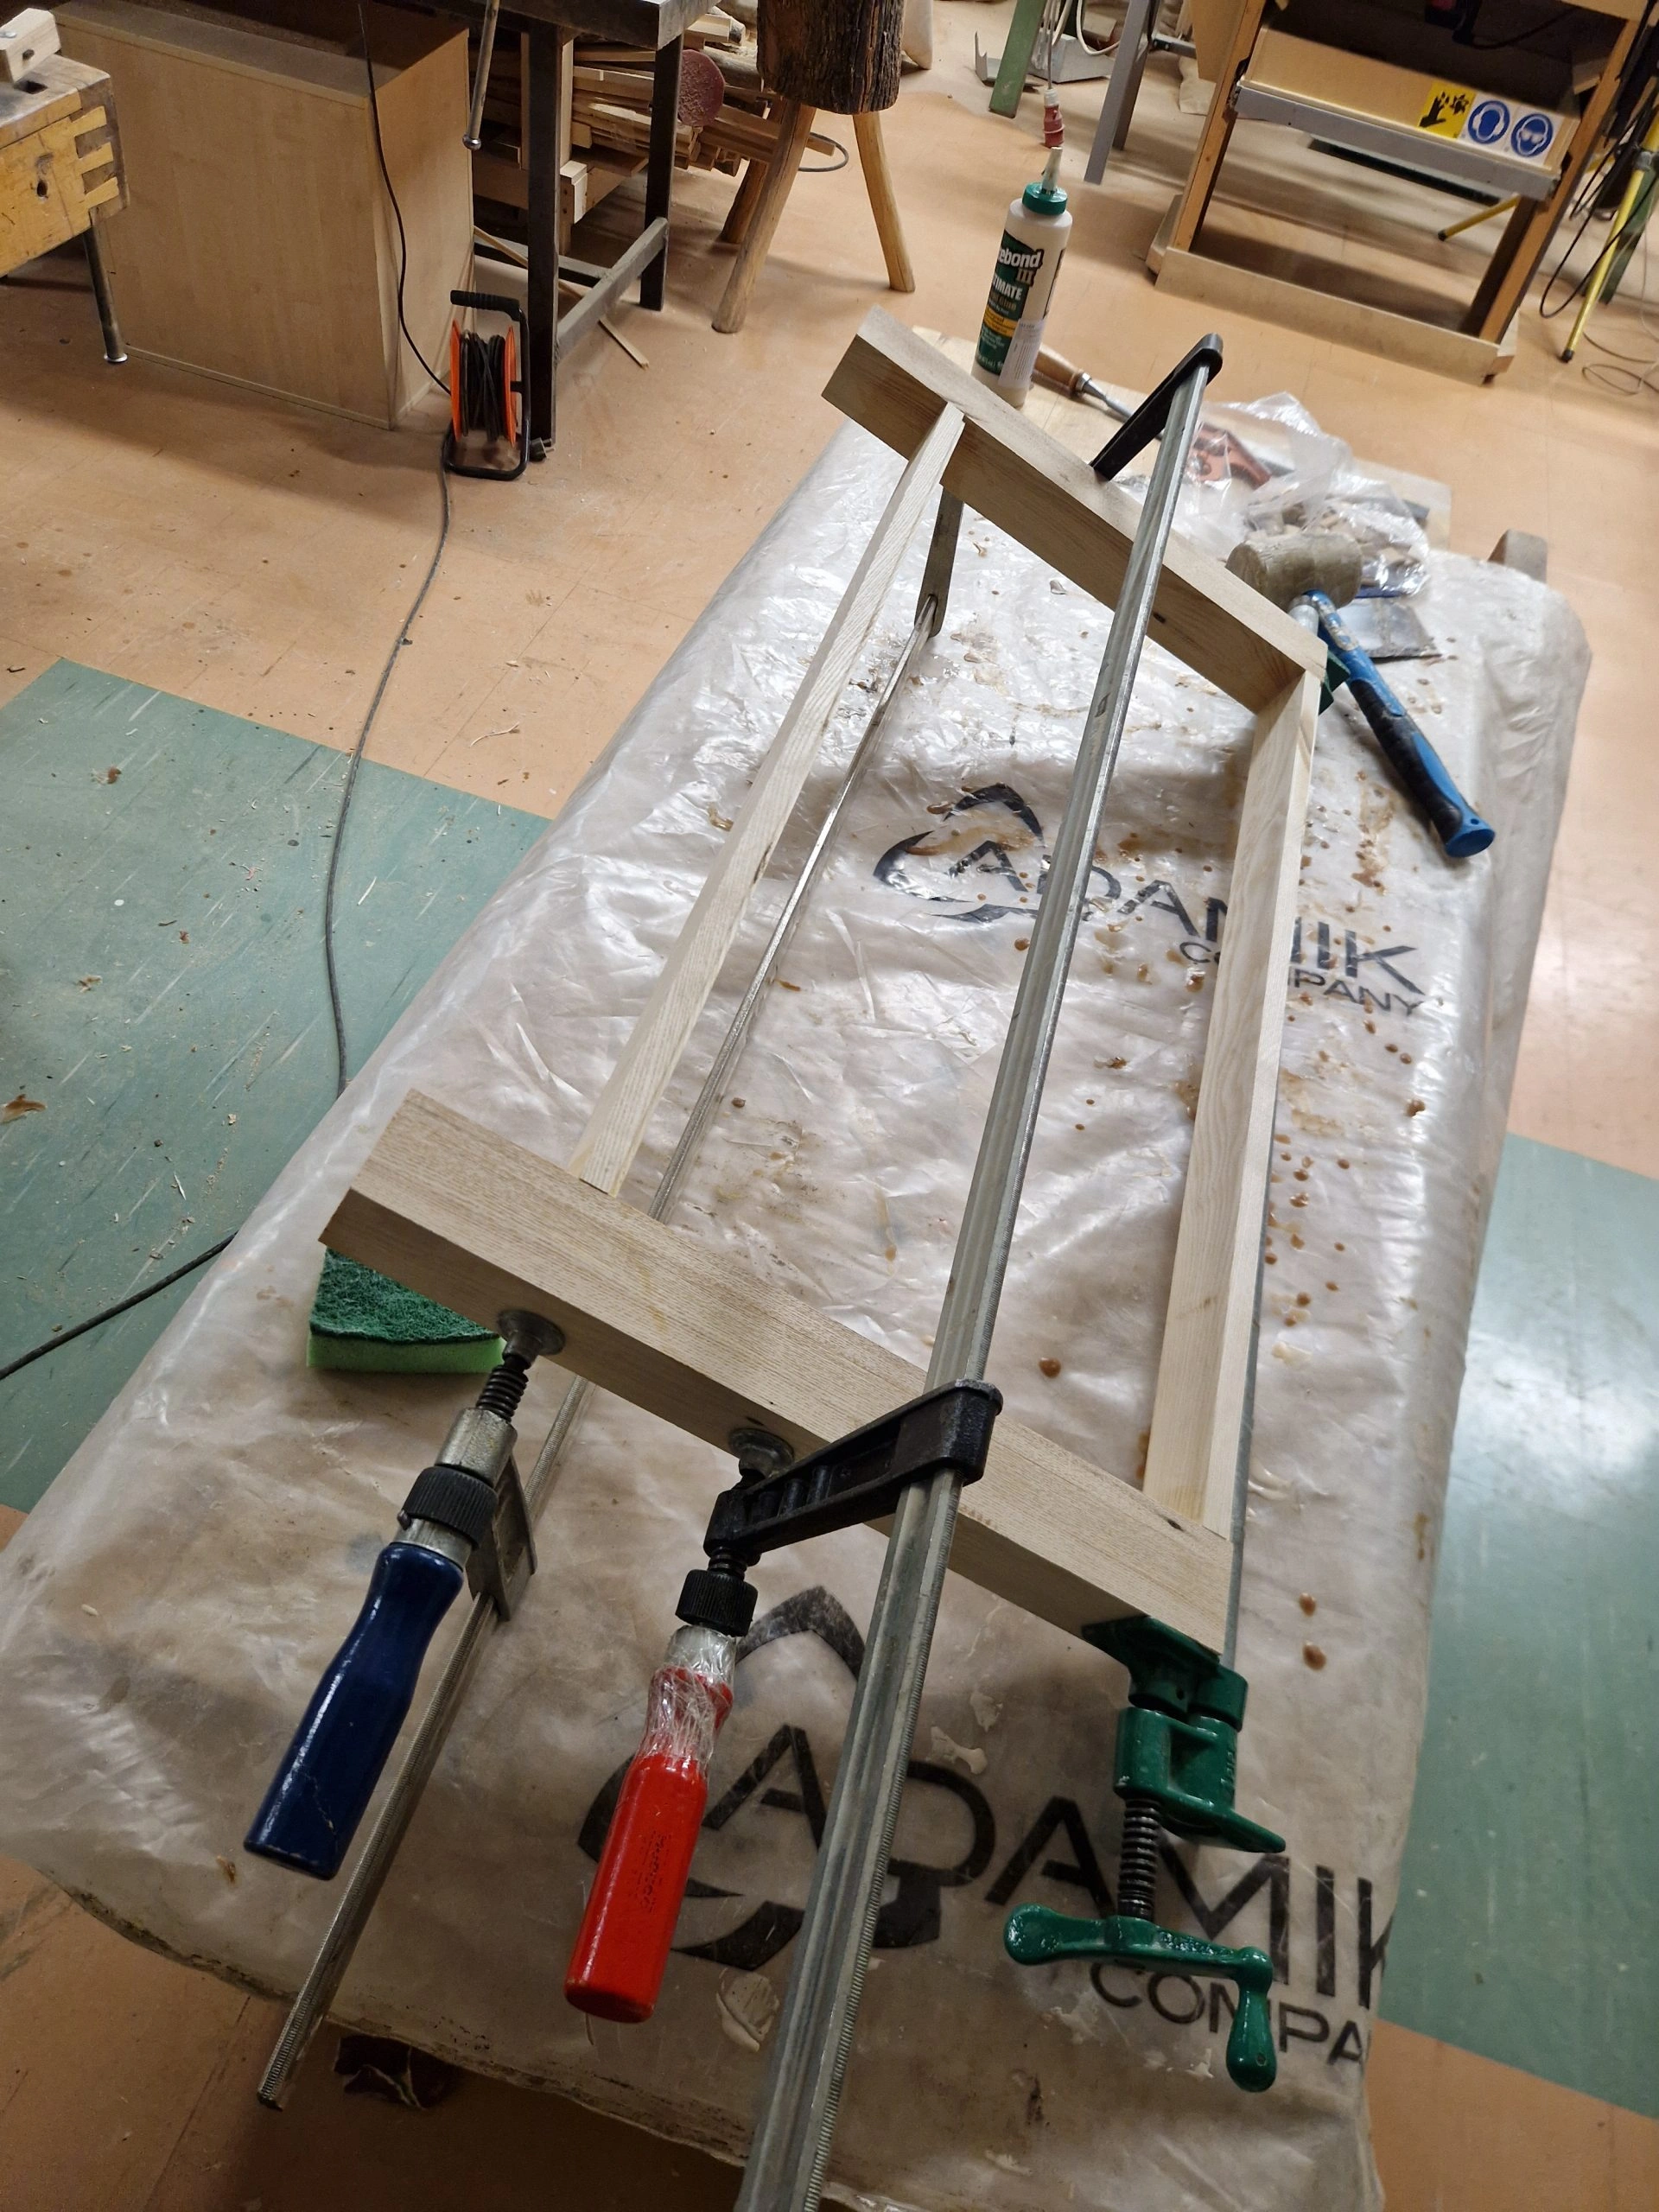
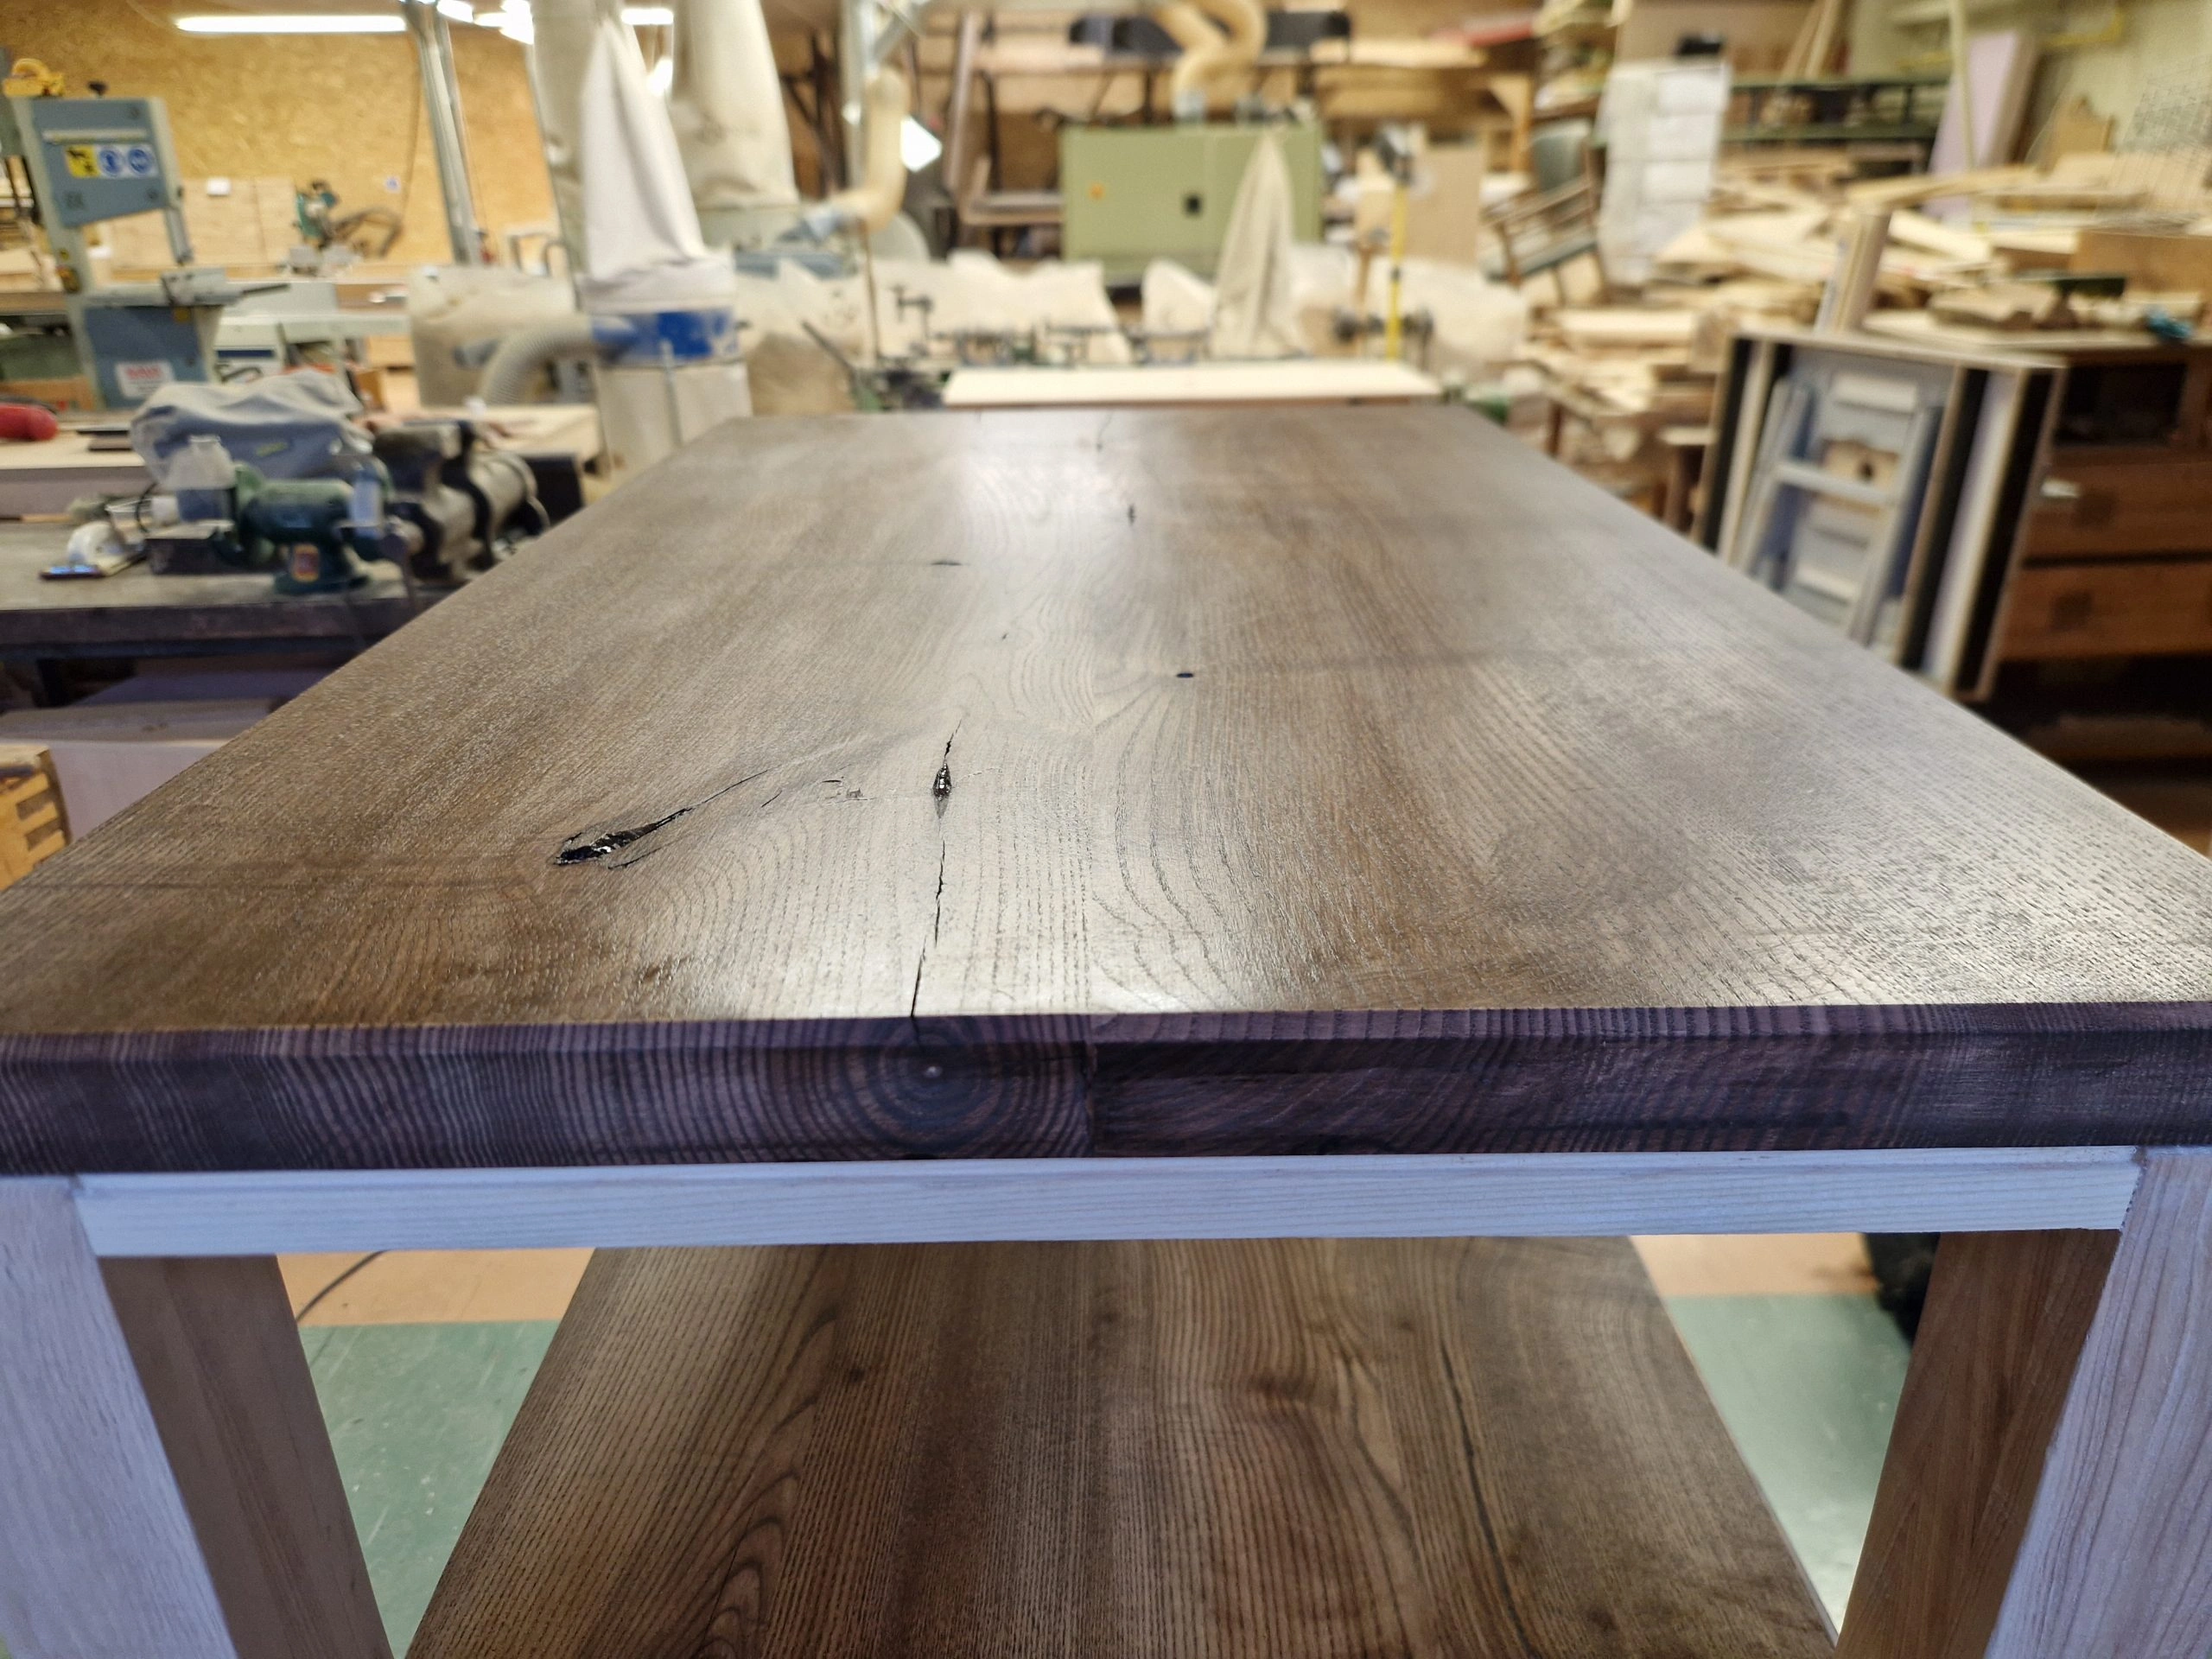
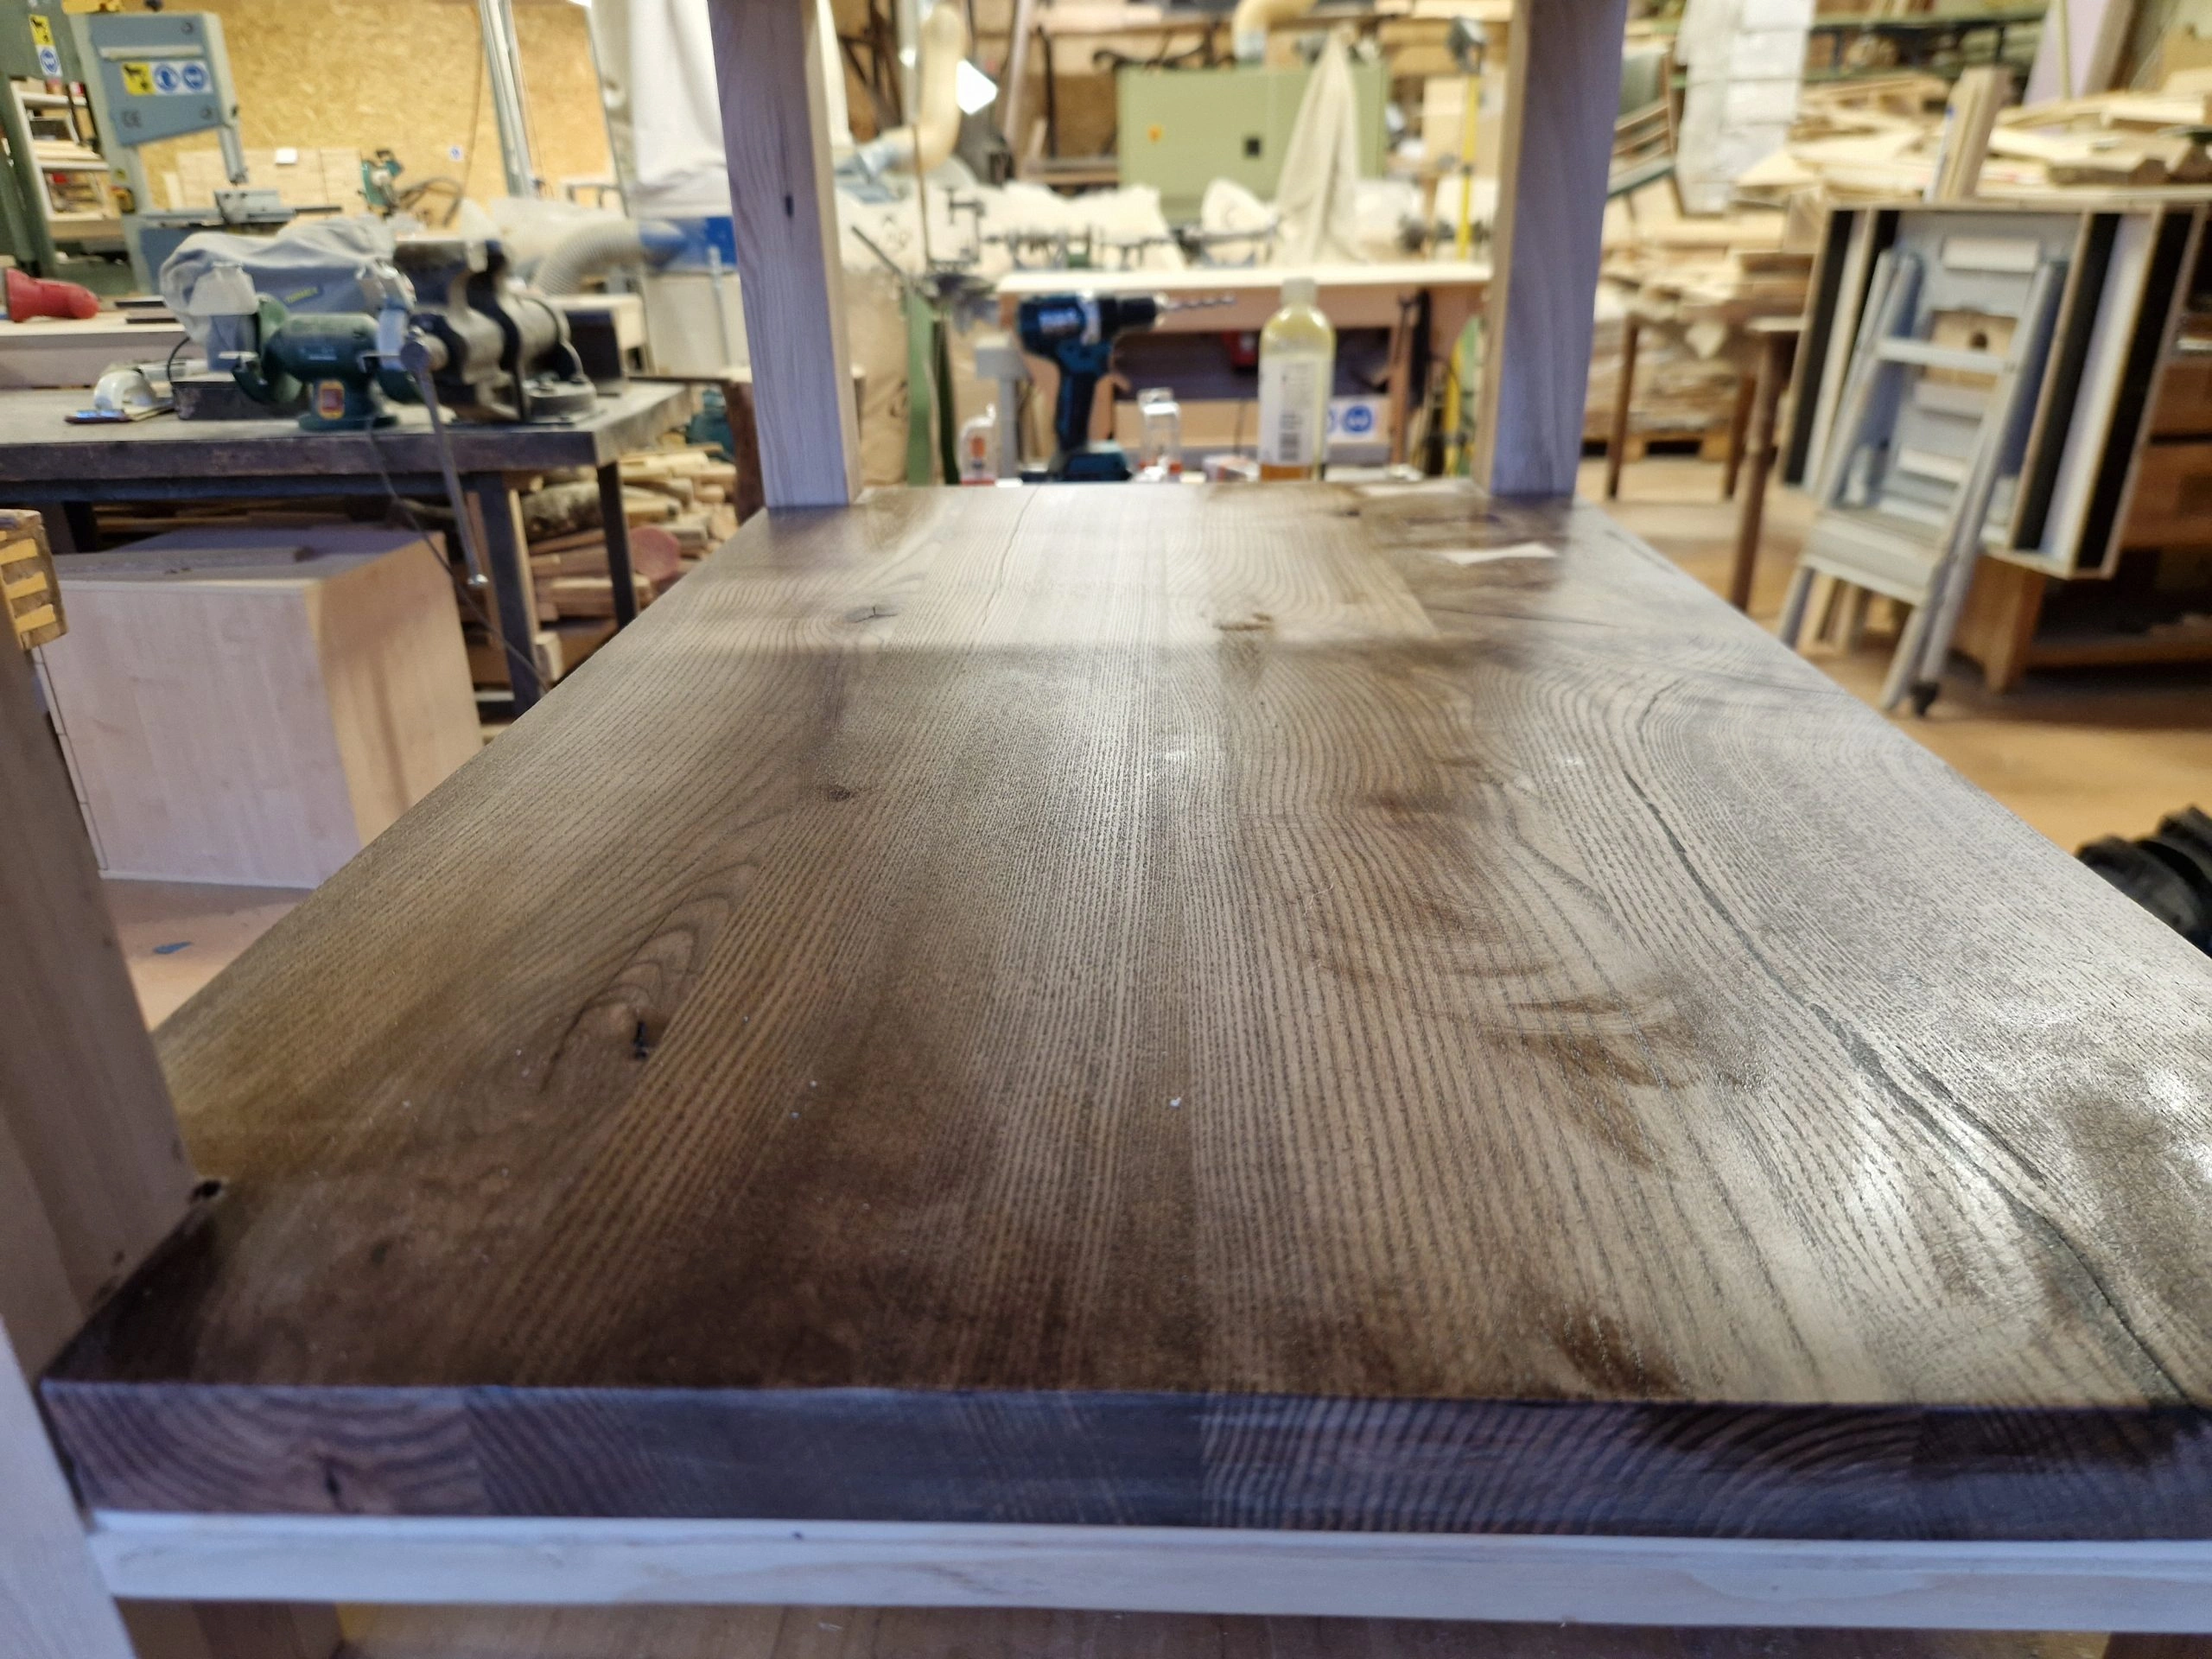
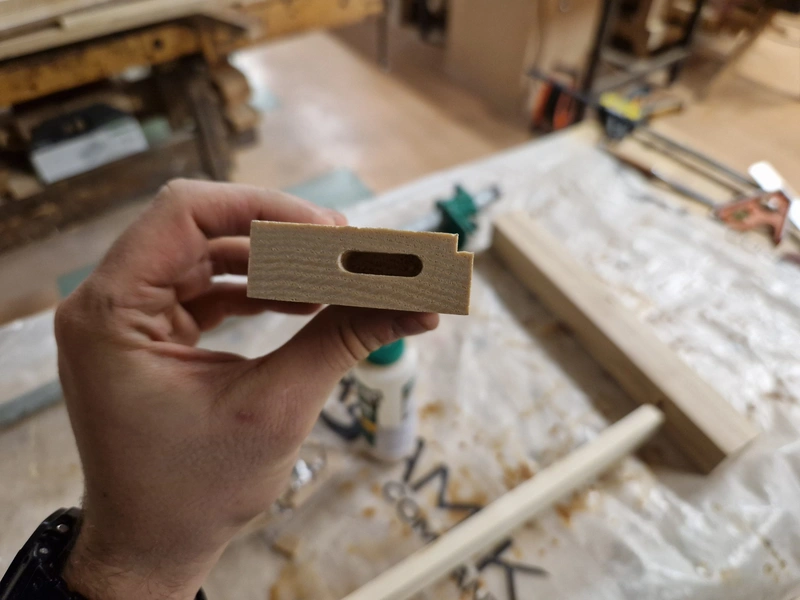
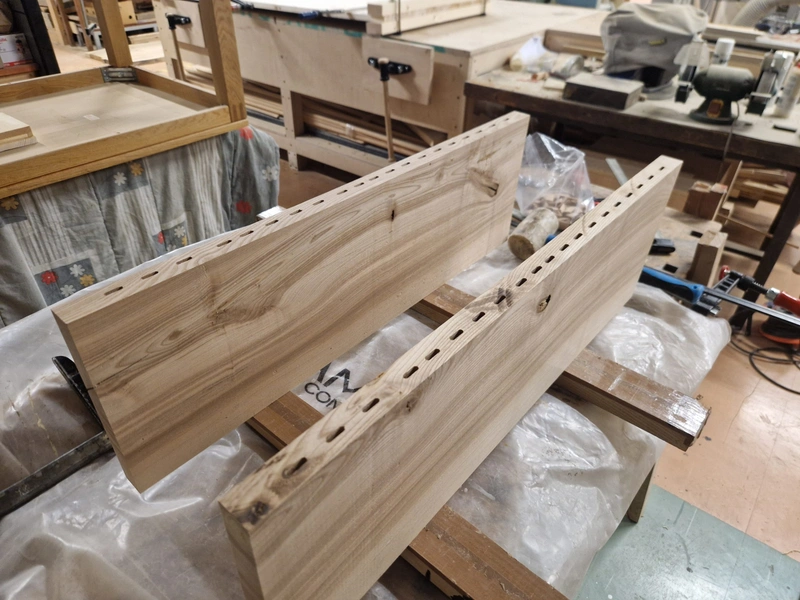
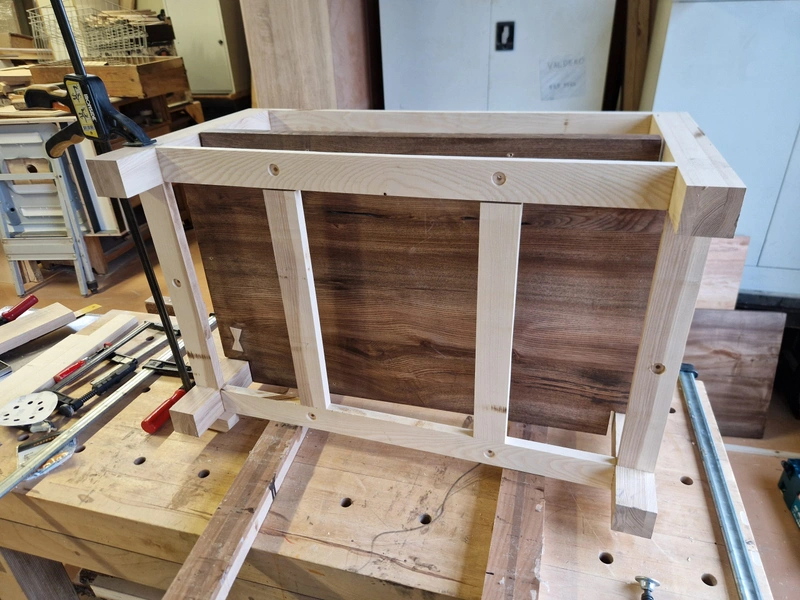
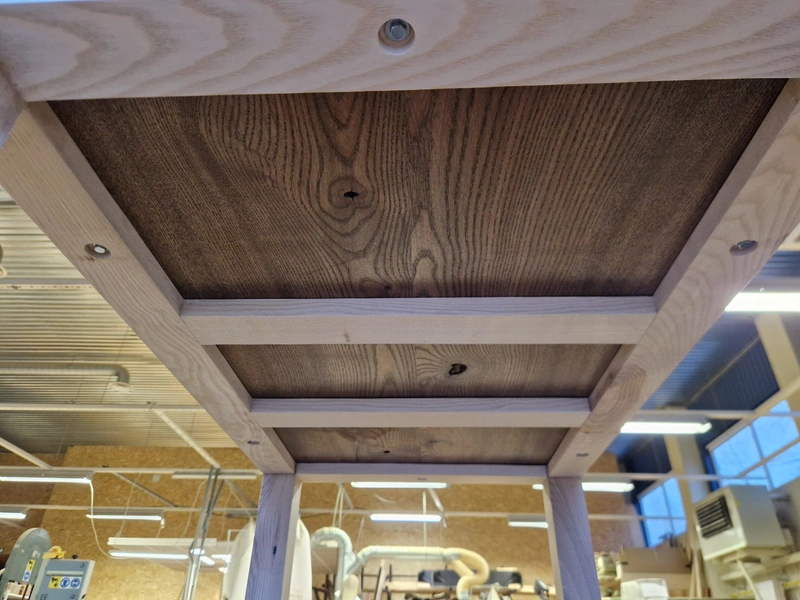
With the individual legs done, it was time to work on connecting them together. For this a simple domino approach was chosen (the oval hole in the legs is connected to an oval hole in the frame via piece of wood called a Domino). The horizontal frame elements also have a shadowline cut into them because they reduce the visual weight of the frame when looking at the piece, while still being quite thick and strong, suitable for having a pair of heavy tabletops attached to them.


1 / 4
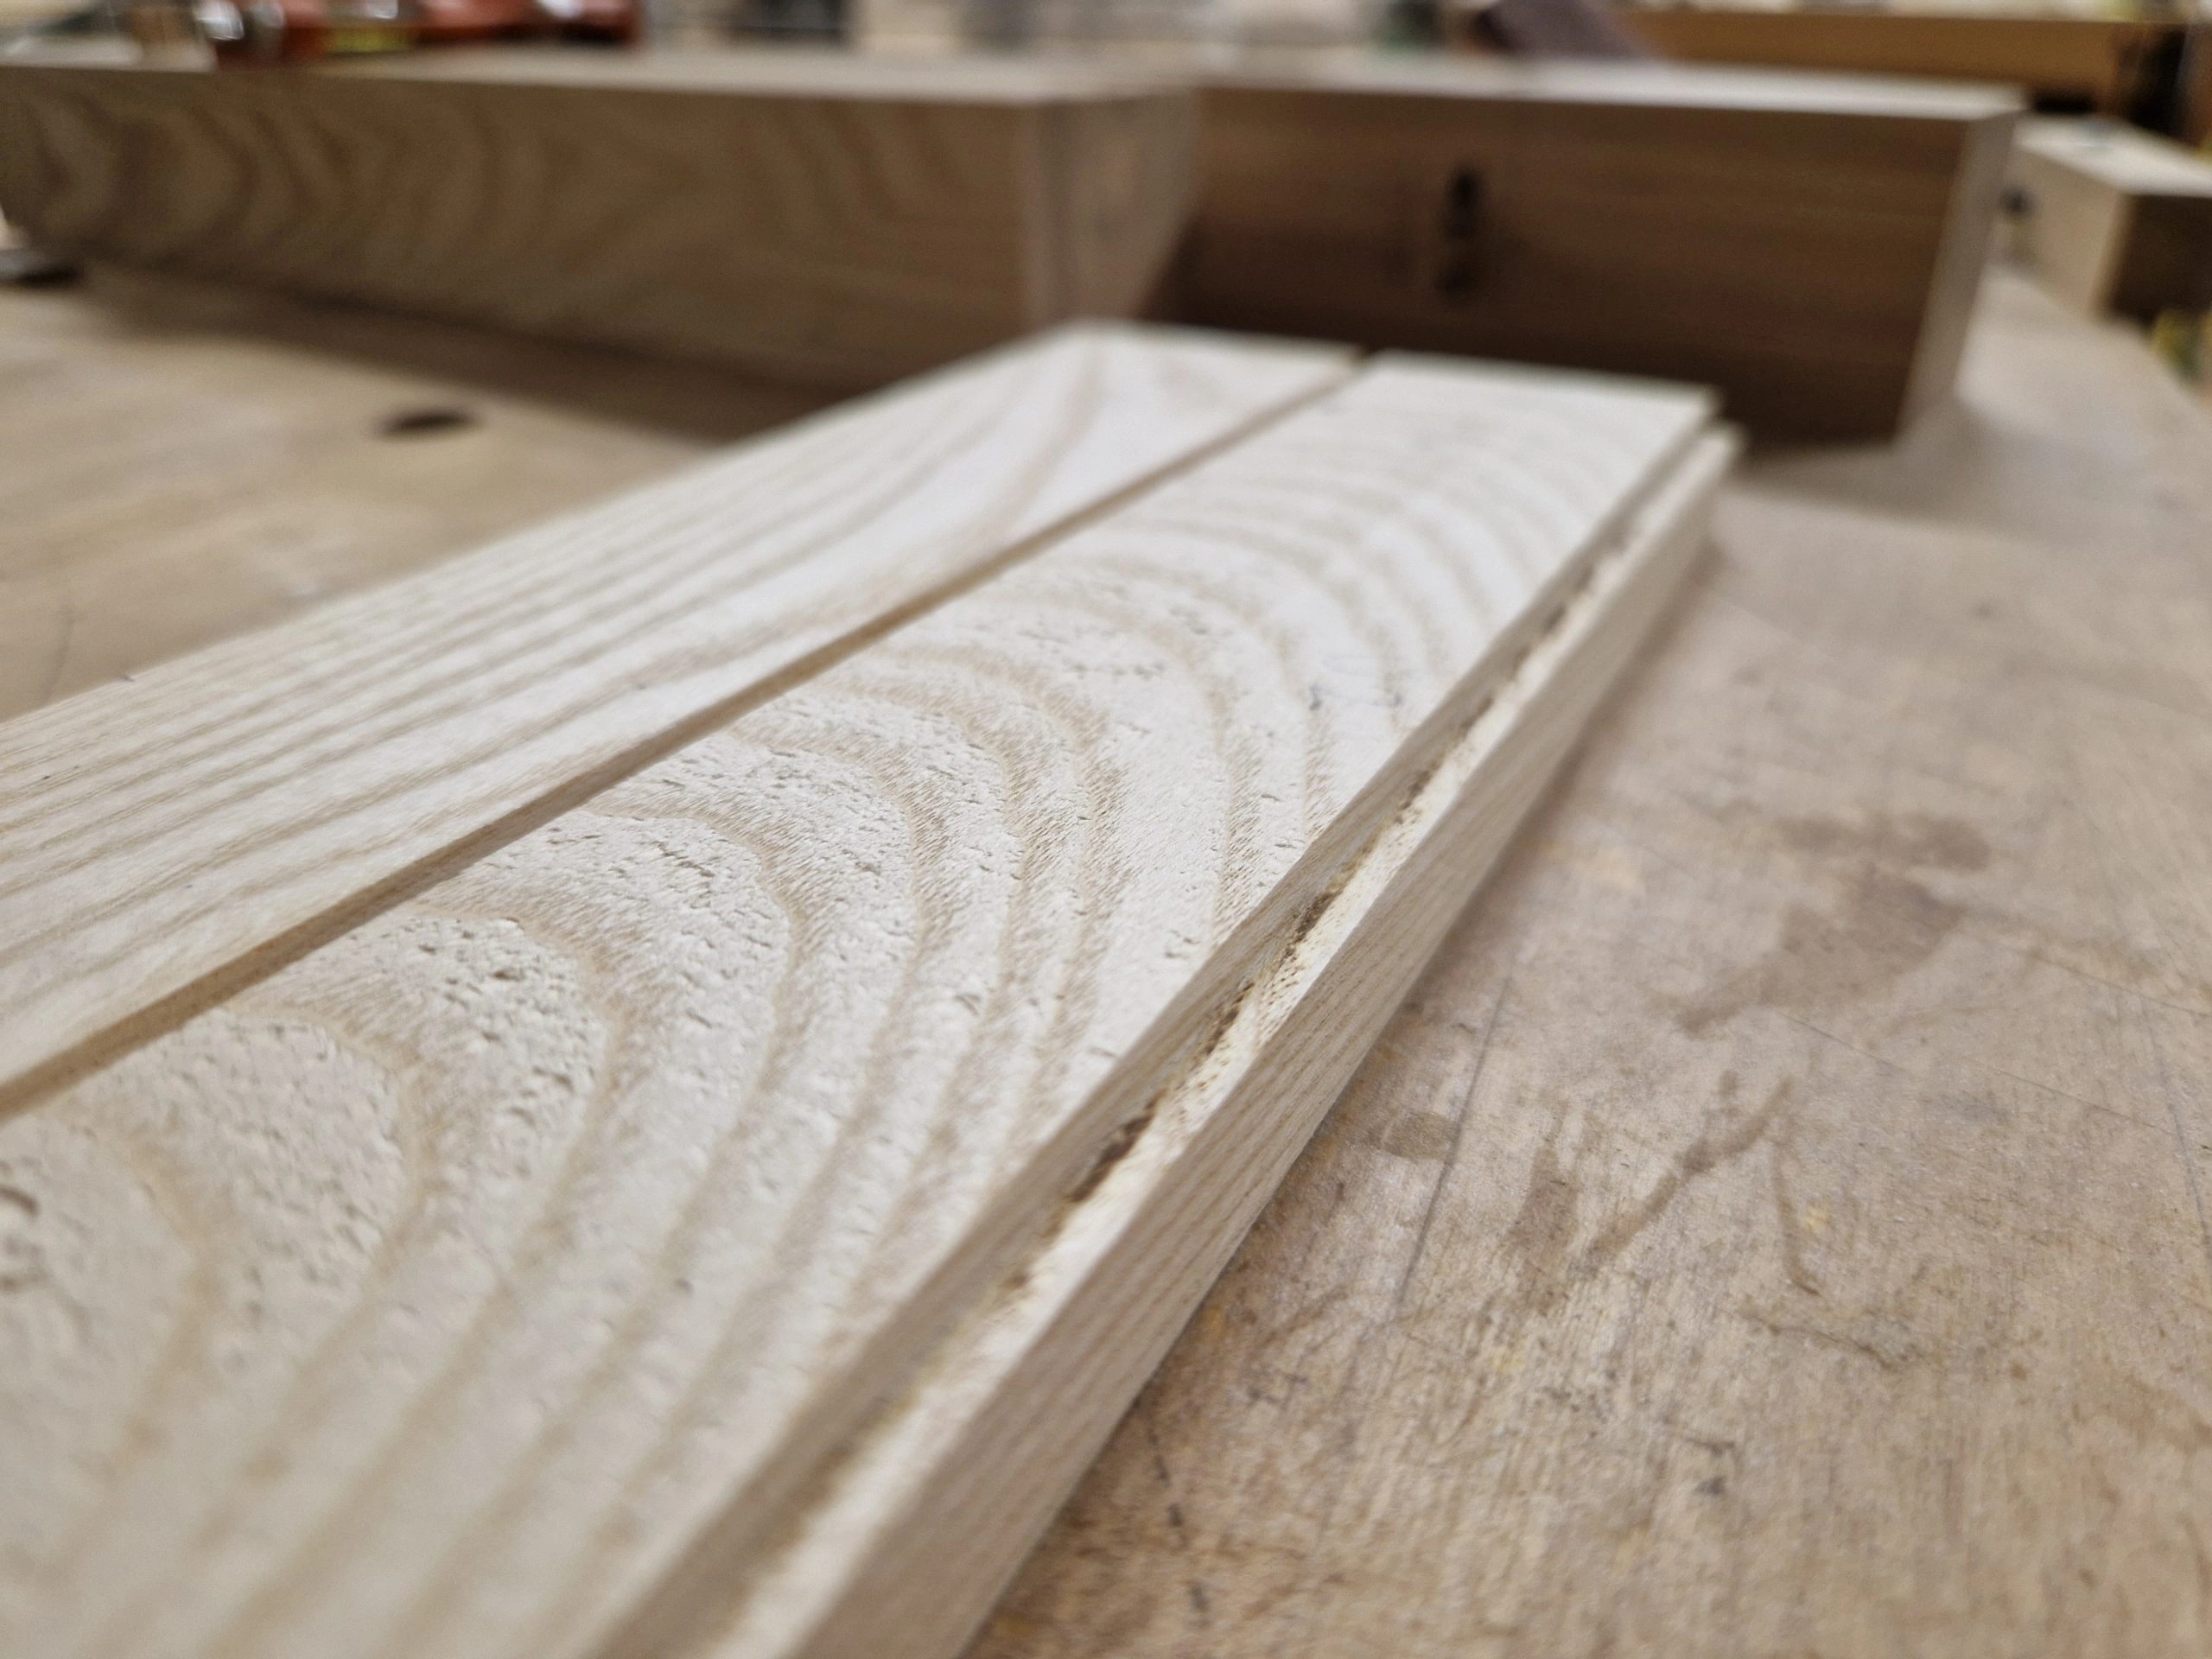
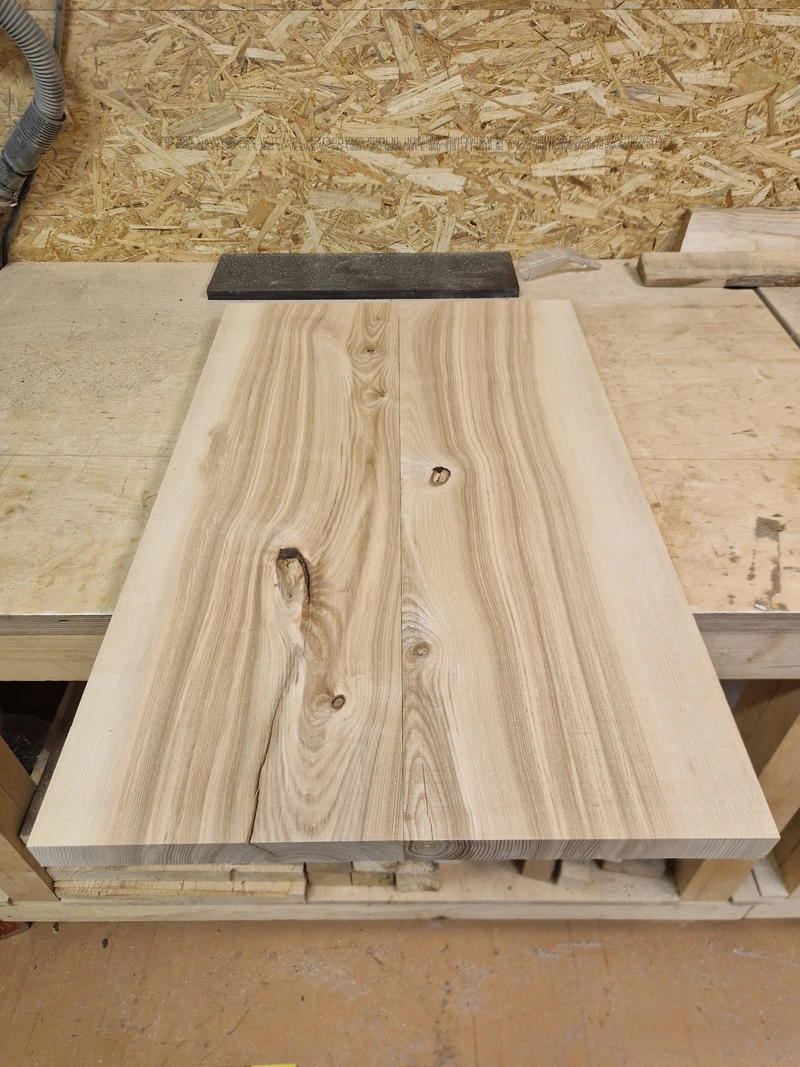
Simple process of cutting the rough stock to size, milling both sides flat, both edges straight, cutting domino holes and gluing the planks together to form a tabletop. Done twice.
1 / 3
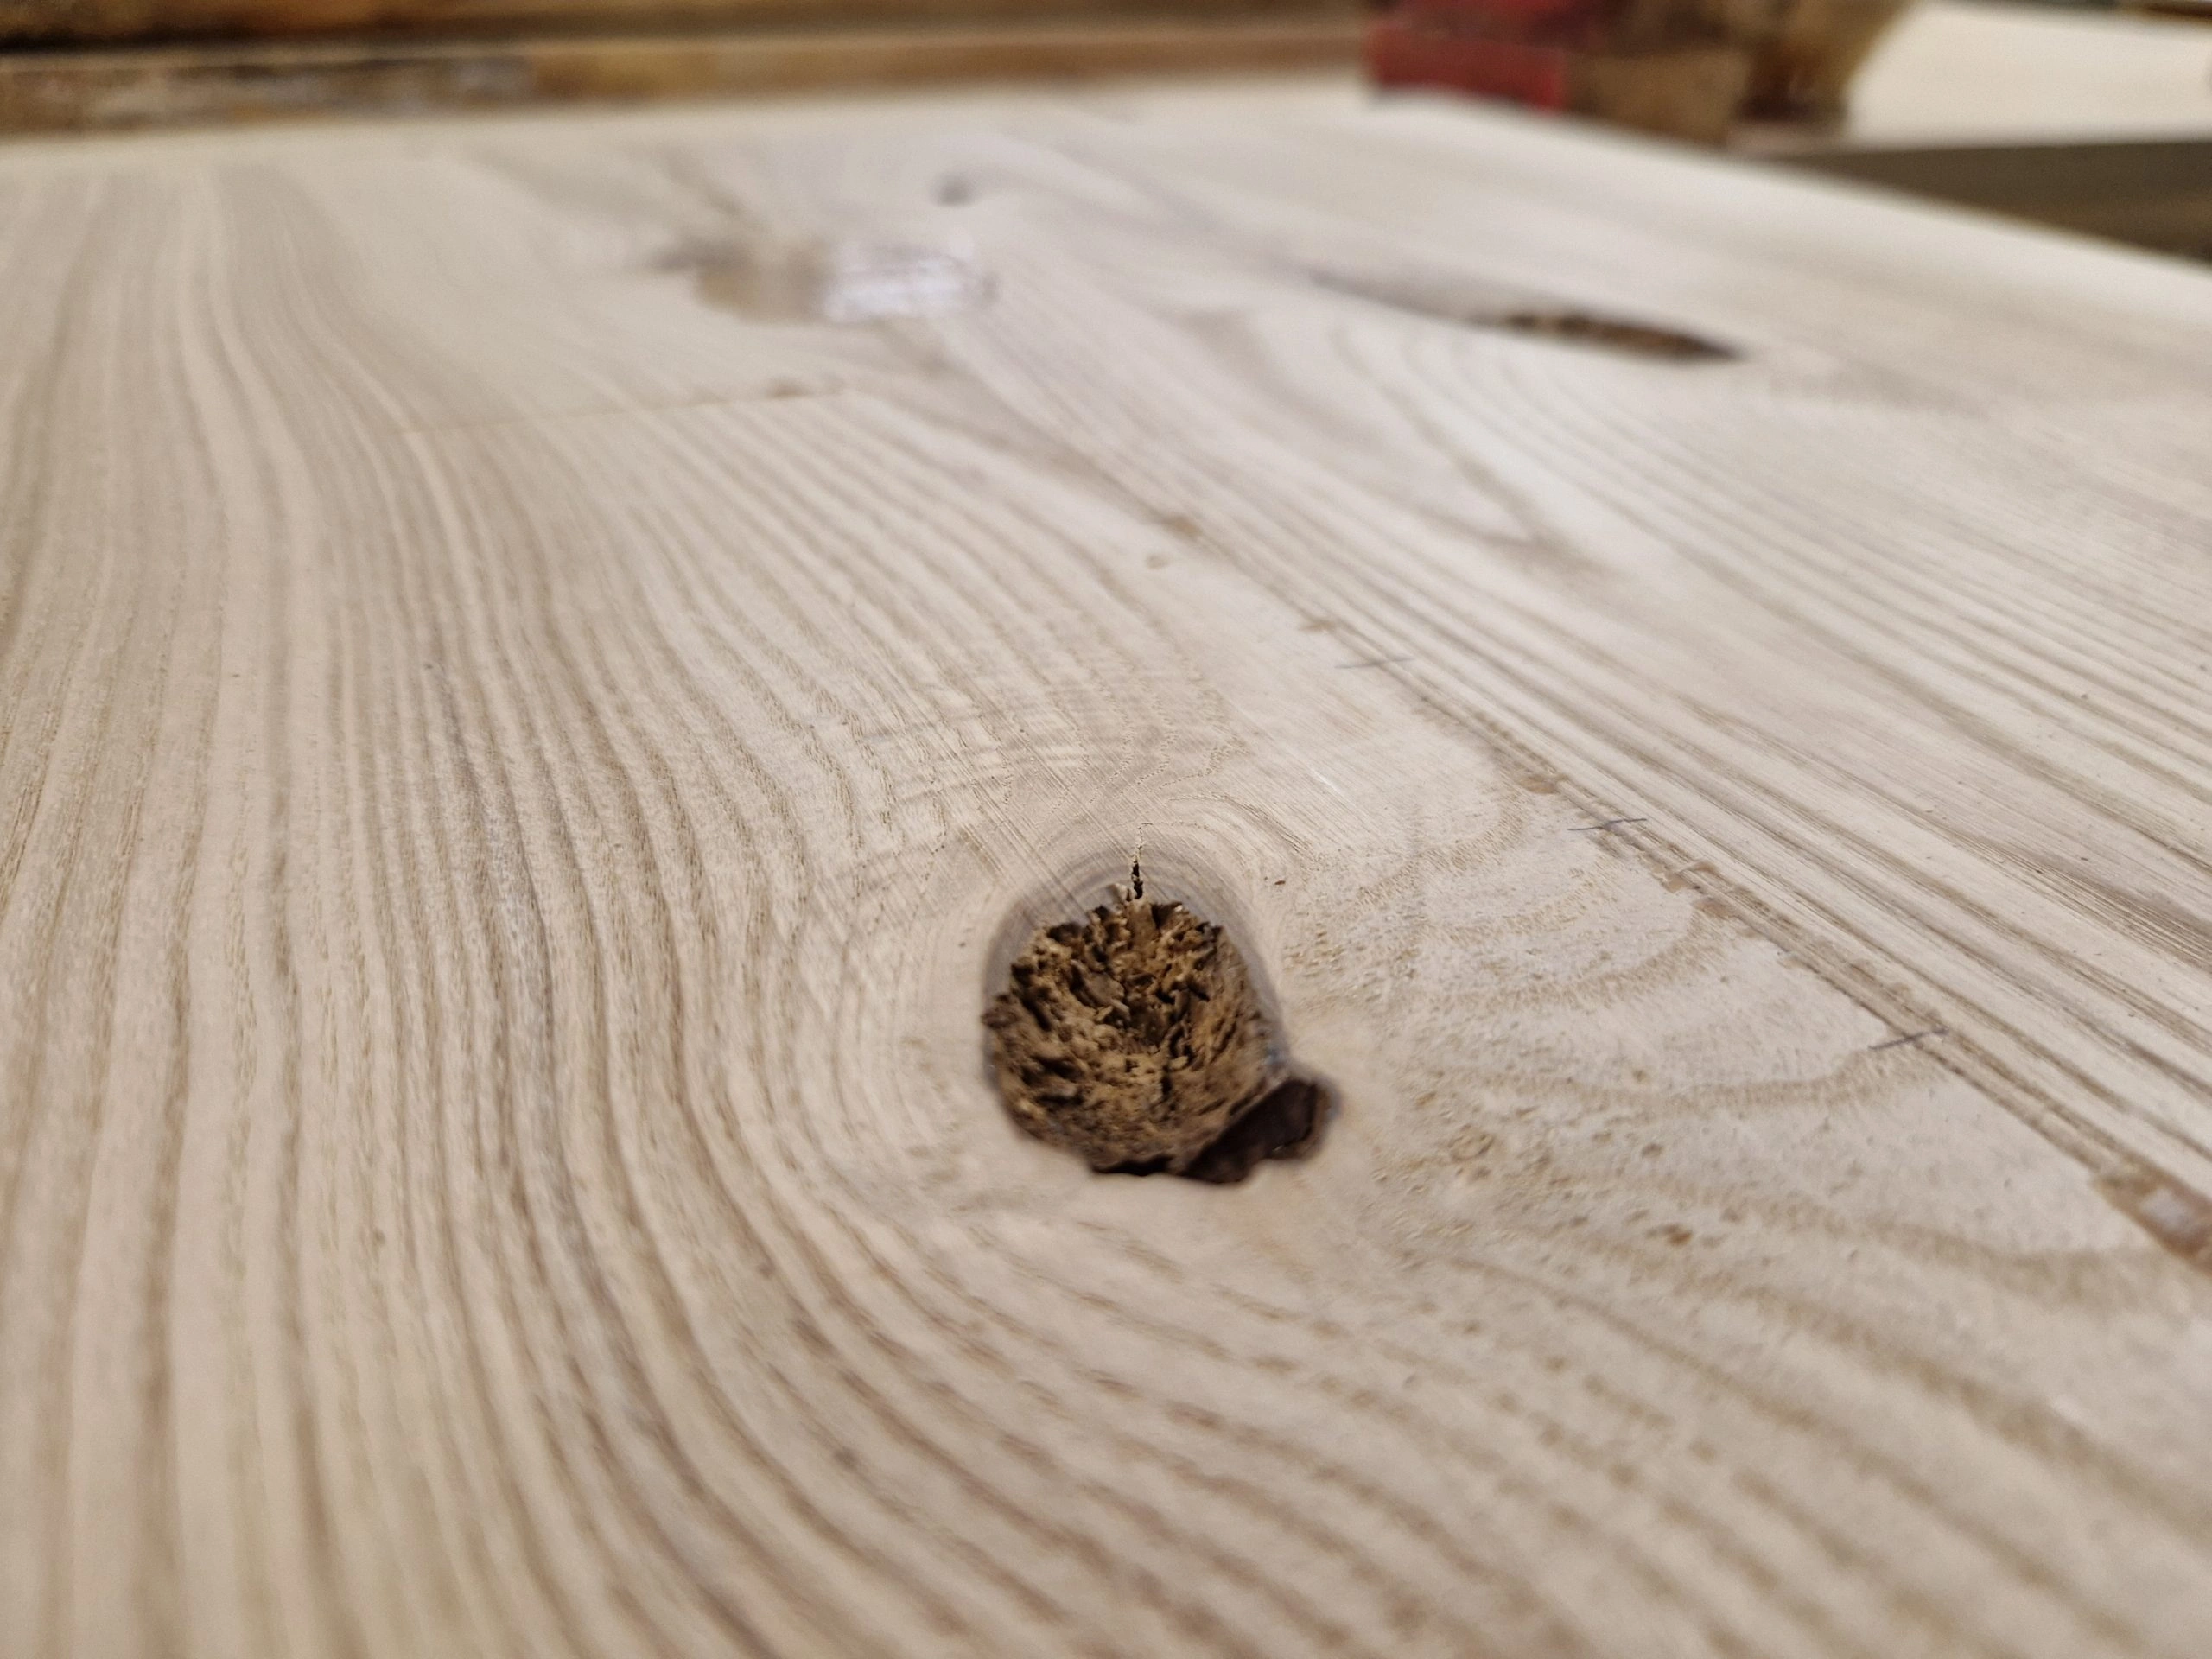
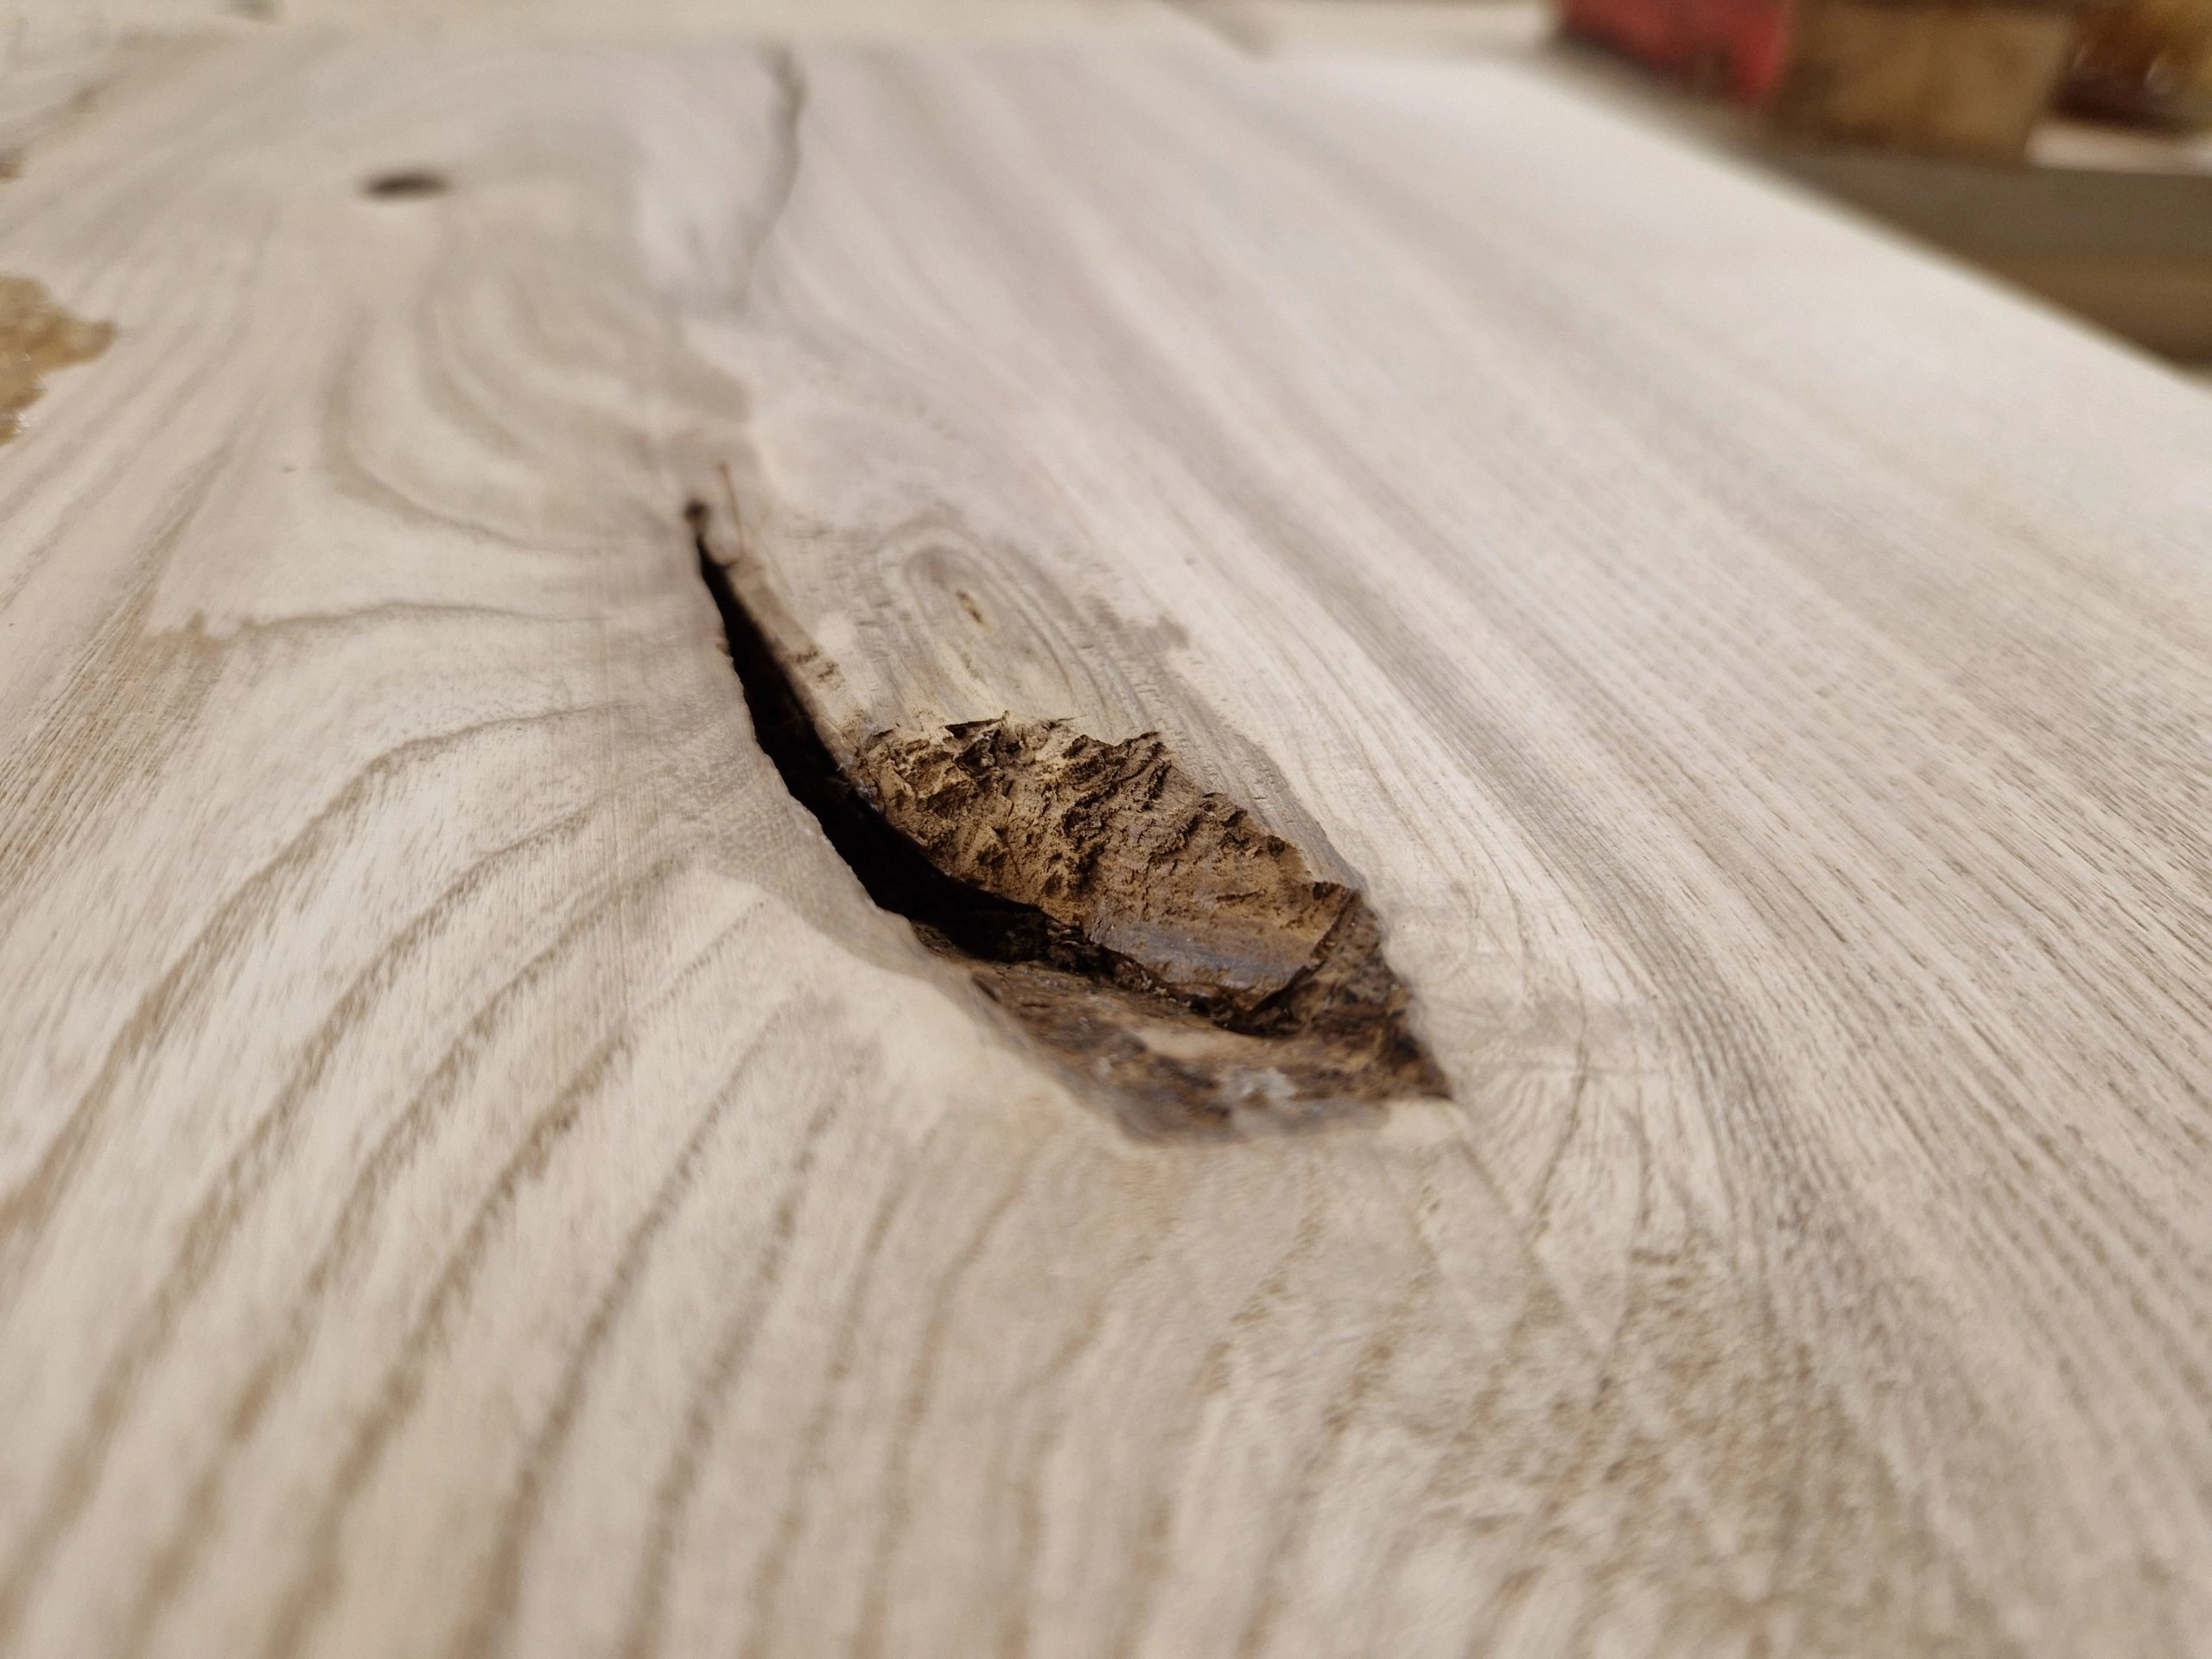
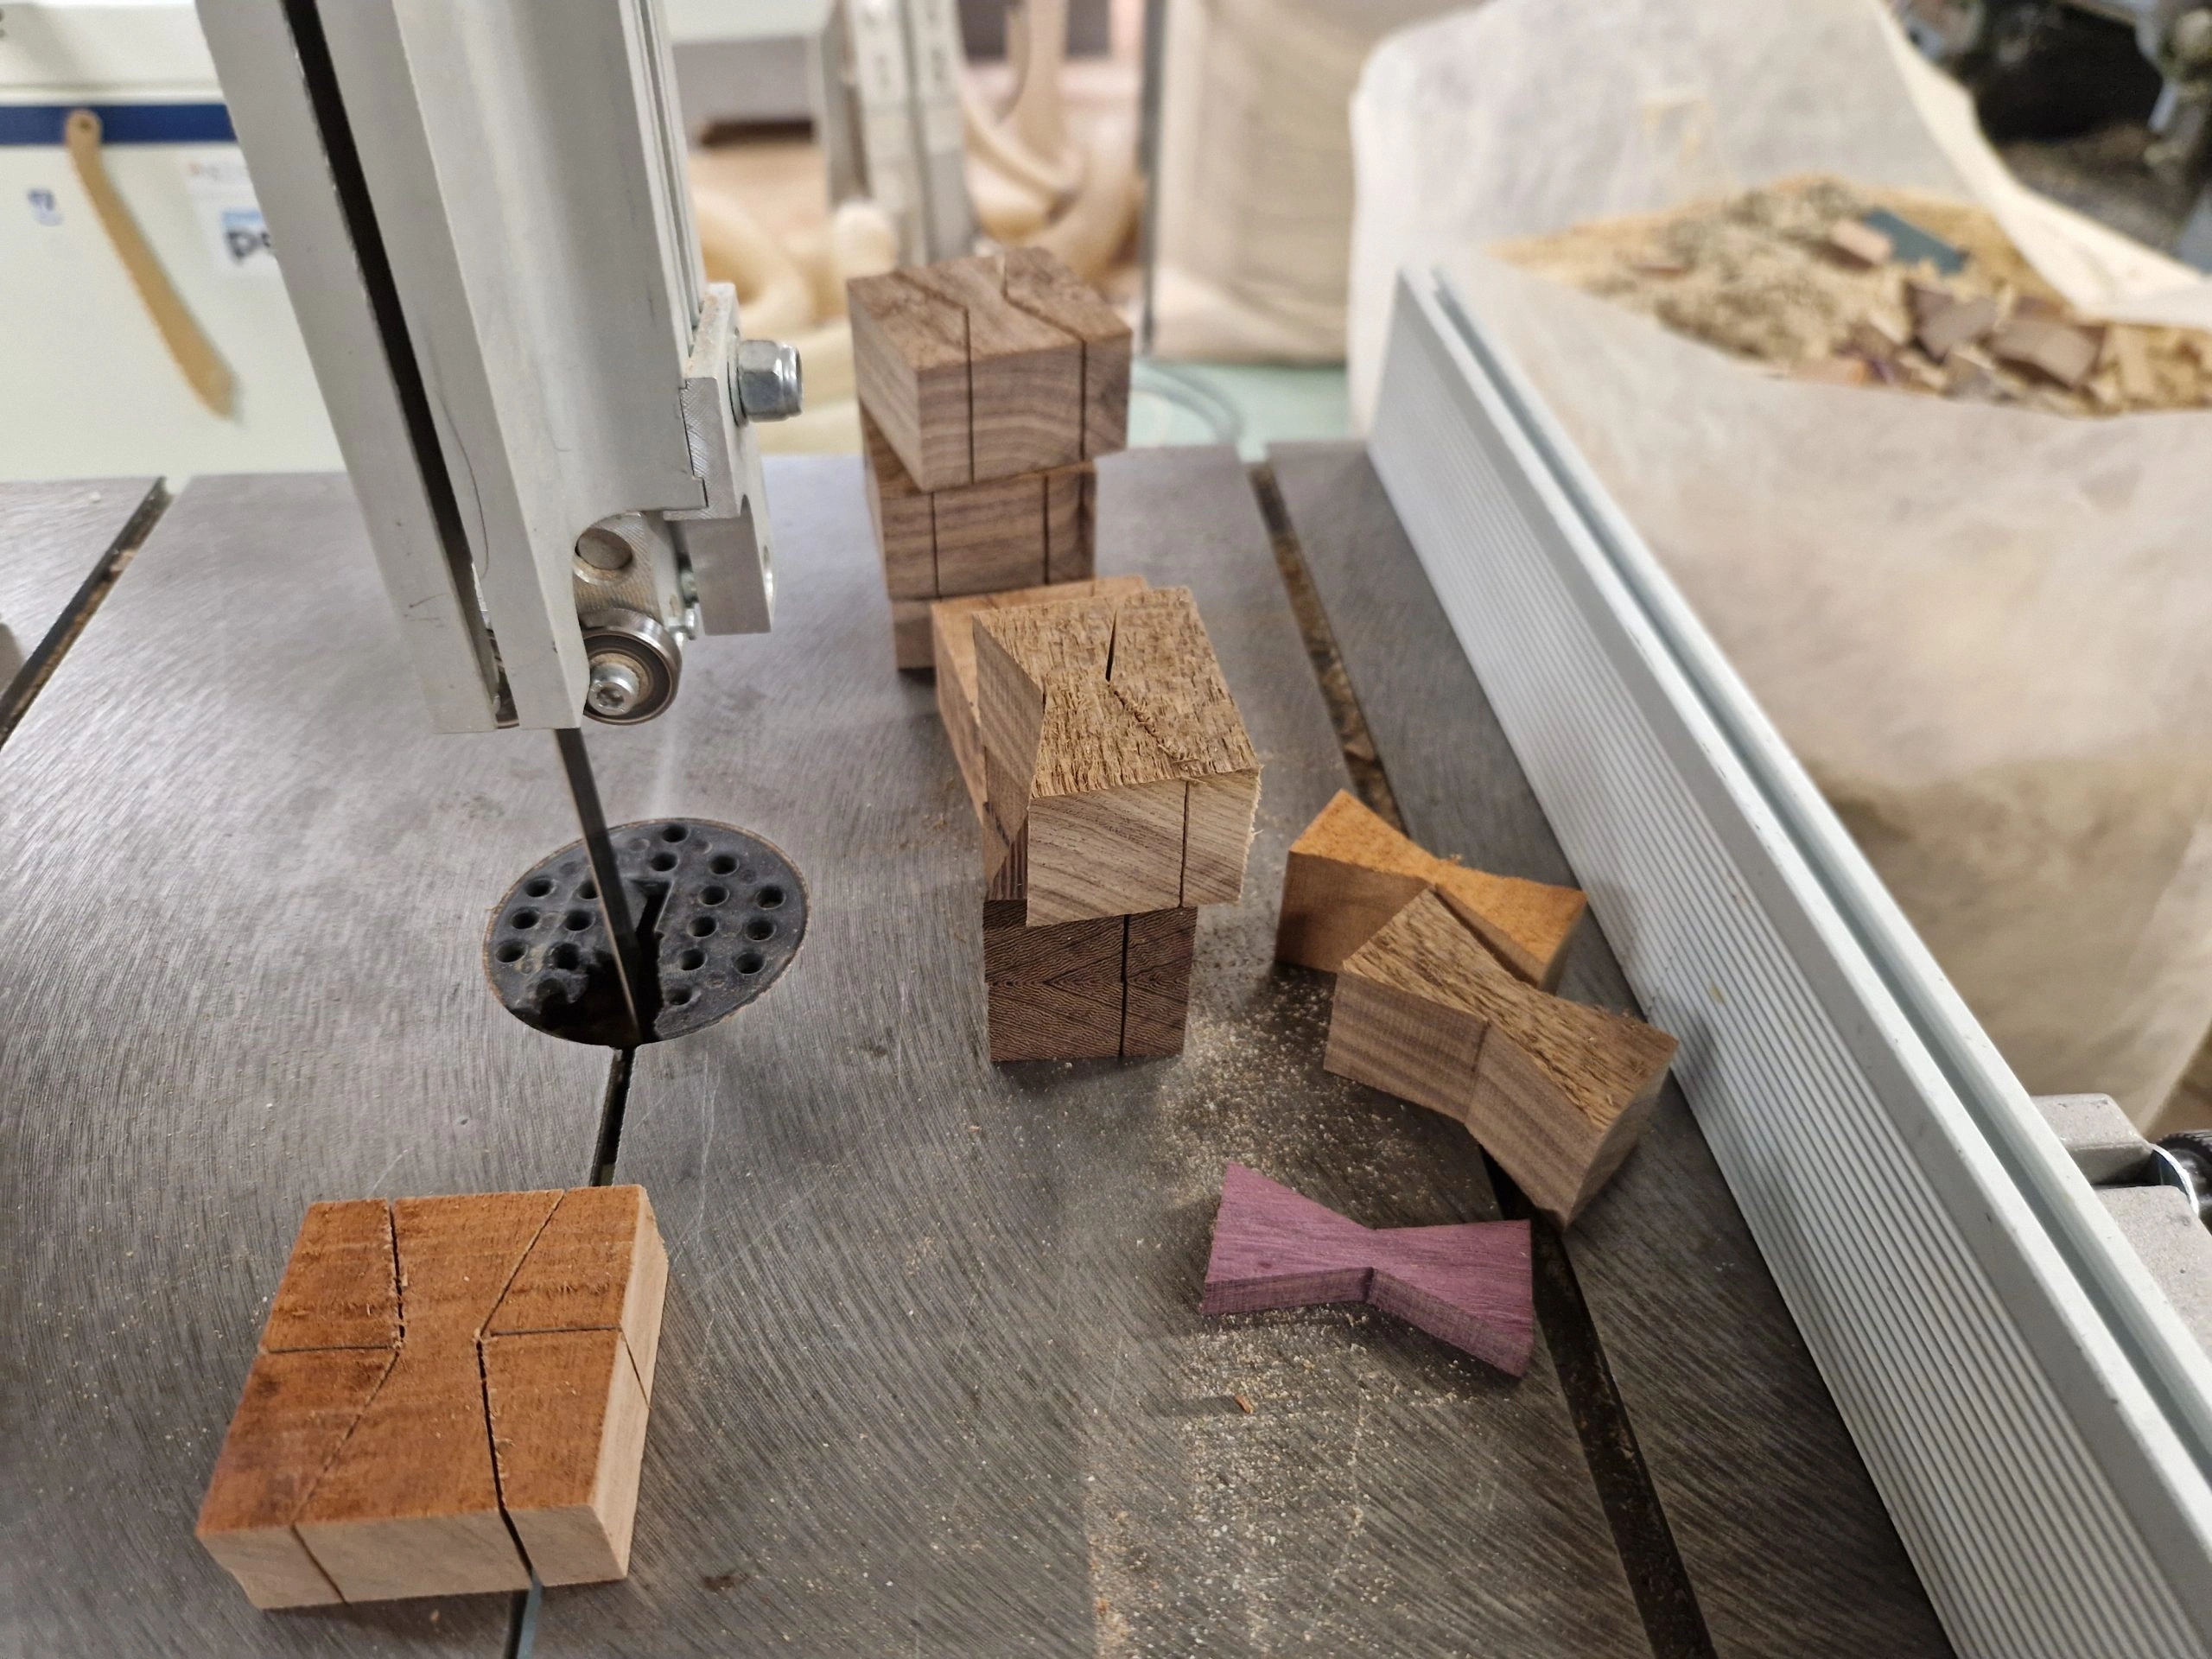
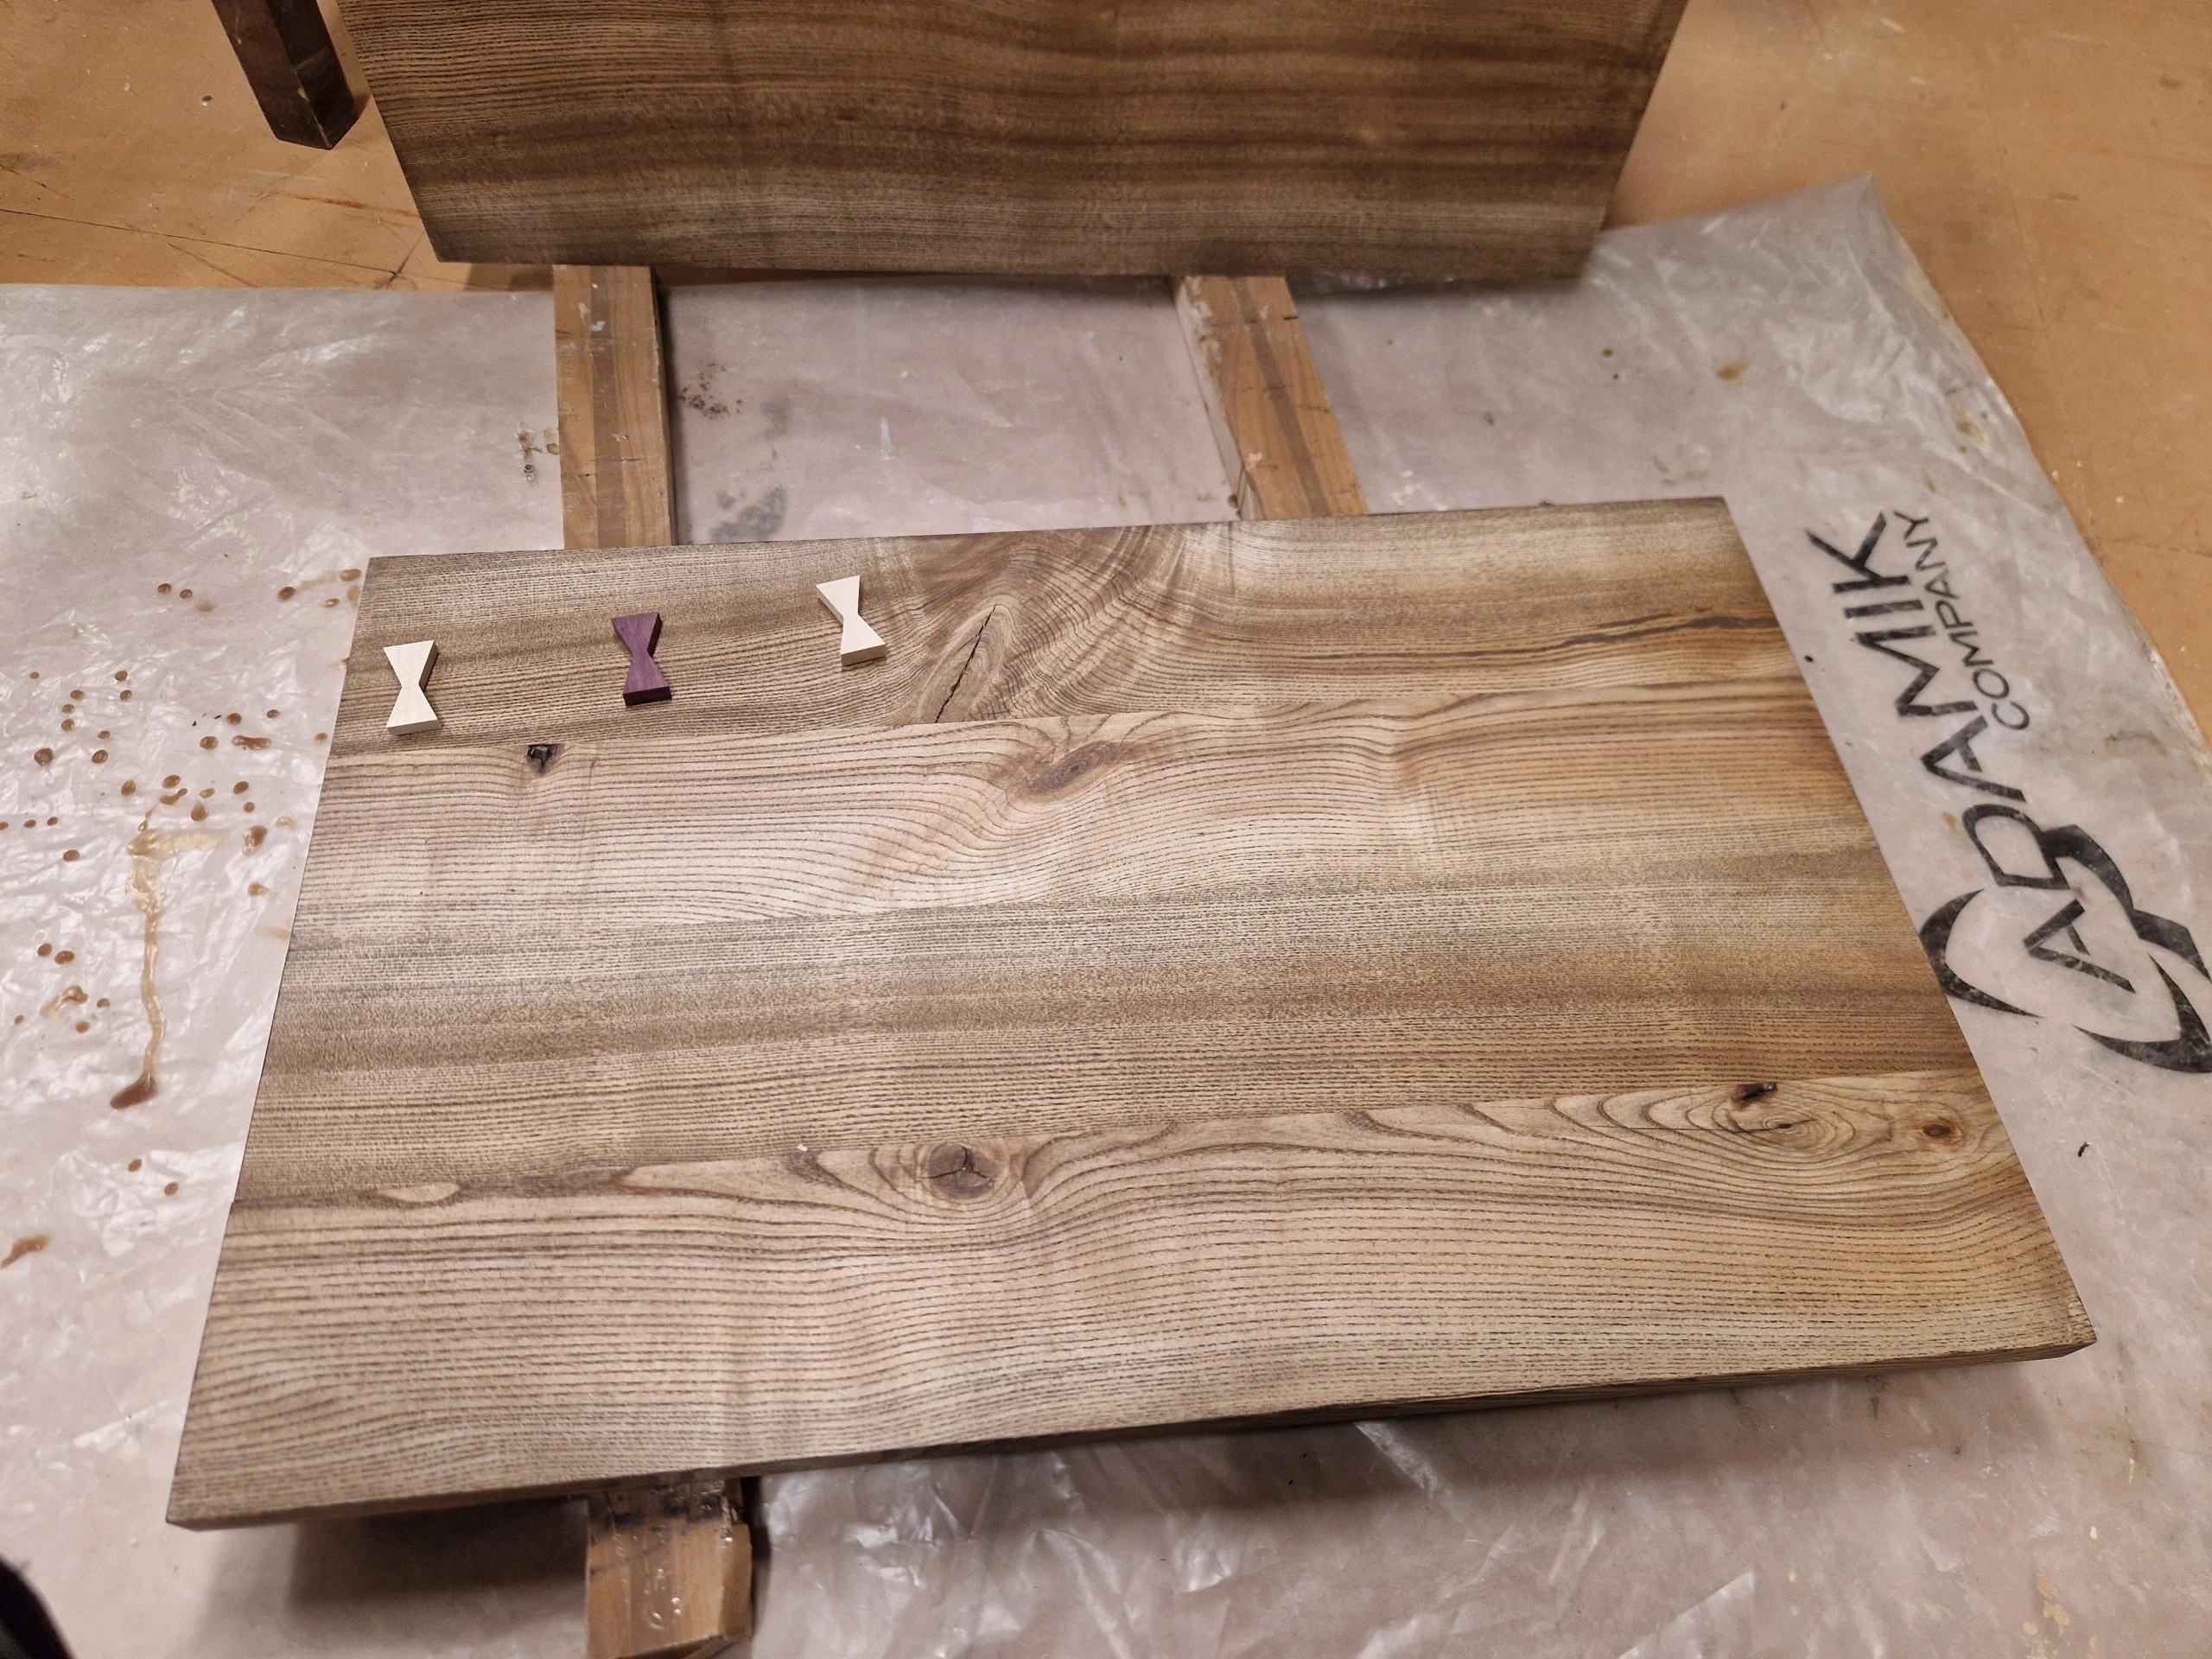
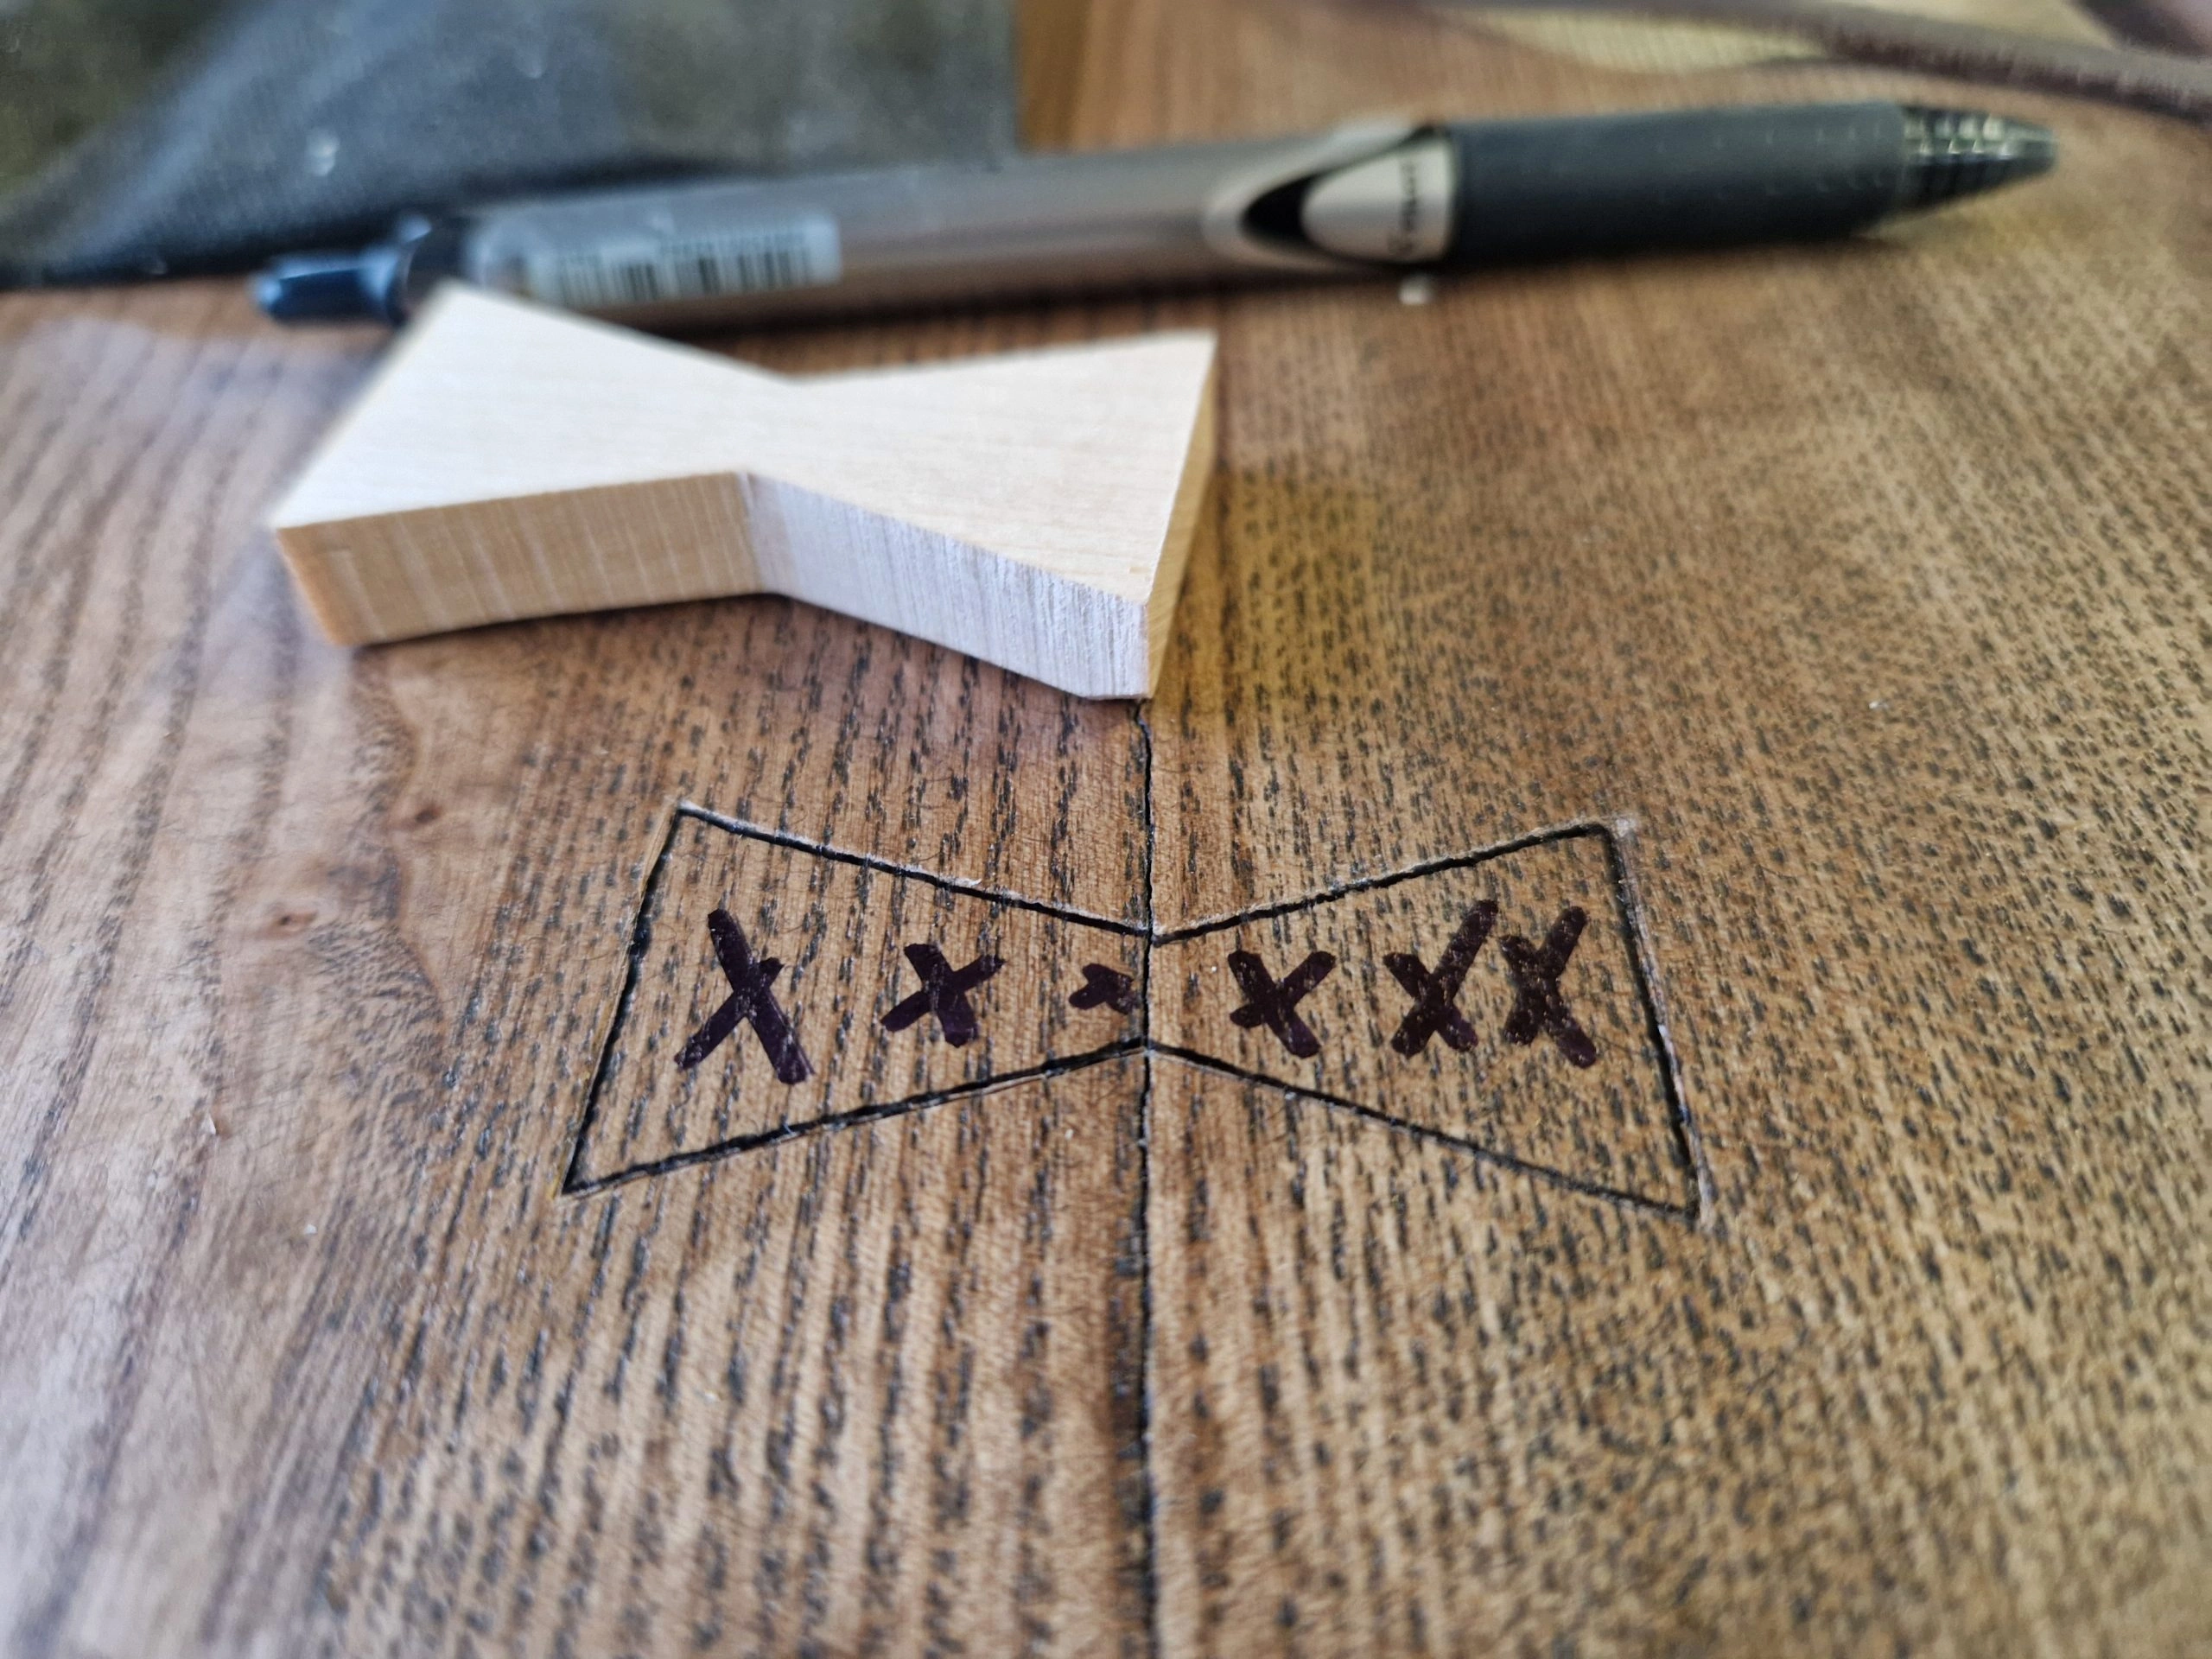
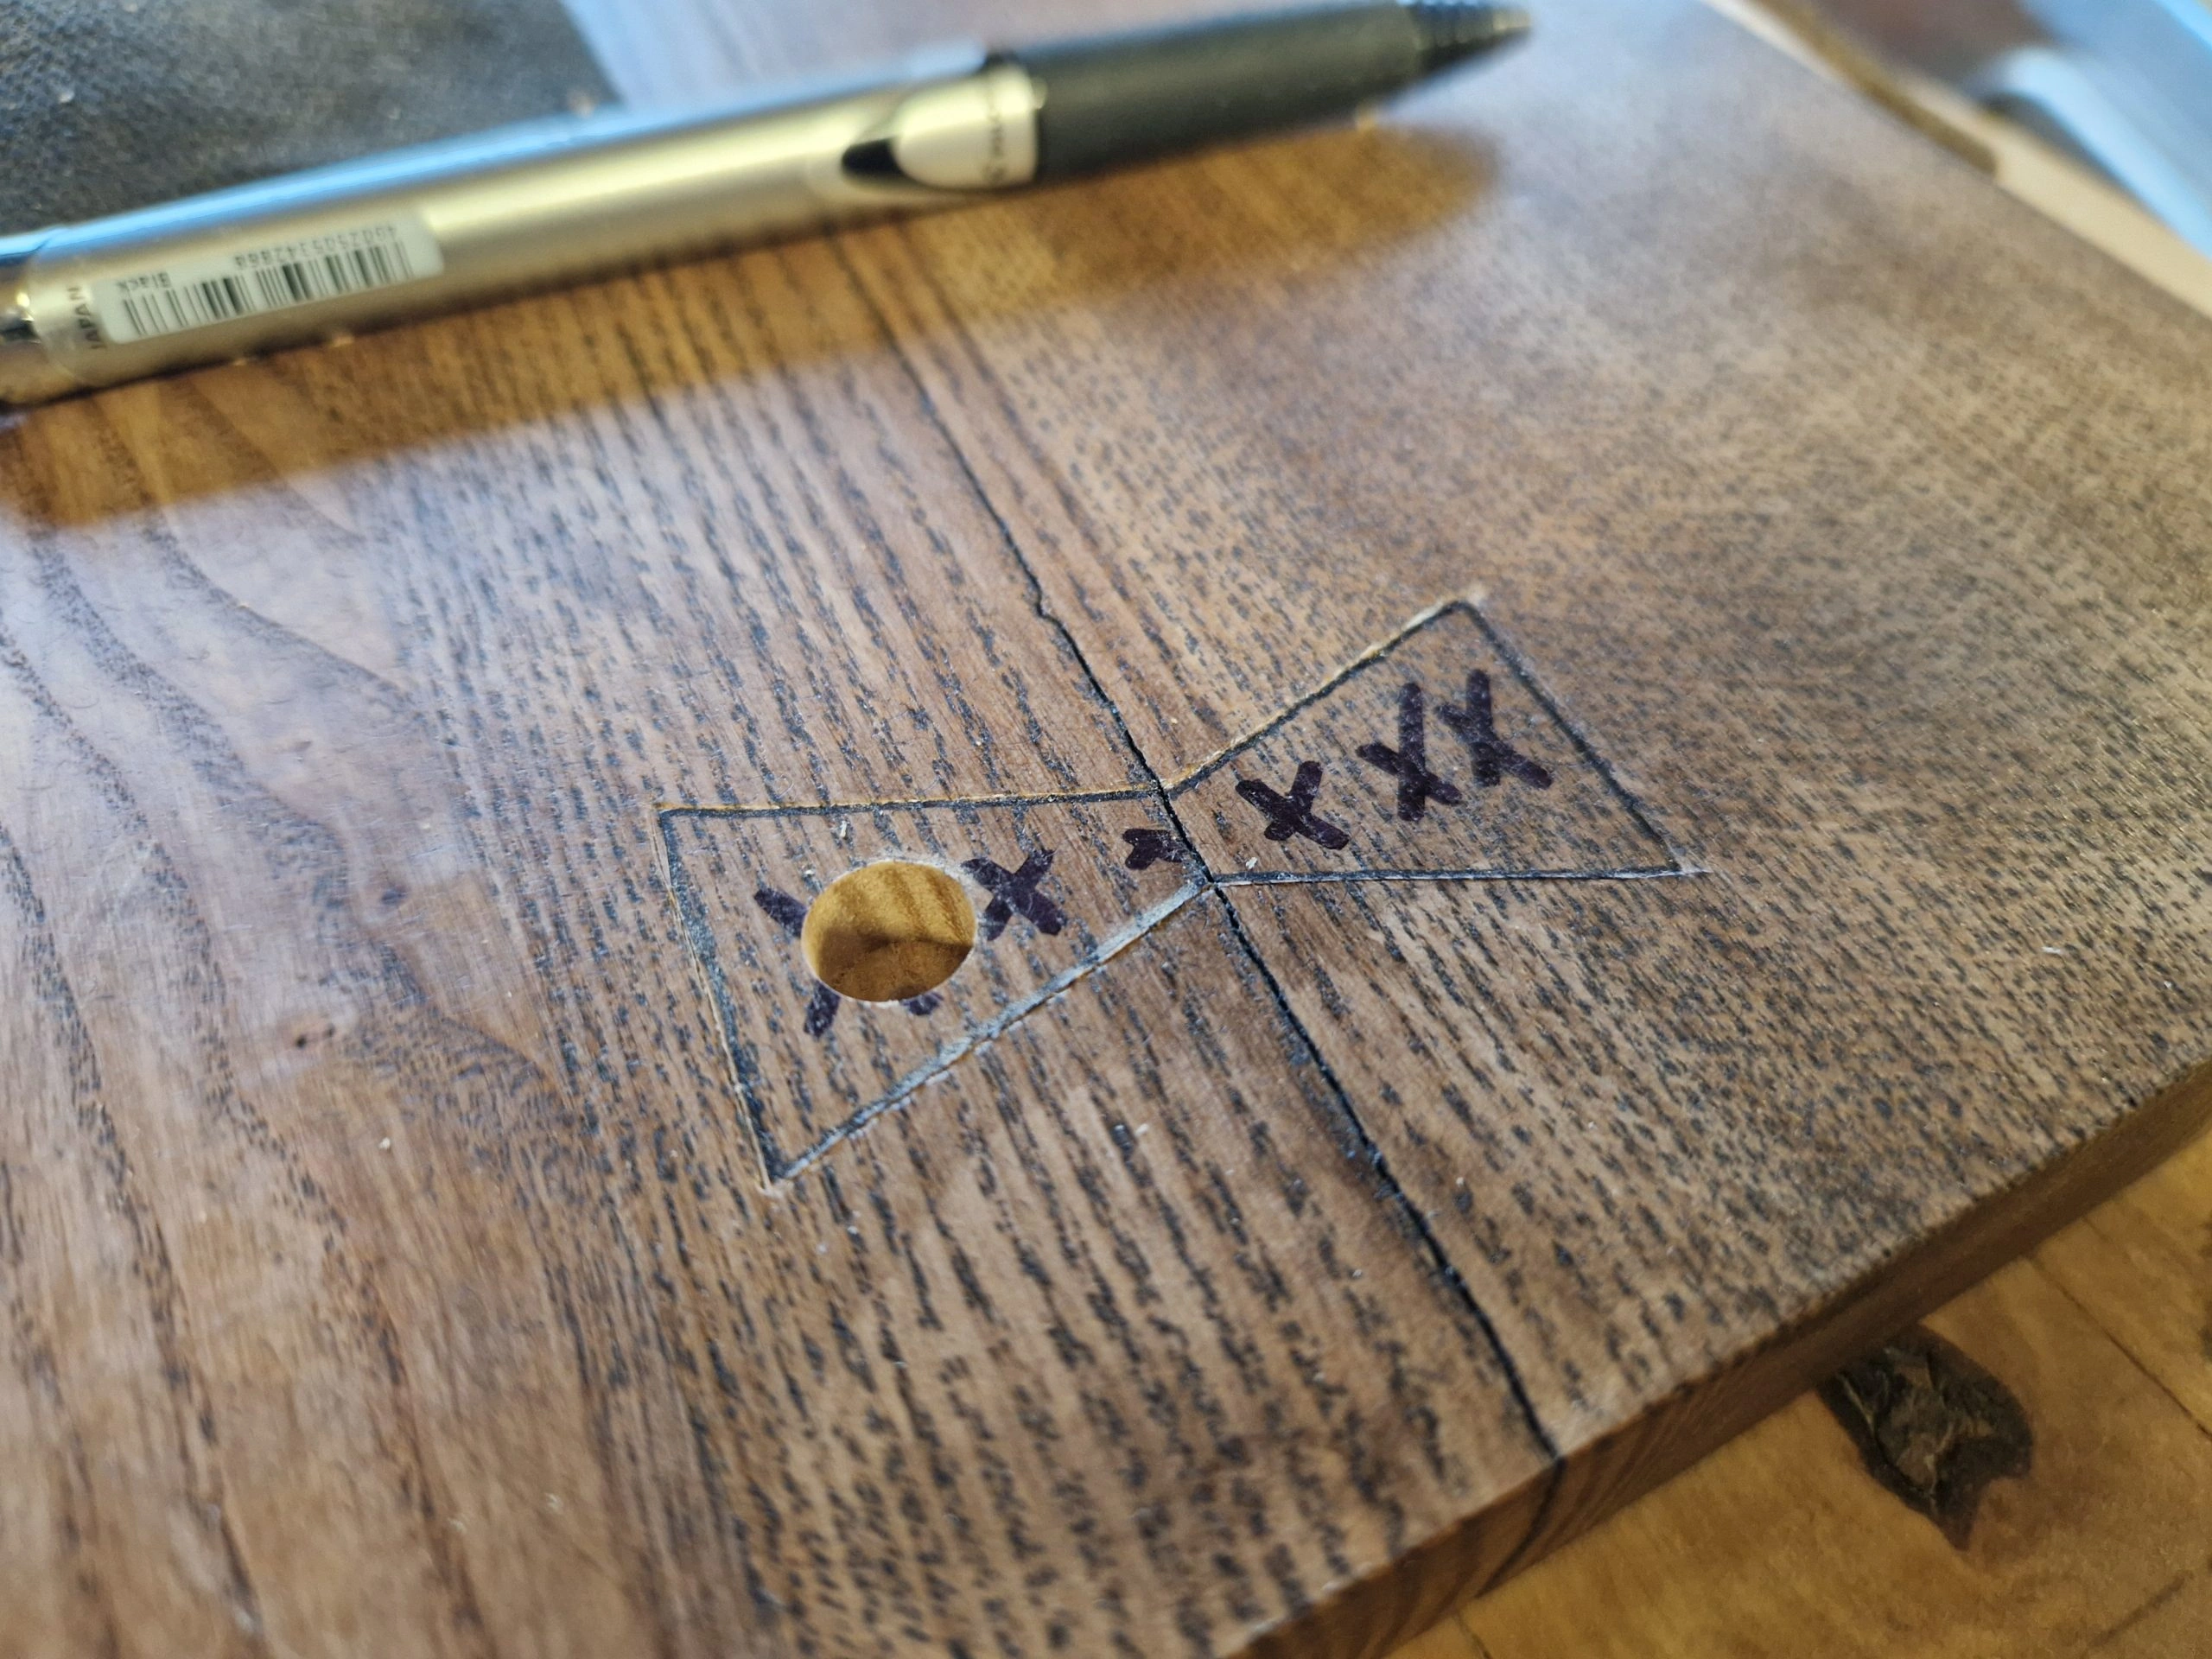
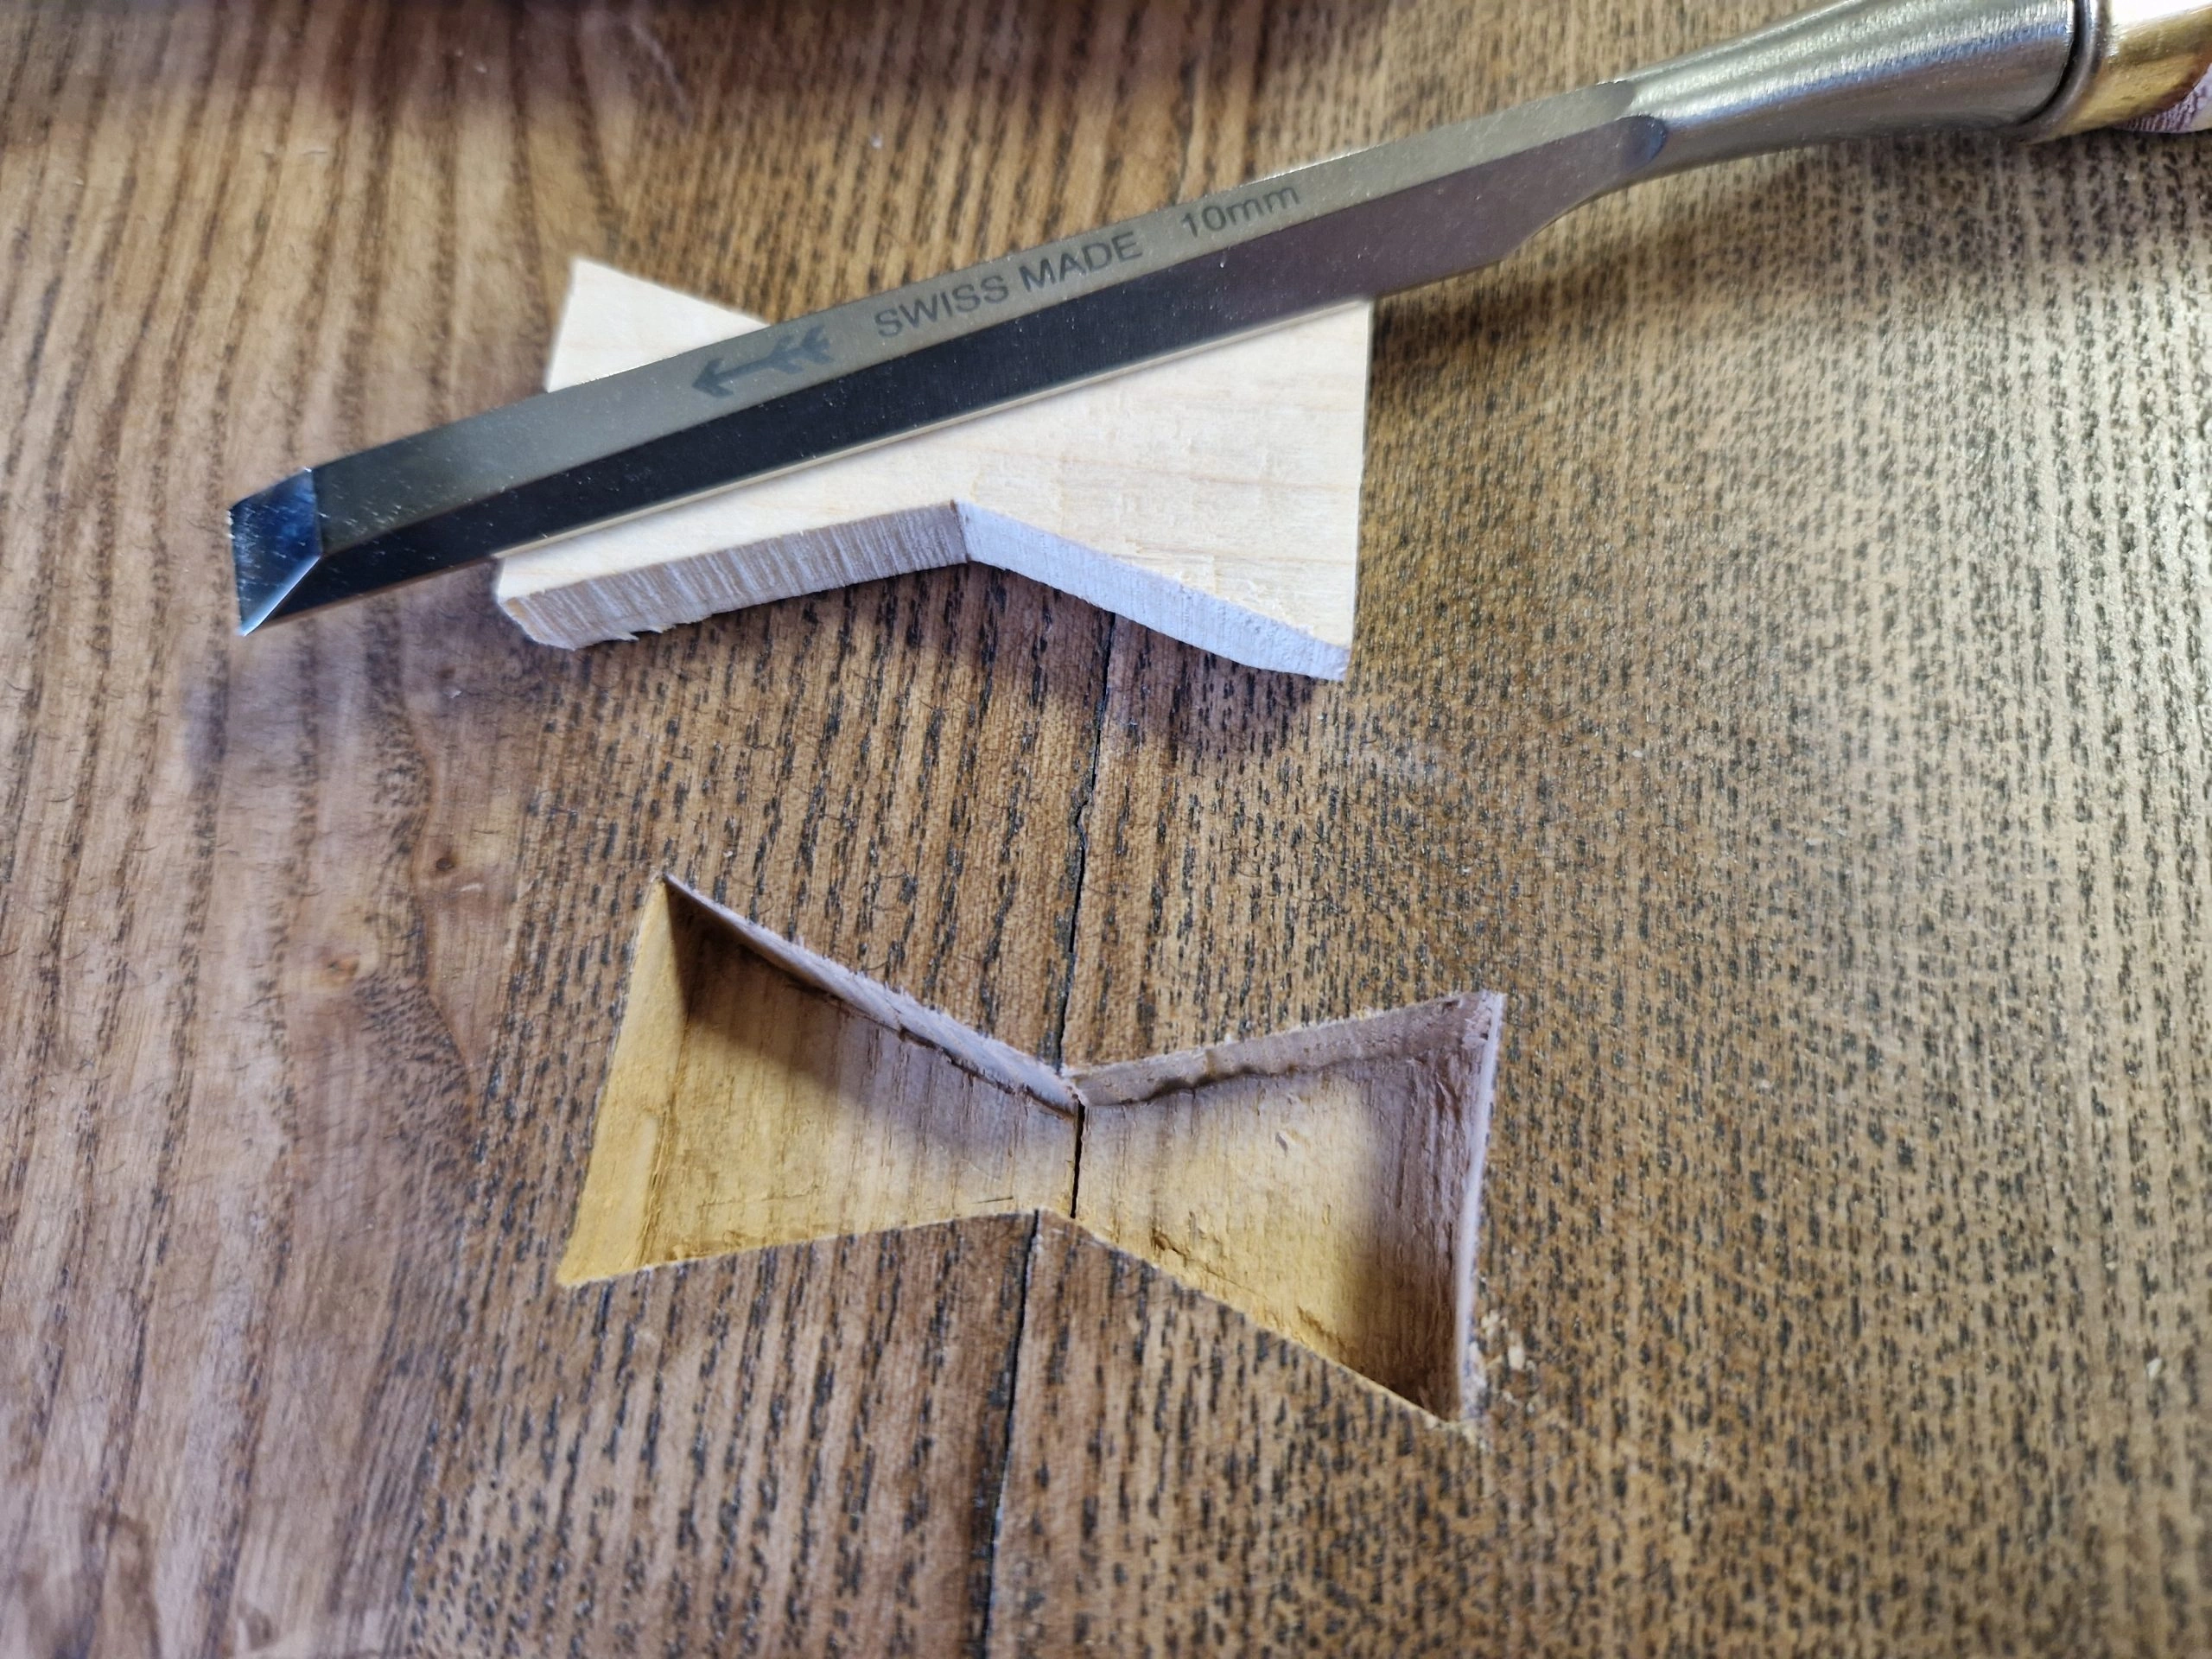
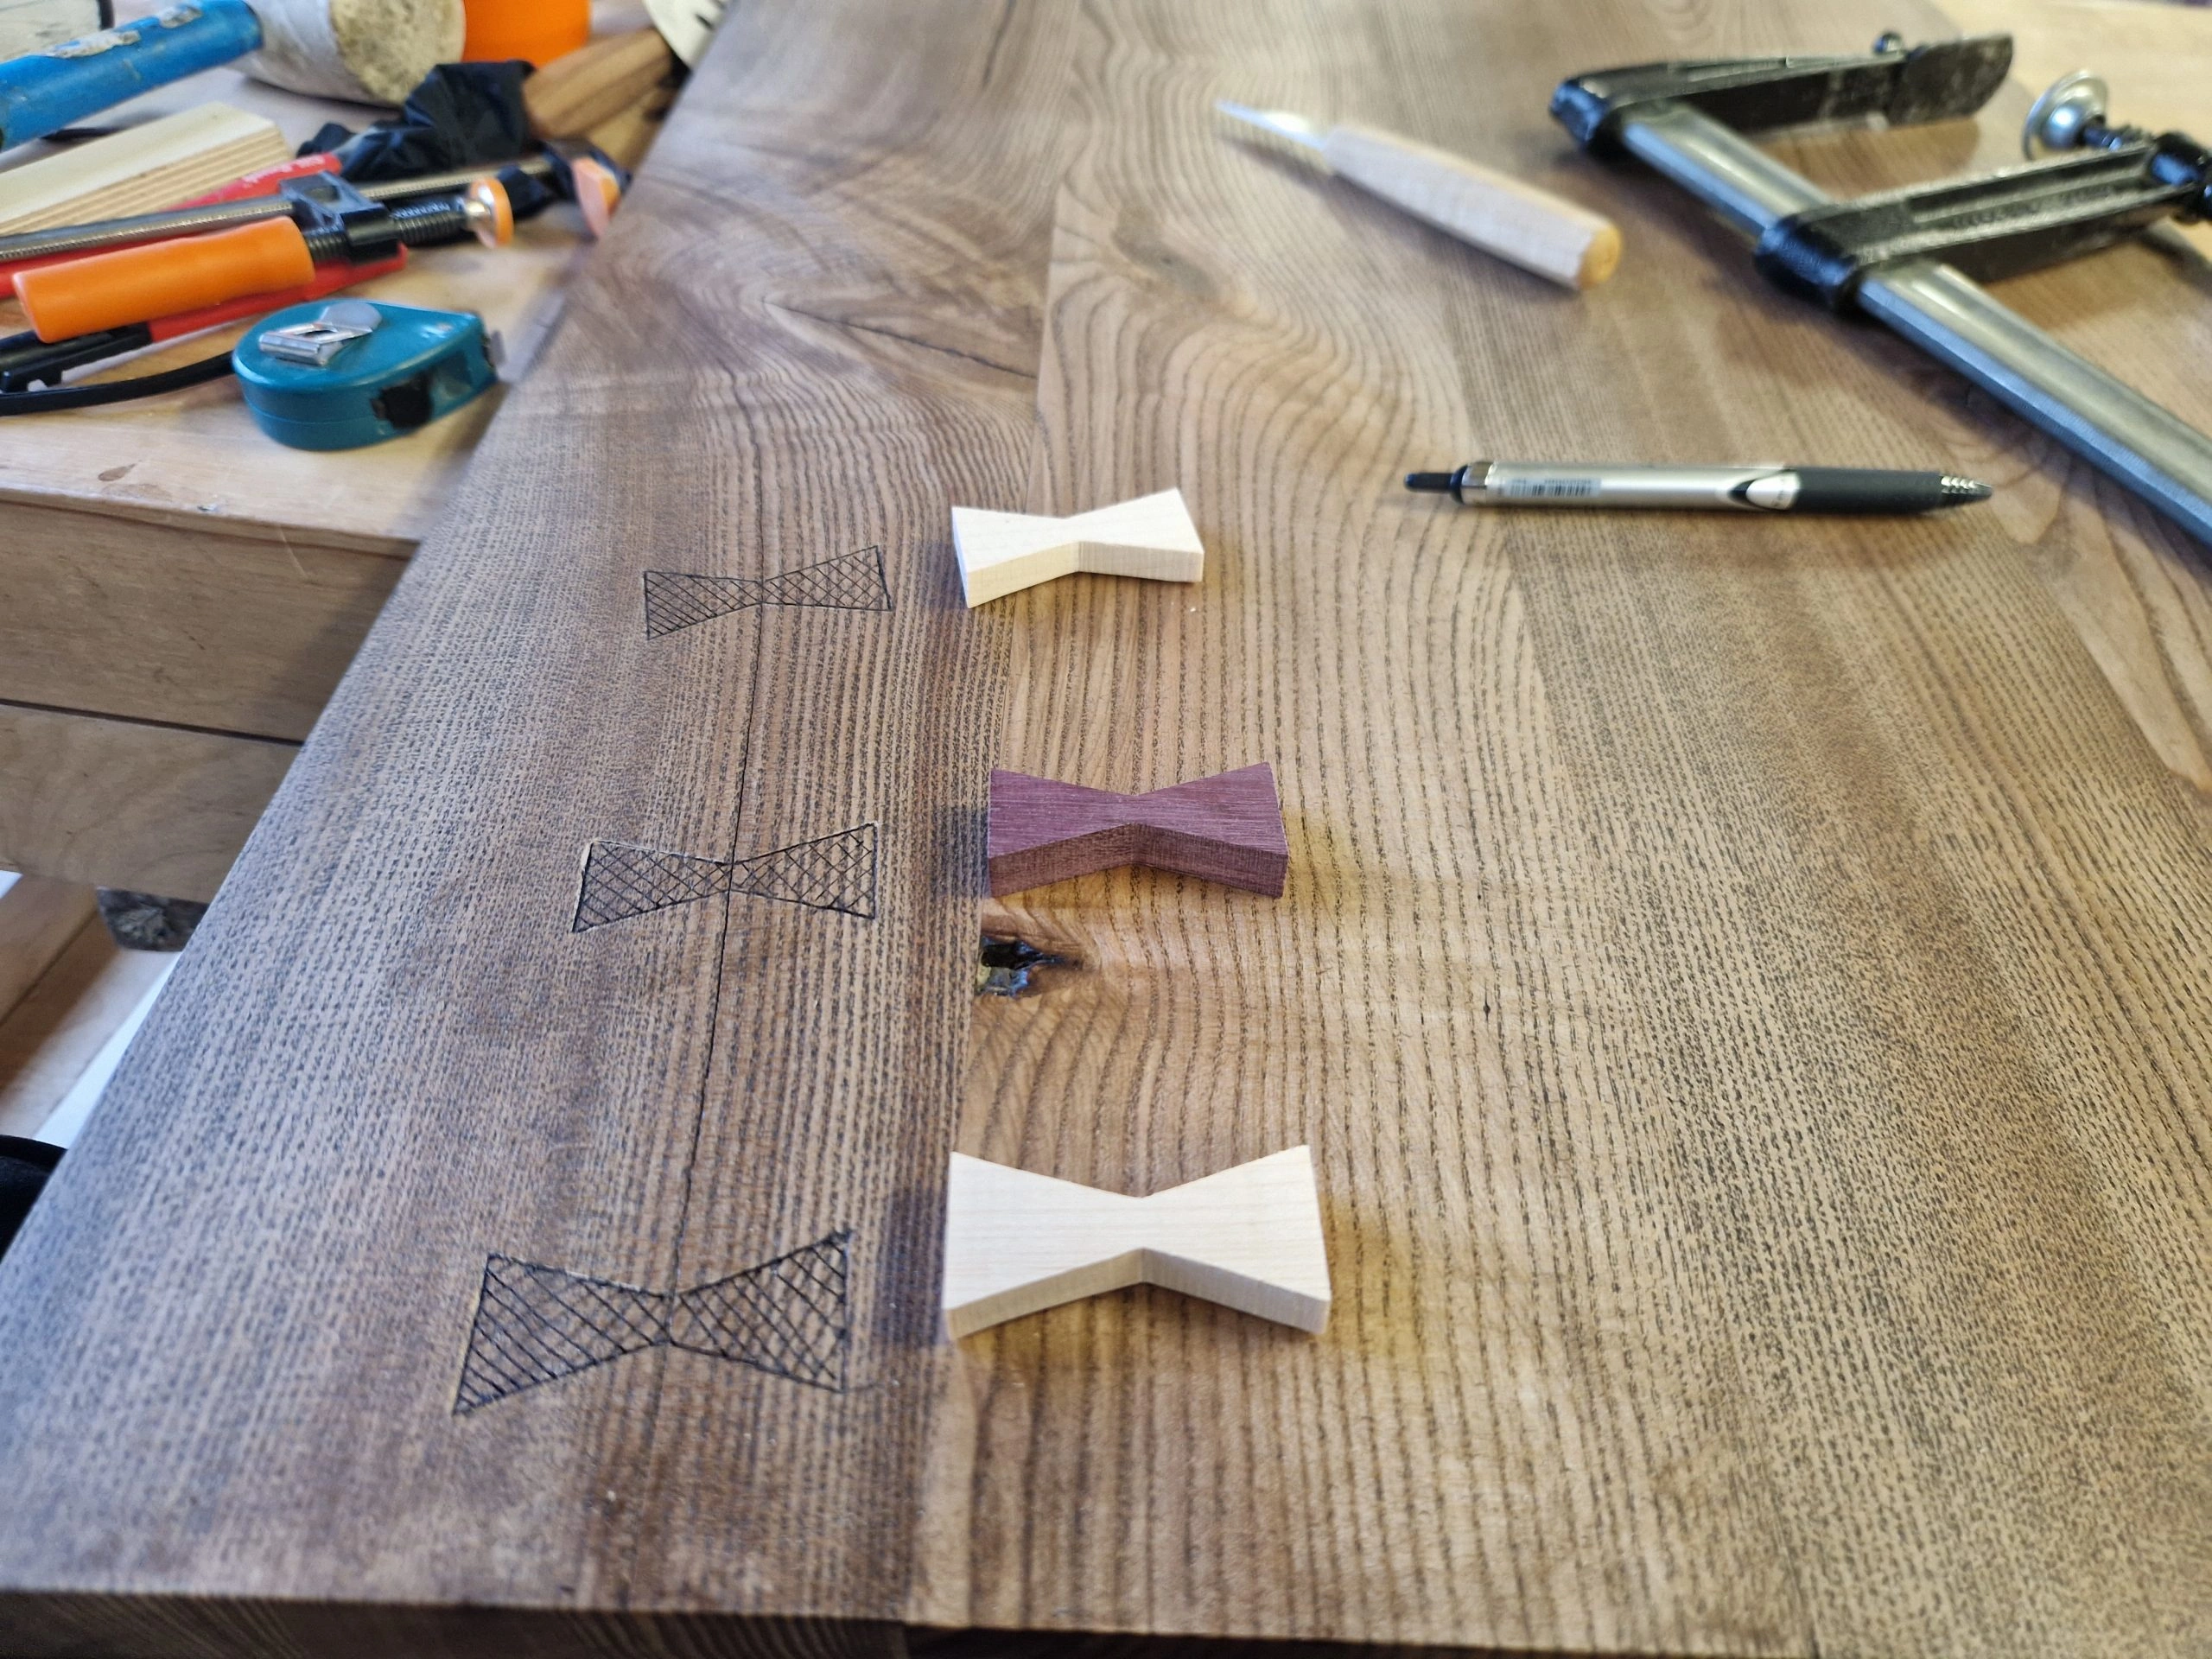
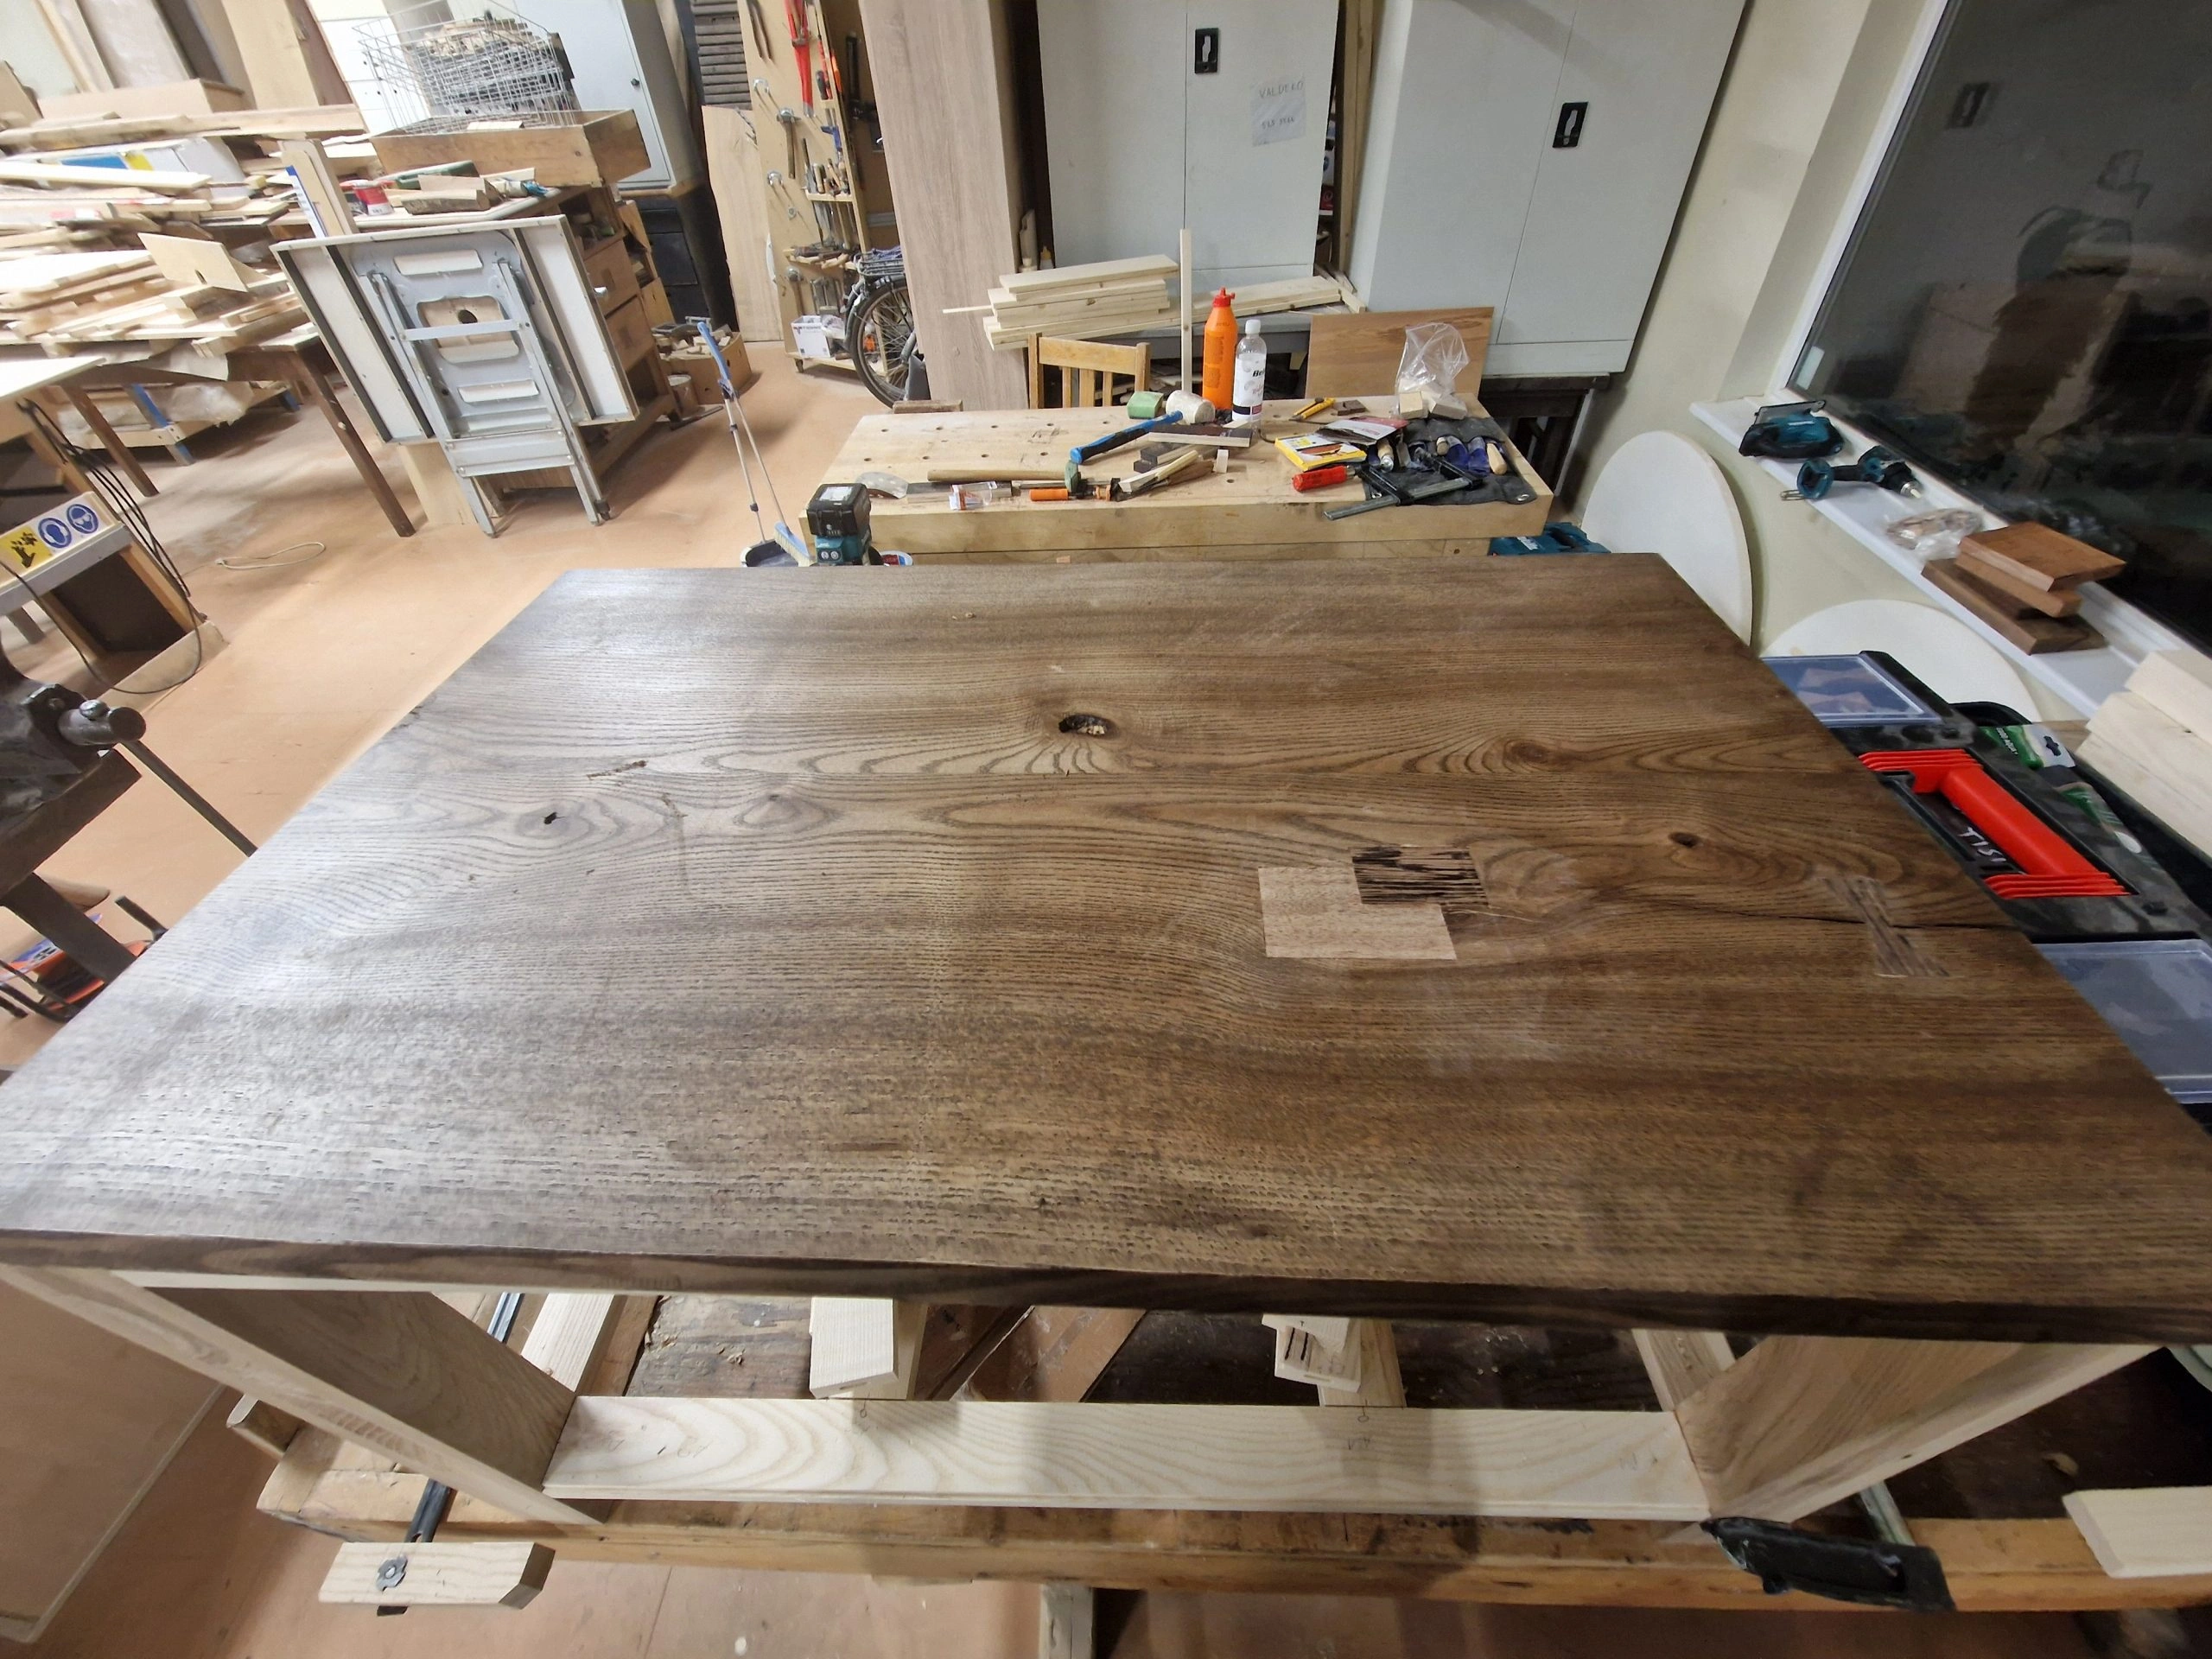
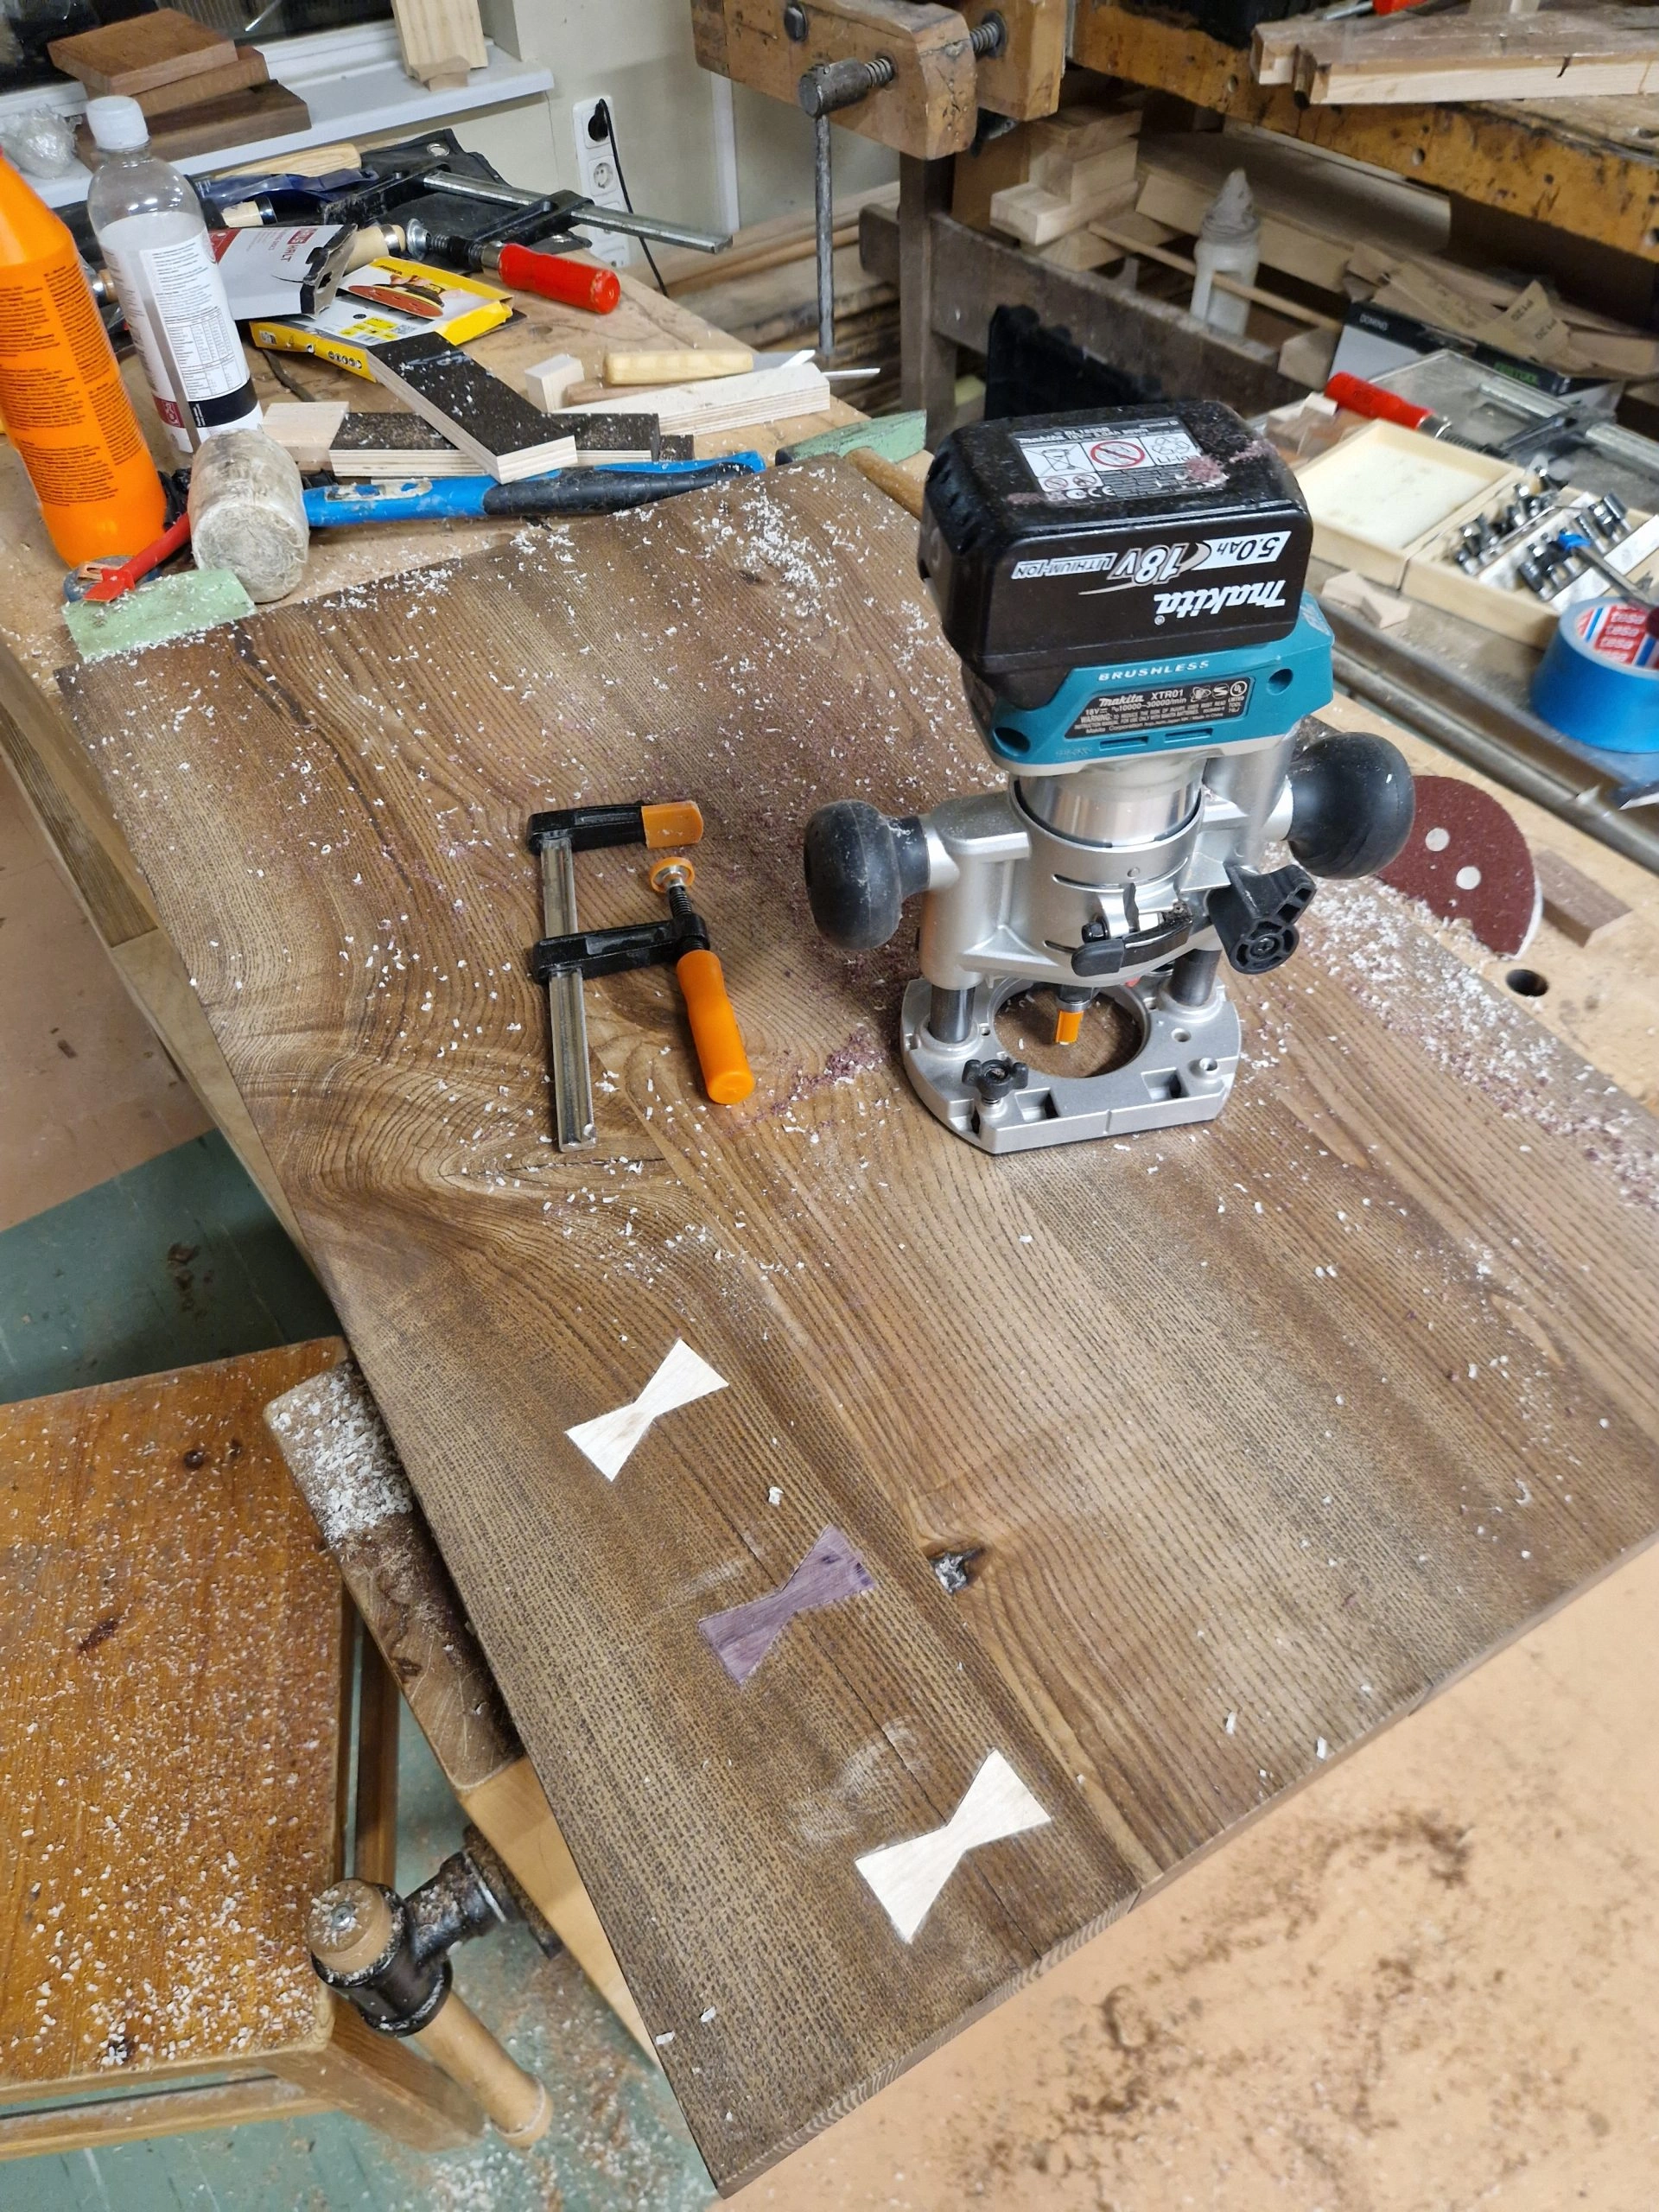
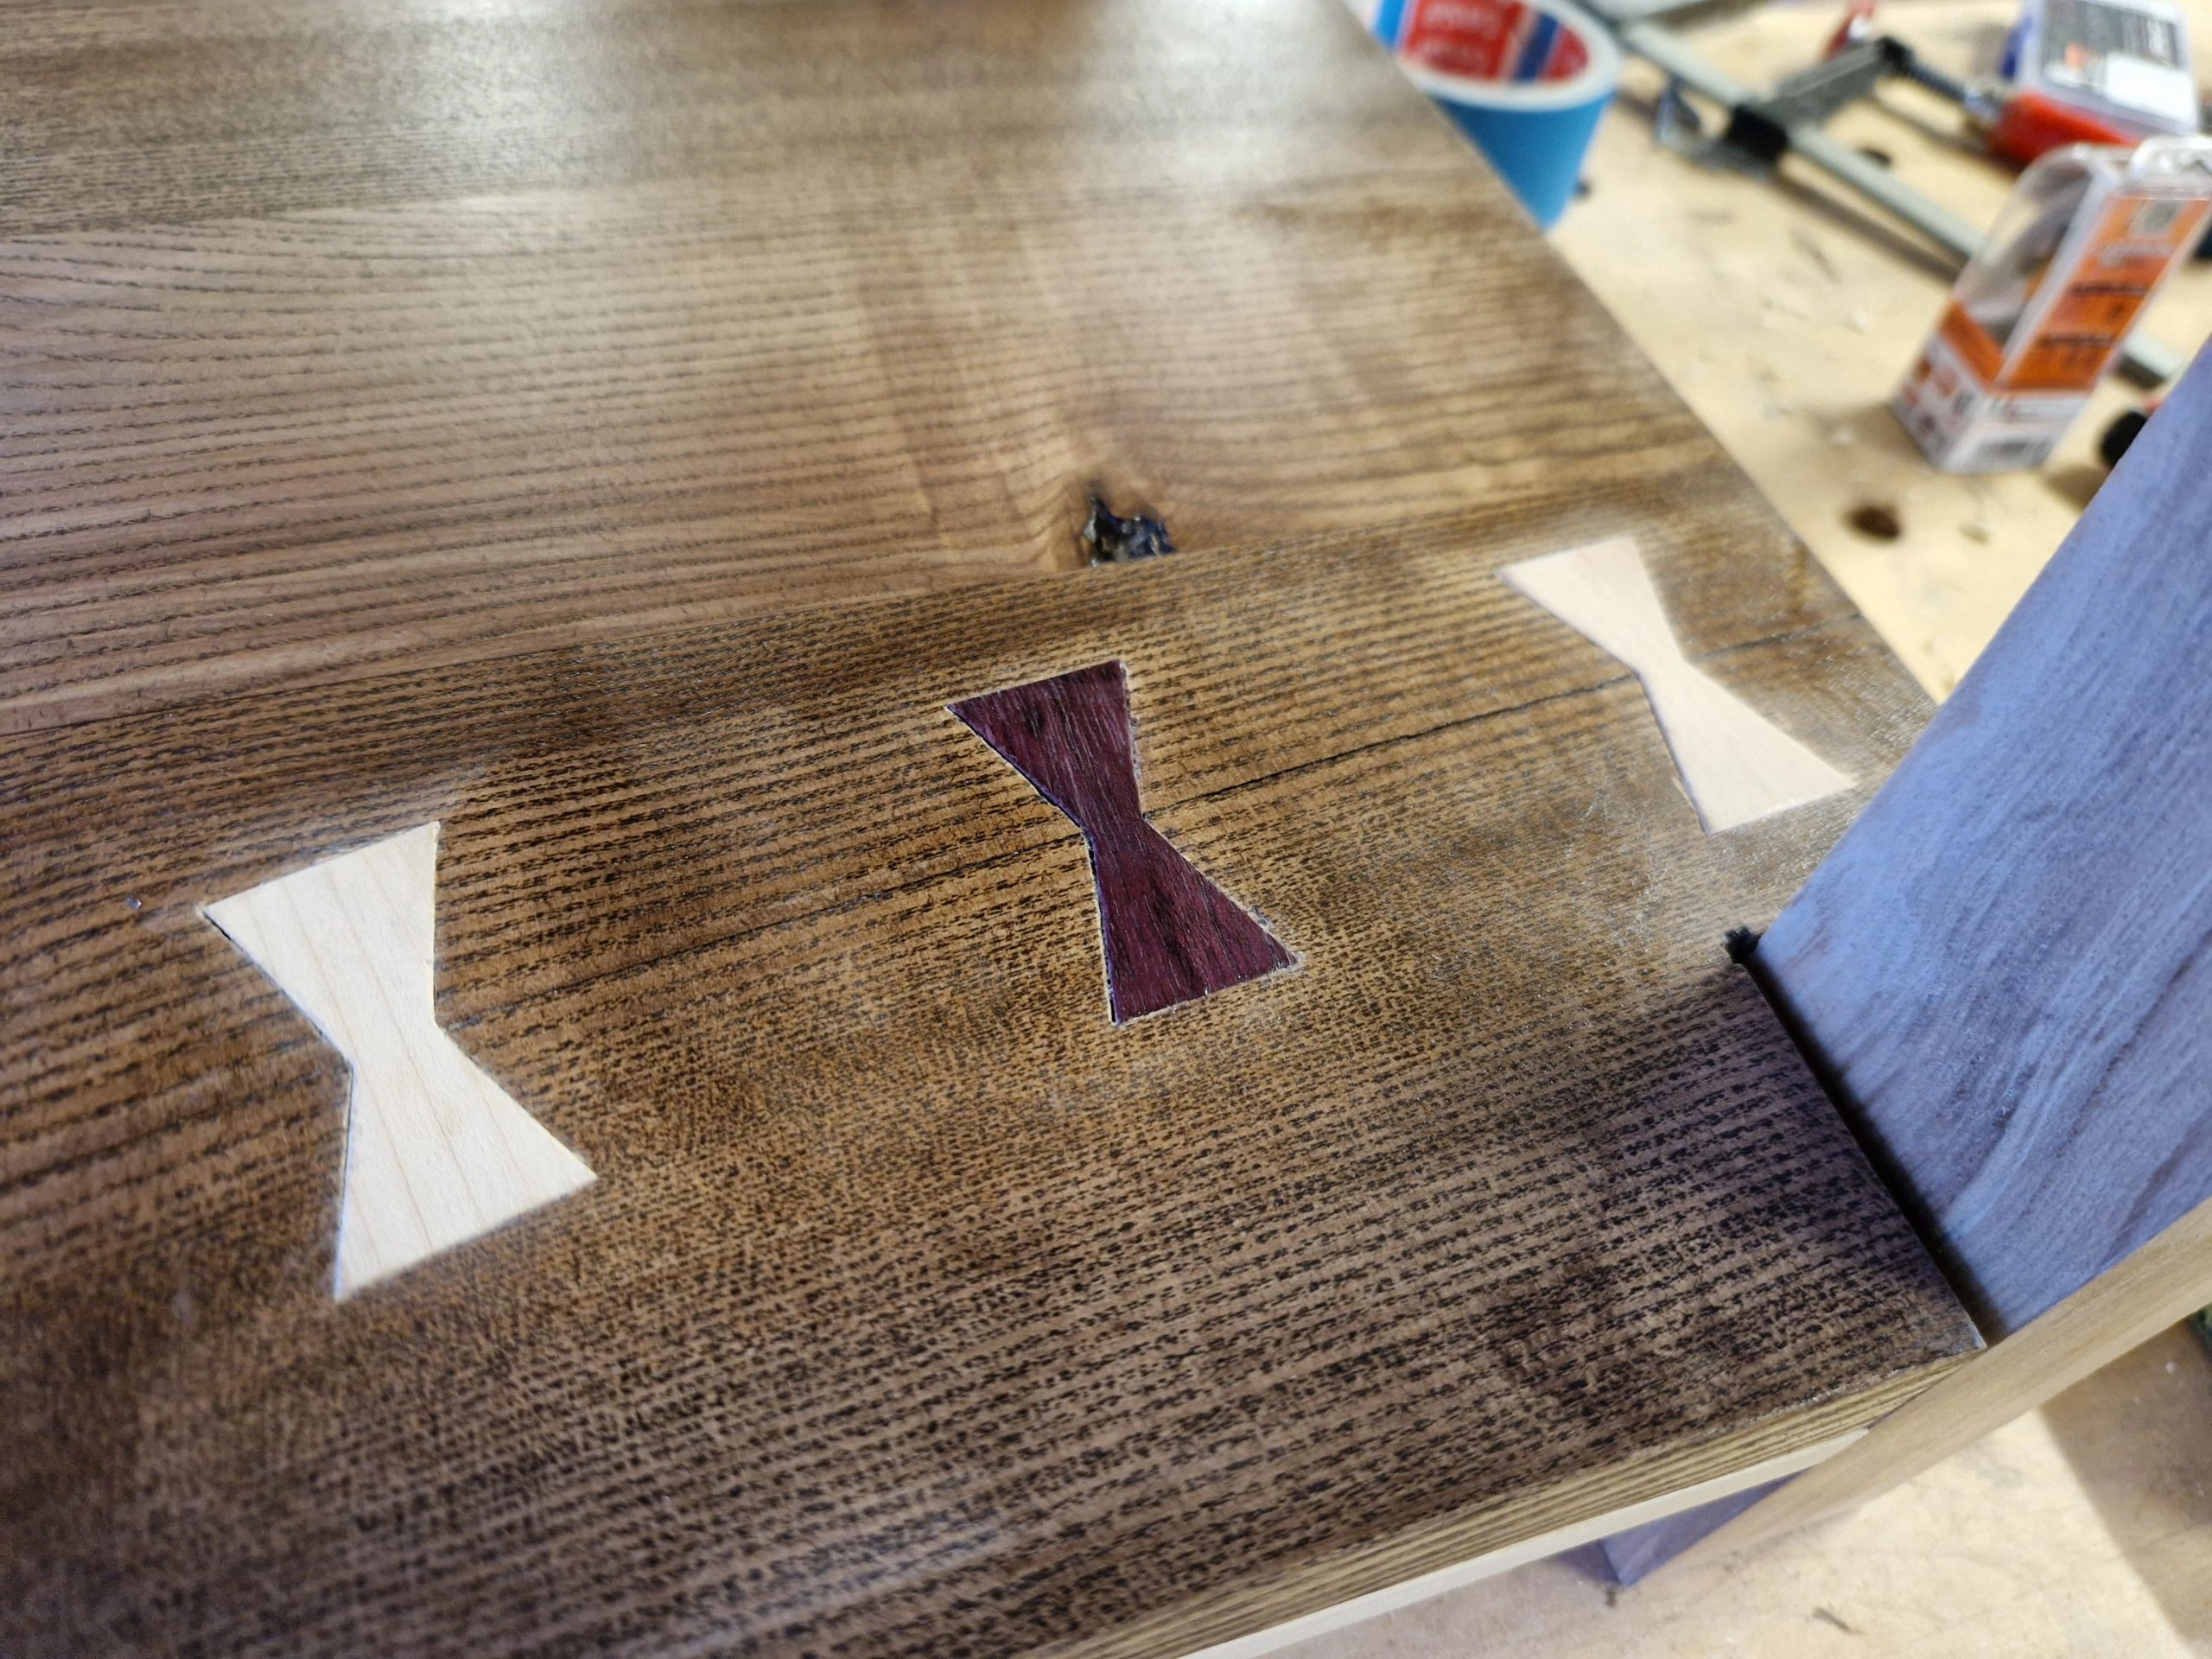
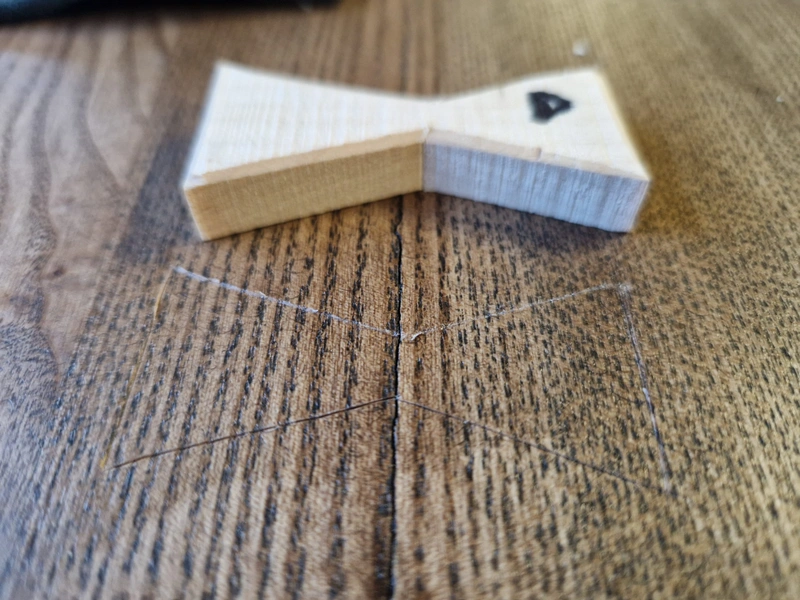
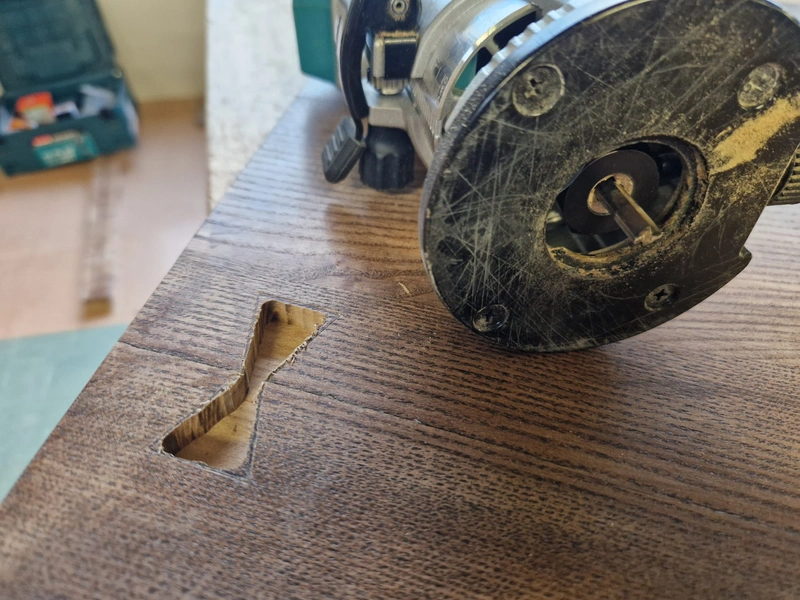
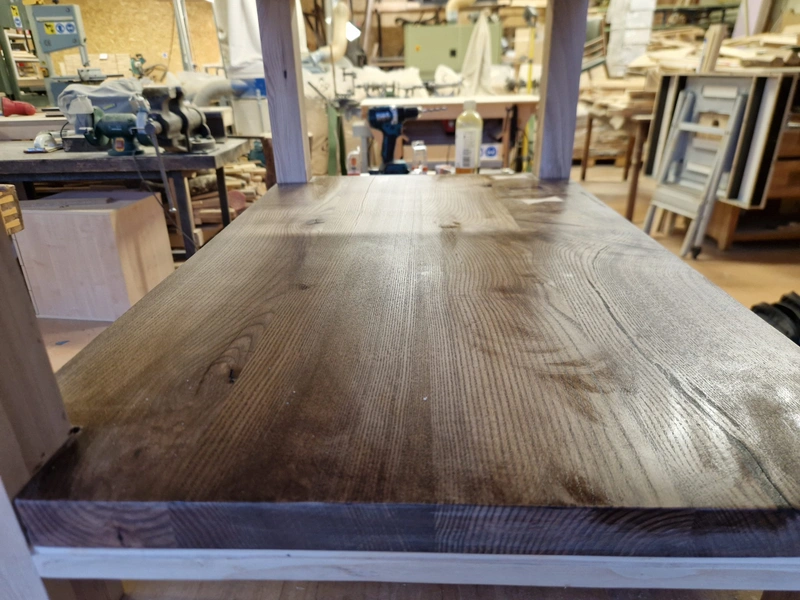
Applied Osmo Topoil — Terra finish on the tabletops in the hopes of simplifying the next steps. As the design principle goes - if you cant hide it, highlight it, so regarding knotholes and cracks in the tabletops, I opted to try a new approach by adding bowtie and square inlays with highly contrasting wood in the tabletops to increase its structural integrity. The bowties act as stabilizers for the crack, making it difficult for the crack to grow because it's being pulled together on both sides by the bowtie. The contrasting wood color acts as a highlighter, hopefully turning the ugly defect into a unique characteristic. It's a feature, not a bug.
This was my first dabble in Japanese joinery/techniques with proper chisels, marking knives and so on, and I have to say I really like it. It also became painfully clear how limiting it is to use wood stain instead of dark wood where dark wood elements are desired. For example, after adding a bowtie with light wood color into the dark stained tabletop, a good woodworker would sand the patch to make the transition seamless, because usually people expect flat, level and smooth tabletops. However, if I had sanded this, I would've ruined the stain, thus I would've had to re-apply the stain, and after careful considerations I realised I would probably get a bunch of stain on the light wood. Thus either making the bowties look ugly, or the tabletop look ugly. A true nokk-kinni-saba-lahti situation. So my solution was to use the router to cut the bowtie as close to the tabletop as possible, but not sand it, so the bowties are basically 0.1mm higher than the table. Good enough, but unfortunately not perfect. Understanding these limitations and the usual hassle of staining made me realise I am no longer interested in staining wood at all.


1 / 7
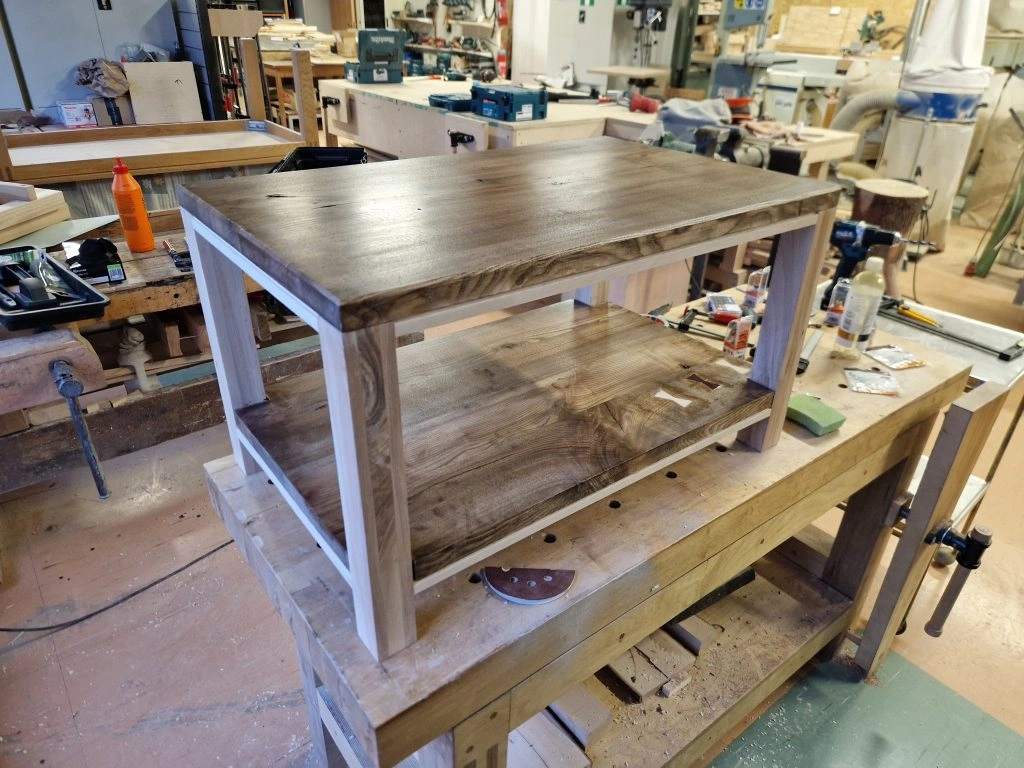
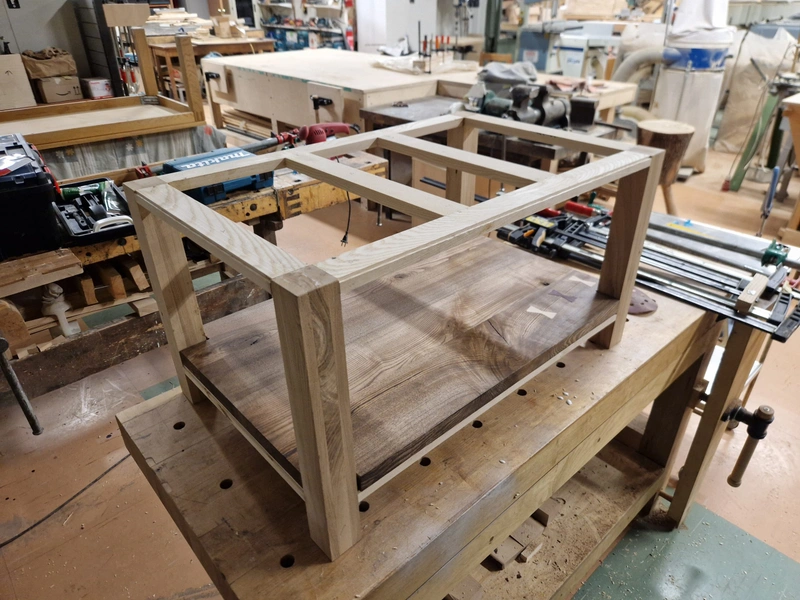
With the leg-pairs joined, and tabletops patched, stained and sanded, it was time to put it all together. Luckily earlier I had caught the fact that the bottom tabletop would not fit in the frame if I were to glue the legs and frame together, so I kept the leg-pairs and frame separate up to this point. After setting the bottom tabletop between the leg-pairs, I glued the legs into a single frame in a wonky orientation with the tabletop sitting on its side. Luckily it worked out well and I could continue with attaching the tabletop.
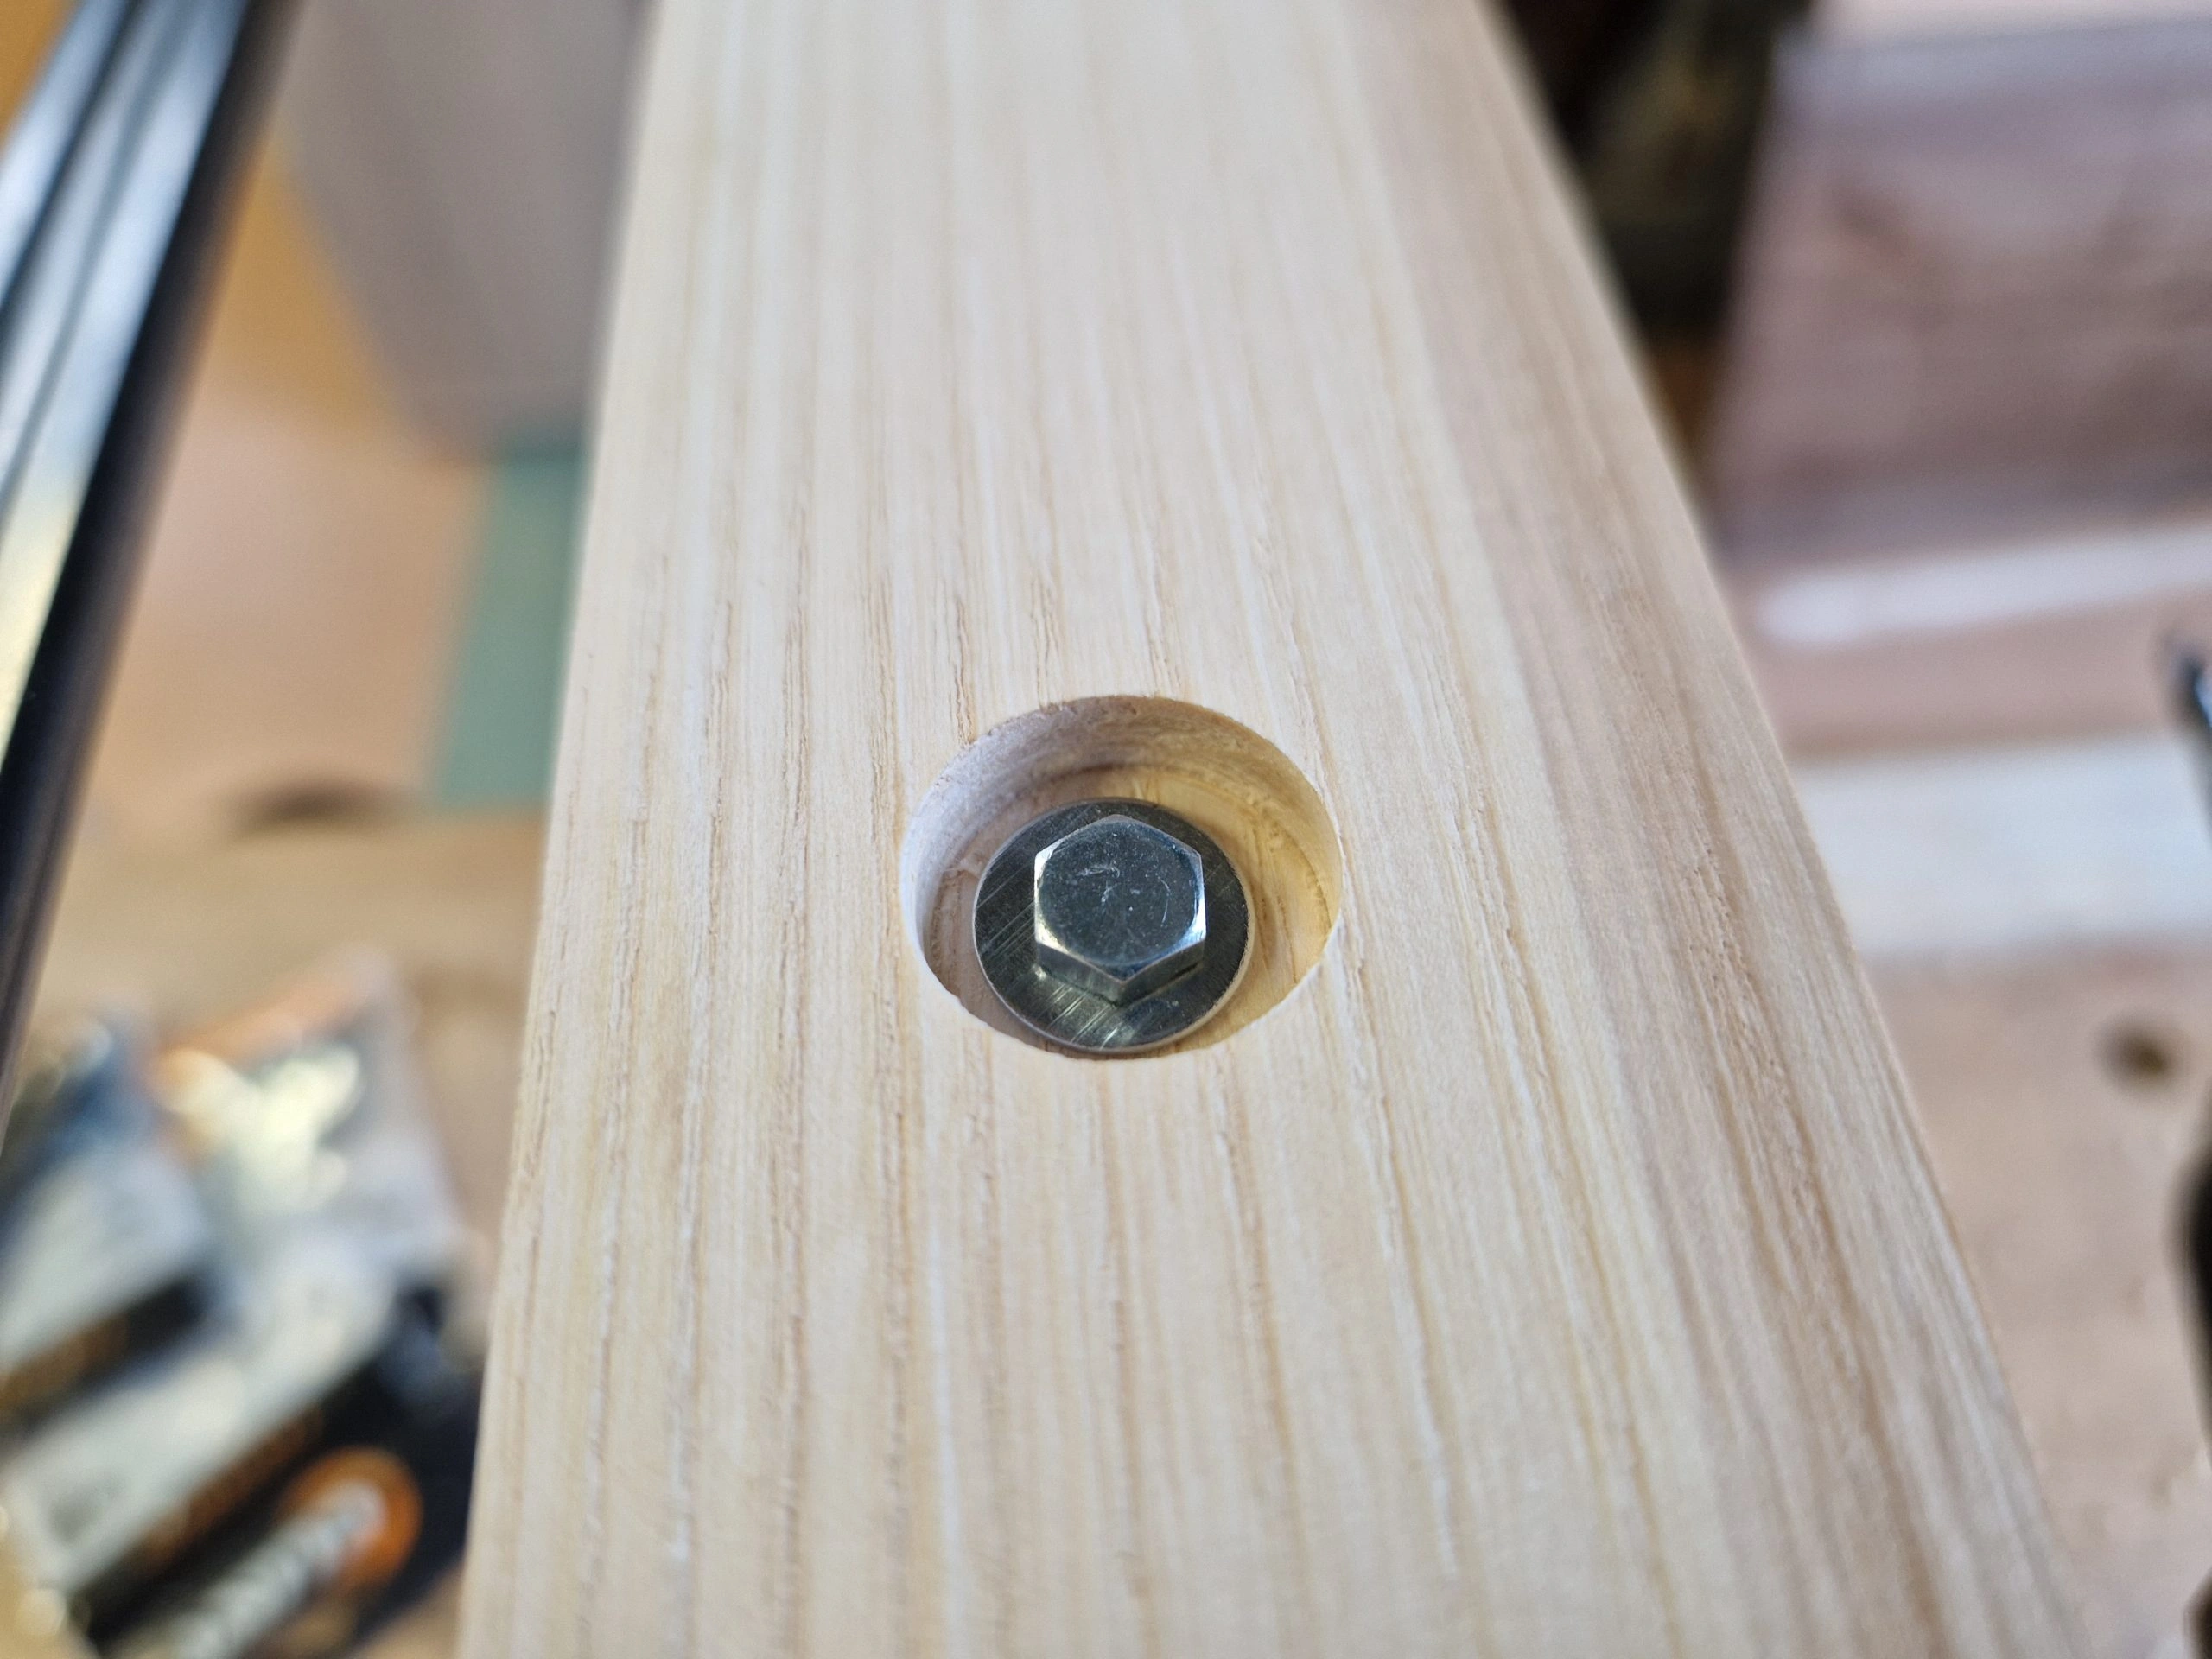
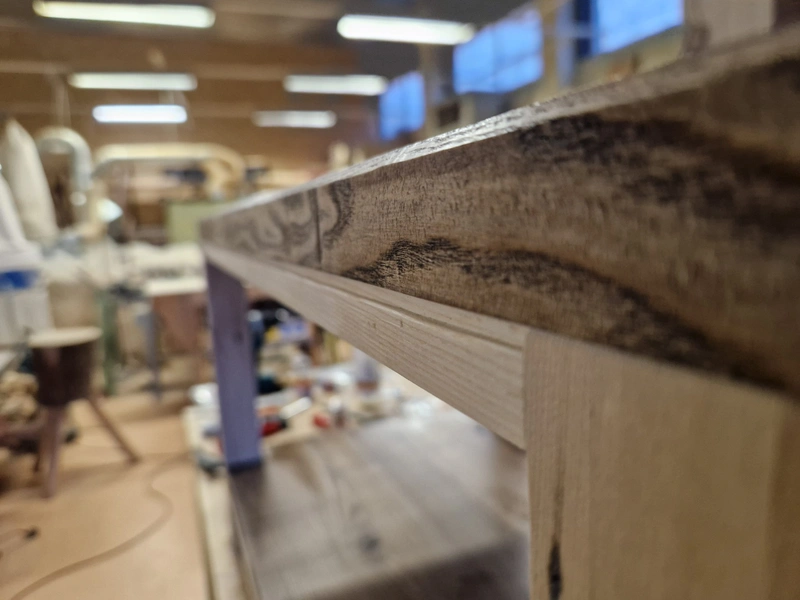
In order to keep solid wood tabletops flat and straight, it is important to allow the wood to expand and contract as the seasons pass and humidity changes. For this I opted to test out threaded inserts (the brass tube) which allows me to create a metal "female" part into the table that a bolt can be screwed into. And by creating a hole much bigger than the bolt needs, it is possible to attach the bolt through the frame into the tabletop, while allowing the tabletop to move the bolt in its slot as the tabletop expands/contracts.
1 / 5
There were no big blunders, aside from a small router-bit slipping incident about 10 seconds after thinking the thought "Okay, this is the last part where I can catastrophically fuck up". However the consequences were not too bad and I am probably the only one who will ever notice that issue, so it shall remain unspecified.
I got my first taste of chisel-work and I can't wait to practice some more. There is something different about handtools that you can not get with power tools. The saw and the drill are too abstract, too distant - you can not *feel* the piece changing. I recently read an interesting piece which highlighted the fact that when a person hits a nail with a hammer, they do not feel the handle in their palm, they feel the head of the hammer hitting the nail. This describes how a handtool, while working, becomes an extension of ourselves, and I believe that could be related to the reason why handtools enhance the process of woodworking as much as they do.
I also managed to develop a disdain for staining wood, partly because of how difficult it is to get a good result with them and mainly because of how much it limits the woodworker. Many techniques are essentially undoable if you like high-contrast elements in a project, like I do.
Overall I am very happy with the result, it turned out exactly as I hoped it would. I gained a lot of insight in many different aspects and feel like I changed quite a lot as a woodworker during the span of a single project.


1 / 5